
Your kentia palm sits in its corner with roots poking out of the drainage holes, water running straight through the pot, and new fronds arriving smaller than the last ones.
Knowing how to repot kentia palm plants correctly matters, because this slow-growing palm resents root disturbance and can sulk for months after a rough move.
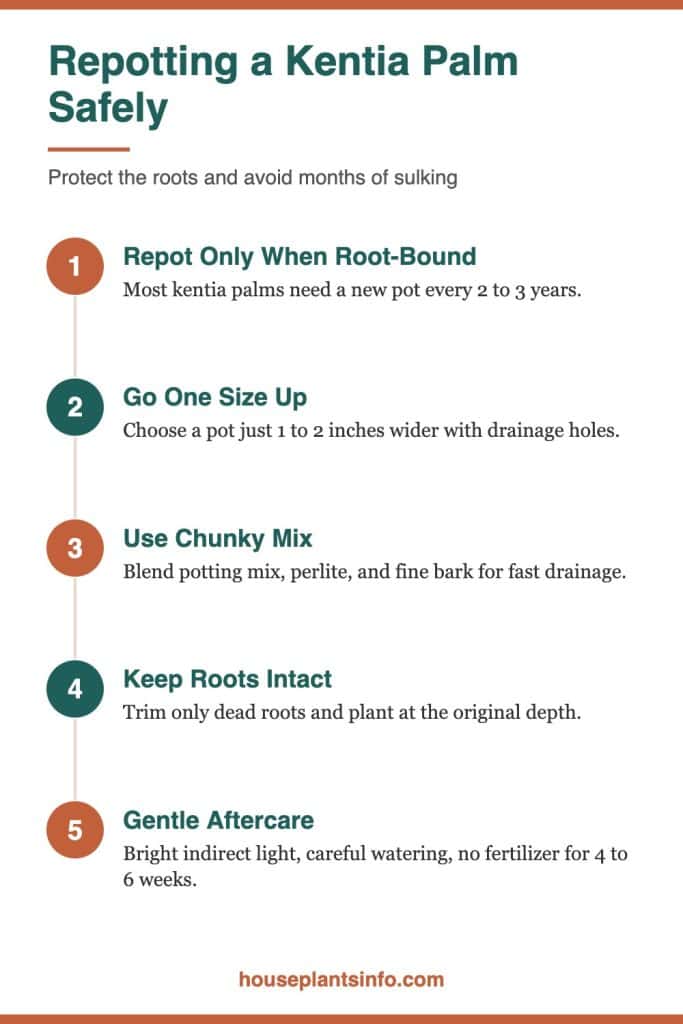
The short version: Repot a kentia palm only when it is truly root-bound, usually every 2 to 3 years, in spring or early summer.
Move it into a pot just 1 to 2 inches wider with drainage holes and a fast-draining, chunky mix. Keep the root ball intact, plant it at the same depth, and water thoroughly once.
This guide covers timing, pot and soil choice, the full repotting process, dividing crowded pots, aftercare, transplant shock, common mistakes, and growing from seed.
At a Glance
| Factor | What it needs |
|---|---|
| Light | Bright, indirect light; tolerates medium light, 3 to 8 feet from an east or west window |
| Water | Water when the top 1 to 2 inches of soil are dry; never let it sit in water |
| Humidity | Average indoor humidity is fine; 40 to 60% keeps frond tips cleaner |
| Temperature | 65 to 80°F ideal; keep above 50°F and away from cold drafts |
| Soil | Fast-draining mix with peat or coir, perlite, and fine bark |
| Pet safety | Generally regarded as non-toxic to cats and dogs; confirm on the ASPCA plant list |
| Difficulty | Easy to moderate; repotting is the riskiest part of its care |
When Does a Kentia Palm Need Repotting?
A kentia palm needs repotting when roots fill the pot so densely that water drains too fast, roots circle the bottom, or the plant tips over from top-heaviness. If none of these signs appear, leave it alone, since this palm grows well slightly crowded.
Signs the Roots Have Run Out of Room
Look for thick roots growing out of the drainage holes or pushing the root ball up above the rim. A pot that dries out in 2 or 3 days, when it used to take a week, is another strong signal.
A soil moisture meter helps here. If the probe reads dry only a few days after a deep watering, and you have not moved the plant closer to a heater or sunny window, the pot is likely packed with roots.
Other clues include:
- Water pooling on the surface, then rushing out the bottom without soaking in
- New fronds that are noticeably smaller or slower than usual
- A plastic nursery pot that bulges or cracks
- A plant so top-heavy it falls over when you open the window
Best Time of Year
Spring through early summer is the best window. The palm is actively growing, so it can replace damaged root tips before the dark months arrive.
In Chicago and other northern cities, avoid repotting from November through February. Short days, dry radiator heat, and cool windowsills slow root recovery, which raises the risk of rot in fresh soil.
When to Wait Instead
Skip repotting if the plant is already stressed from a recent move, pests, or overwatering. Fix the underlying problem first and give it a few weeks of stable conditions.
A newly purchased palm also usually does better if you wait. Let it adjust to your light and temperature for at least 4 to 6 weeks before touching the roots.
Sophia’s tip: Before you decide, tip the plant on its side and slide the pot off. If you see mostly soil with a few roots, slide it back in and wait another season.
What Pot Size and Soil Should You Use?
Choose a pot only 1 to 2 inches wider than the current one, with at least one drainage hole. Fill it with a fast-draining mix that holds some moisture but never stays soggy.
Choosing the Right Pot
Oversized pots are the most common repotting error with kentia palms. Extra soil holds water the roots cannot reach, and that soggy zone invites root rot.
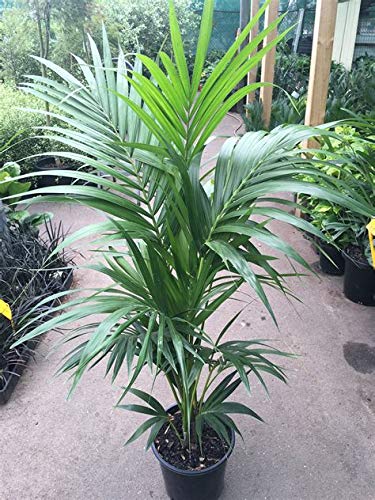
Kentia palms have deep roots, so a pot that is slightly taller than wide suits them. Large plants also benefit from a heavy base to prevent tipping.
| Pot material | Pros | Cons |
|---|---|---|
| Terracotta | Breathes, dries evenly, heavy and stable | Dries faster near radiators; heavy to move |
| Plastic | Light, holds moisture, inexpensive | Can tip over; easier to overwater |
| Glazed ceramic | Heavy, decorative, stable | Often lacks holes; check before buying |
| Decorative cachepot | Hides a plain nursery pot | Must be emptied after watering |
If you love a pot without drainage, use it as an outer cover. Keep the palm in a draining nursery pot inside and dump any water that collects.
Building a Good Potting Mix
Kentia palms want a mix that drains quickly and stays lightly moist. A commercial palm or indoor plant mix works when you loosen it with extra grit.
A reliable homemade blend:
- 2 parts peat-based or coir-based potting mix
- 1 part perlite or pumice
- 1 part fine orchid bark
This combination keeps air around the roots while still holding enough water between waterings. Avoid garden soil, which compacts in pots and can carry pests.
What to Skip at the Bottom
Do not add a layer of gravel or pebbles under the soil. It raises the wet zone higher in the pot rather than improving drainage.
A piece of mesh or a coffee filter over the hole is enough to keep soil from washing out.
How to Repot Kentia Palm Step by Step
The goal is to move the root ball into fresh soil with as little root damage as possible. Plan on 20 to 40 minutes, and work somewhere you can sweep up soil easily.
Getting Ready
Water the palm one or two days before repotting. Slightly moist roots slide out more easily and handle disturbance better than dry, brittle ones.
Gather your new pot, potting mix, a clean trowel, a clean knife or pruners, and a tarp or old sheet. Wear gloves if you have sensitive skin, since older stems can feel rough.
The Eight Steps
- Lay the pot on its side and gently roll or tap it to loosen the root ball. Squeeze plastic pots on all sides.
- Slide the plant out by holding the base of the stems, not the fronds. If it sticks, run a knife around the inside edge.
- Inspect the roots. Healthy kentia roots are firm and tan to orange-brown. Soft, black, or foul-smelling roots are rotten.
- Trim only dead or rotten roots with clean pruners. Leave healthy circling roots in place rather than cutting or teasing them hard.
- Add fresh mix to the bottom of the new pot so the top of the root ball will sit about 1 inch below the rim.
- Center the palm and keep it at exactly the same depth it grew before. Burying the stems invites rot.
- Fill around the sides with mix, pressing lightly with your fingers to remove large air pockets. Do not pack it hard.
- Water slowly until it drains from the bottom, then let the pot finish draining fully.
Handling a Badly Root-Bound Palm
If roots form a solid mat, loosen only the outer half-inch at the bottom with your fingers. Kentia roots are brittle, and breaking many of them sets the plant back.
Never slice deep vertical cuts into a kentia root ball. That technique suits some fast-growing plants, but this palm recovers slowly from heavy root loss.
Sophia’s tip: For a tall palm, have a second person hold the stems upright while you fill the pot. It keeps the plant centered and saves the fronds from snapping.
Should You Separate a Pot of Kentia Palms?
Usually, no. Most potted kentia palms are several seedlings planted together for a fuller look, and separating them often injures the tangled roots more than the plant can tolerate.
Why Division Is Risky
Kentia palms are single-stemmed and do not produce offsets the way some clumping palms do. Each stem has its own root system, but those roots weave tightly together over the years.
Pulling them apart tears many roots. Each divided plant can drop fronds or stall for a full season, and smaller divisions may not survive.
If You Still Want to Divide
Divide only a healthy, actively growing plant in late spring. Soak the root ball first, then gently work stems apart with your fingers, cutting only where roots cannot be untangled.
Pot each division in a snug container just large enough for its roots. Keep it in bright, indirect light, water only when the top inch is dry, and expect slow growth for several months.
A Gentler Alternative
If one stem looks weak or crowded, you can leave it in place or cut it off at soil level. That opens up space without disturbing the roots of the remaining stems.
How Do You Care for a Kentia Palm After Repotting?
Give the palm bright, indirect light, steady temperatures, and a careful watering routine for the next 4 to 8 weeks. Hold off on fertilizer until you see new growth.
Light and Placement
Put the palm back in a spot with bright, indirect light, such as 3 to 6 feet from an east window or a few feet back from a south or west window. Direct afternoon sun through glass can scorch fronds.
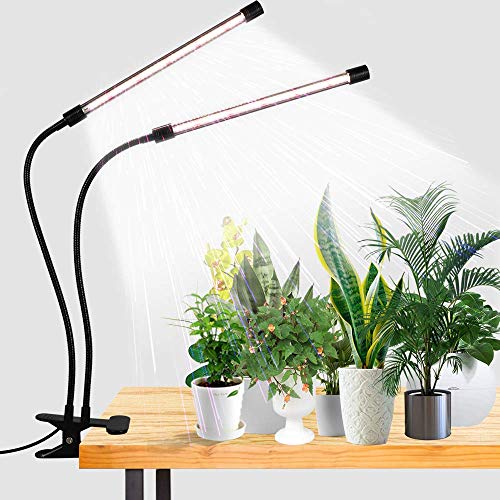
In dim apartments, a full-spectrum grow light placed 2 to 3 feet above the plant for 10 to 12 hours a day can support recovery, especially in winter.
Water Carefully While Roots Settle
Fresh mix holds moisture differently than old, root-filled soil, so overwatering is the biggest risk after repotting. Wait until the top 1 to 2 inches feel dry before watering again.
For a detailed schedule by season and pot size, see how often do you need to water a kentia palm. In general, expect watering every 1 to 2 weeks in summer and less often in winter.
Temperature, Humidity, and Drafts
Keep the palm between 65 and 80°F and away from cold drafts, open exterior doors, and AC vents. Avoid placing it right next to a radiator or forced-air register, which dries soil and fronds unevenly.
During dry winter months, a room humidifier helps keep frond tips from browning. Misting does little for lasting humidity.
When to Feed Again
Wait 4 to 6 weeks, or until a new spear appears, before fertilizing. Then use a balanced or palm-specific liquid fertilizer at half strength every 4 to 6 weeks in spring and summer.
Fresh potting mix often contains some nutrients, and feeding damaged roots can burn them. For year-round routines, this guide on how to plant, grow and care for kentia palm covers the full picture.
Pets and Kids
The kentia palm is generally regarded as non-toxic to cats and dogs, but check the ASPCA plant list to confirm. Fresh potting mix with perlite or fertilizer can still upset a pet’s stomach, so keep curious animals and toddlers from digging in it.
Transplant Shock: Why Fronds Brown After Repotting and the Fix
Some browning, yellowing, or drooping in the first few weeks is normal transplant shock as the roots settle. It usually fades within 2 to 6 weeks if light and watering stay steady.
What Transplant Shock Looks Like
Typical signs include brown frond tips, one or two lower fronds yellowing, slight drooping, and a pause in new growth. The newest central spear should stay green and firm.
If the spear turns brown, soft, or pulls out easily, the problem is more serious than shock. That usually points to rot at the crown or roots.
How to Help the Palm Recover
- Keep the plant in one location; moving it again adds stress
- Water only when the top inch or two is dry
- Avoid fertilizer until new growth appears
- Keep it out of direct sun, cold drafts, and blasts from heating vents
- Raise humidity in winter if frond tips are crisping
Should You Cut Off Damaged Fronds?
Leave yellowing fronds until they turn fully brown. The palm draws nutrients back from them as they fade, which helps it recover.
Once a frond is completely dry, cut it close to the stem with clean pruners. Learn the right technique to prune a kentia palm plant without harming the trunk. For help reading discoloration, see kentia palm dead leaves – all you need to know.
Sophia’s tip: Trim only the brown tips on otherwise green fronds, following the natural pointed shape of the leaf. Leave a thin sliver of brown so you do not cut into living tissue.
Repotting Mistakes That Cause Root Rot and Pests
Most kentia palm failures after repotting come from too much pot, too much water, or buried stems. Avoiding these few errors keeps the roots healthy and pests away.
Common Mistakes and Their Fixes
| Mistake | What happens | Fix |
|---|---|---|
| Pot too large | Soggy soil, root rot | Move up only 1 to 2 inches |
| Planting deeper | Stem rot at the base | Keep the original soil line |
| Dense or garden soil | Poor drainage, suffocated roots | Use a chunky, fast-draining mix |
| Watering on a fixed schedule | Waterlogged roots | Check soil dryness first |
| Heavy root pruning | Long stall, frond loss | Trim only dead or rotten roots |
| Repotting in winter | Slow recovery, rot risk | Wait for spring or early summer |
Recognizing Root Rot Early
Root rot shows up as fronds yellowing from the base, a sour smell from the soil, and roots that are black and mushy. The base of stems may feel soft.
If you catch it early, unpot the palm, trim all rotten roots, and replant in fresh, dry mix in a clean pot. Water lightly and let it dry more than usual between waterings.
Pests to Watch After a Move
Stressed palms attract spider mites, mealybugs, and scale. Dry indoor air makes spider mites especially likely during heating season.
Check the undersides of fronds every week or two. Fine webbing, cottony clusters, or small brown bumps on stems mean it is time to wipe fronds and treat with insecticidal soap or horticultural oil.
Fungus Gnats in Fresh Soil
New, moist potting mix sometimes brings fungus gnats. Let the top 2 inches dry between waterings, and use yellow sticky traps to catch the adults.
Can You Grow a Kentia Palm From Seed?
Yes, but it takes patience. Kentia seeds can take anywhere from 2 to 12 months to germinate, and seedlings grow slowly for several years.
Preparing the Seeds
Use fresh seeds, since kentia seeds lose viability as they dry out. Soak them in warm water for 1 to 3 days, changing the water daily.
Remove any remaining fruit flesh, which can encourage mold. The seeds should look clean and firm before planting.
Planting and Germination
Press each seed halfway into a moist mix of seed-starting soil and perlite. Keep the container covered loosely with plastic to hold humidity.
Germination needs warmth, ideally 80 to 90°F. A seedling heat mat placed under the tray is the most reliable way to maintain that temperature indoors, especially near a cool winter window.
Caring for Seedlings
Once a spear appears, keep the seedling in bright, indirect light and evenly moist soil. Pot it up only when the roots fill its small container.
Many growers plant several seedlings together to recreate the full look of a nursery palm. If you are still deciding which palm suits your room, compare kentia palm vs majesty palm which one fits your home.
Your Next Steps
- Slide your palm out of its pot and check whether roots truly fill it before deciding to repot
- Pick a pot only 1 to 2 inches wider with a drainage hole, and mix palm-friendly soil with perlite and bark
- Plan the repot for spring or early summer, and water the plant a day or two beforehand
- Keep the root ball intact and plant at the same depth, trimming only dead or rotten roots
- Place the palm in bright, indirect light away from radiators and AC vents, and wait 4 to 6 weeks before feeding
- Check the soil and frond undersides weekly for the first two months
Common Questions About Repotting Kentia Palm
How often should you repot a kentia palm?
Most kentia palms need repotting every 2 to 3 years, and large, mature plants can go even longer. Repot only when roots fill the pot, since this palm grows well slightly crowded and dislikes root disturbance.
Can you repot a kentia palm in winter?
It is better to wait for spring or early summer. Winter’s low light, dry heat, and slower growth make roots recover more slowly, which raises the chance of rot and lingering transplant shock.
Why is my kentia palm drooping after repotting?
Mild drooping in the first few weeks is usually transplant shock as damaged roots regrow. Keep the plant in steady, bright, indirect light and water only when the top inch or two is dry; most palms perk up within 2 to 6 weeks.
Should I loosen the roots when repotting a kentia palm?
Only gently, and only around the outer edge if the roots are tightly matted. Kentia roots are brittle and slow to regrow, so heavy teasing or cutting often causes more harm than circling roots do.
What is the best soil for repotting a kentia palm?
Use a fast-draining mix that still holds some moisture, such as 2 parts peat or coir potting mix, 1 part perlite, and 1 part fine bark. Avoid garden soil and dense mixes that stay wet for days.

Hi! I’m Sophia, and I love plants – especially an expert in growing house plants. I stay in Chicago, United States of America, and through my blog and social media platforms, provide tips and tricks on how to grow healthy, vibrant plants indoors. Check out more here.