
Your dieffenbachia has grown tall and leggy, with a long bare cane topped by a tuft of leaves leaning toward the window.
If you are wondering how to propagate dieffenbachia from that awkward stem, you are in a good position, because this plant roots readily from almost every part of its cane.
The short version: Cut the leafy top off with 4 to 6 inches of stem and root it in water or moist potting mix.
Then slice the remaining bare cane into 2 to 3 inch sections, each with at least one node, and lay them on damp mix to sprout. Keep everything warm (70 to 80°F) in bright, indirect light.
This guide covers the supplies, timing, five propagation methods, aftercare, troubleshooting, and pet safety.
At a Glance
| Factor | What it needs |
|---|---|
| Light | Bright, indirect light, 3 to 6 feet from an east or west window |
| Water | Mix kept evenly moist, never soggy; water changed every 3 to 5 days for jar cuttings |
| Humidity | 50 to 70 percent; higher speeds rooting |
| Temperature | 70 to 80°F, away from radiators and AC vents |
| Soil | Light, airy mix such as peat or coco coir with 30 to 50 percent perlite |
| Pet safety | Toxic to cats and dogs (ASPCA) |
| Difficulty | Easy; roots in 3 to 8 weeks |
What Do You Need Before You Cut?
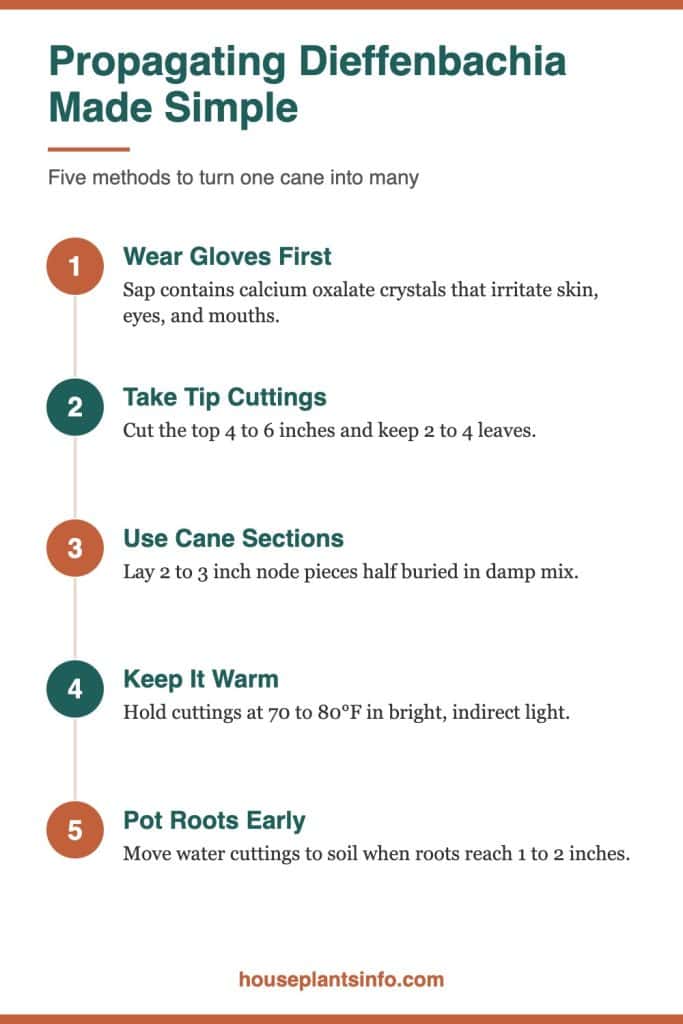
You need a sharp, clean blade, gloves, a container for water or a small pot of airy mix, and a warm, bright spot. Dieffenbachia sap contains calcium oxalate crystals that irritate skin, eyes, and mouths, so protection matters more than with most houseplants.
Supplies Worth Gathering
- A sharp knife or pruning shears wiped with rubbing alcohol
- Disposable gloves and, ideally, eye protection
- Clear glass jars or vases for water rooting
- Small pots (4 inches) with drainage holes
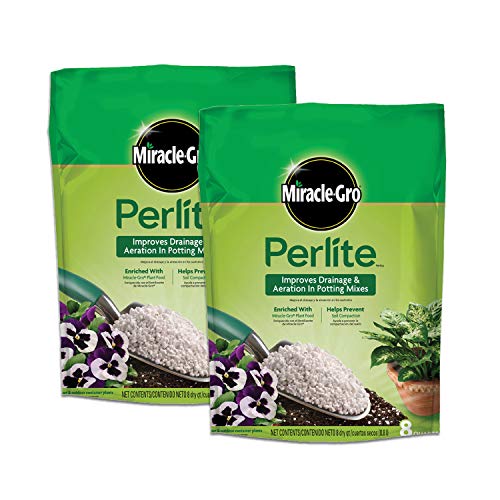
- Fresh potting mix blended with perlite
- Optional rooting hormone powder
- Clear plastic bags or a clear tote for humidity
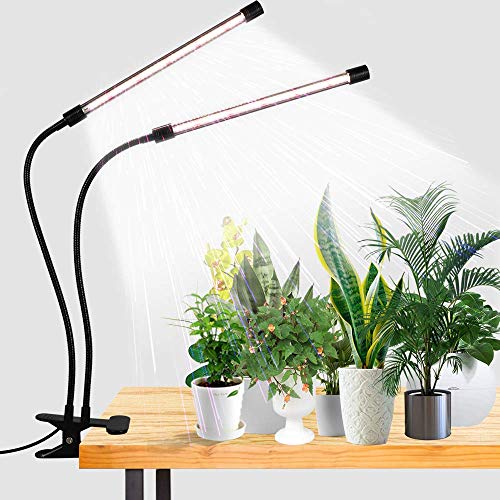
In a cool apartment, a seedling heat mat under your pots or jars can shave weeks off rooting time. If your windows face north or winter days are short, a grow light set on a timer for 12 to 14 hours keeps cuttings from stalling.
Protecting Yourself and Your Space
Work on newspaper or a cutting board, since sap can drip and stain. Avoid touching your face until you have washed your hands, and rinse your blade afterward.
Sophia’s tip: Keep a damp paper towel next to you while cutting. Wiping each cut cane immediately stops sap from running down the stem and onto your gloves, which keeps the job much cleaner.
When and Where Should You Cut a Dieffenbachia?
Cut in spring or early summer, when the plant is actively growing and indoor light is strongest. Make your cuts on healthy green cane, just above a node, avoiding soft, discolored, or shriveled sections.
Picking the Right Season
Spring through midsummer gives the fastest results because longer days and warmer rooms fuel root growth. Cuttings taken in fall or winter still root, but they can take twice as long, especially near cold glass or in rooms dried out by forced-air heat.
If your plant is declining, do not wait for spring.
Propagating healthy sections is one of the best rescue options, and the guide on dieffenbachia: why is it dying and how can you save it helps you decide whether to rescue the whole plant or just salvage cuttings.

Reading the Cane
Nodes are the slightly raised rings left where old leaves attached. Each node holds a dormant bud that can push out roots, shoots, or both.
Choose cane that is firm, green or pale tan, and plump. Skip anything mushy, blackened, or hollow, since rot spreads from those areas into cuttings.
How to Propagate Dieffenbachia From Stem Cuttings
Stem cuttings, also called tip cuttings, are the fastest route to a full-looking new plant because the leaves are already there. Take the top 4 to 6 inches of stem, keep 2 to 4 leaves, and root it in water or moist mix.
Taking the Cutting
Cut straight across, about 1/2 inch below a node. Remove any leaves that would sit underwater or below the soil line.
If the cutting has many large leaves, trim it to the top 2 to 4. Fewer leaves mean less water loss while the stem has no roots, which reduces drooping.
Let the cut end dry for a few hours, up to a day, until it looks sealed. This callus lowers the risk of rot, especially for soil rooting.
Rooting in Water
Place the cutting in a clear jar with room-temperature water covering 1 to 2 nodes. Set it in bright, indirect light, not a hot south windowsill.
Change the water every 3 to 5 days, or sooner if it turns cloudy. Rinse any slime off the stem when you do.
Roots usually appear within 3 to 6 weeks. Pot the cutting once roots reach 1 to 2 inches long; waiting for a huge root mass makes the switch to soil harder.
Rooting in Soil
Dip the callused end in rooting hormone if you like, then insert it 1 to 2 inches deep in a pot of pre-moistened mix. Firm the mix around the stem so it stands upright.
Cover loosely with a clear plastic bag to hold humidity, opening it daily for a few minutes of fresh air. A gentle tug that meets resistance after 4 to 6 weeks means roots have formed.
Soil-rooted cuttings skip the transplant adjustment, so I prefer this method for anyone who tends to forget water changes.
How Do You Grow New Plants From Bare Cane Sections?
Slice the leafless cane into 2 to 3 inch pieces, each with at least one node, and lay them sideways on moist mix. Each section can sprout a new shoot and roots, giving you several plants from one stem.
Cutting and Laying the Sections
Keep track of which end was up if you plan to stand pieces vertically, though laying them flat avoids that problem entirely. Let sections callus for several hours.
Lay each piece horizontally on damp mix with the nodes facing up or sideways. Press it in until about half the cane is buried.
Keeping Sections Alive Until They Sprout
Cover the tray or pot with clear plastic and keep it at 70 to 80°F. Mist lightly or water only when the surface starts to dry.
Expect new shoots in 4 to 8 weeks, sometimes longer in winter. The cane may look unchanged for a long time, which is normal as long as it stays firm.
Sophia’s tip: Set cane trays on top of the refrigerator or on a heat mat if your apartment drops below 68°F at night. Steady bottom warmth is the single biggest factor in getting bare canes to wake up.
Using the Stump Left Behind
Do not toss the rooted base in the original pot. Cut it back to 4 to 6 inches and keep it in bright light, and it usually pushes new shoots from the nodes below the cut.
For more on what regrows and what doesn’t, read will dieffenbachia leaves grow back.
Water the stump less than usual until new leaves appear, since it has fewer leaves using moisture.
Which Methods Work Best for Large or Clumping Plants?
Air layering suits tall, prized plants because the top roots while still attached, so there is no risk of losing it. Division is the simplest option when your plant already has multiple stems or offsets growing from the base.
Air Layering a Tall Cane
Pick a spot on the cane 6 to 12 inches below the leaves. Make an upward slanted cut about one third through the stem, then wedge a toothpick in it to keep it open.
Dust the wound with rooting hormone, wrap it in a handful of damp sphagnum moss, and enclose the moss in clear plastic tied above and below. Check that the moss stays moist.
Roots typically show through the plastic in 4 to 8 weeks. Once they fill the moss, cut below the root ball and pot the new plant, moss and all.
Dividing Offsets and Multiple Stems
Remove the plant from its pot in spring and loosen the soil around the base. Look for natural separation points where stems have their own roots.
Pull or cut the clumps apart with a clean knife, keeping some roots on every piece. Pot each division at the same depth it grew before.
Comparing the Five Methods
| Method | Best for | Time to roots or shoots | Difficulty |
|---|---|---|---|
| Stem cutting in water | Watching roots form | 3 to 6 weeks | Easy |
| Stem cutting in soil | Skipping transplant shock | 4 to 6 weeks | Easy |
| Cane sections | Many plants from one stem | 4 to 8+ weeks | Easy to moderate |
| Air layering | Tall, valuable plants | 4 to 8 weeks | Moderate |
| Division | Clumping plants with offsets | Immediate | Easy |
How Should You Pot Up and Care for New Plants?
Move rooted cuttings into a 4 to 6 inch pot with drainage and an airy mix, then keep humidity and moisture steady for 2 to 3 weeks while they adjust. After that, care is the same as for a mature dieffenbachia.
Moving Water Roots Into Soil
Water roots are fragile and adapted to constant moisture. Pot them gently in pre-moistened mix and keep it evenly damp, not wet, for the first couple of weeks.
Some leaf droop in the first week is common. Placing a clear bag loosely over the plant for a few days eases the change.
Light, Water, and Warmth
Give young plants bright, indirect light, such as 3 to 6 feet from an east or west window or a few feet back from a south one. Keep them out of direct midday sun, which scorches tender leaves.
Water when the top inch of mix feels dry. In winter, heated air dries pots faster near radiators, while plants by drafty glass may stay wet longer, so check rather than water on a schedule.
Keep plants above 60°F and away from AC vents, heating registers, and door drafts. Cold blasts cause sudden yellowing and collapse.
Feeding Young Plants
Wait 4 to 6 weeks after potting before fertilizing, since fresh mix holds some nutrients and new roots burn easily. Then use a balanced liquid fertilizer at half strength every 4 weeks in spring and summer.
Skip home remedies until the plant is established. If you are curious about kitchen scraps, see does dieffenbachia like coffee grounds: how to use them safely before adding any.
Sophia’s tip: Pot three or four rooted cuttings together in one 6 inch pot. The result looks full right away instead of like a single thin stem, and the shared pot dries at a more even rate.
Why Are Your Cuttings Rotting, Wilting, or Not Rooting?
Most failures come from cold, too much water, or too little light. Fix the conditions, remove damaged tissue, and most cuttings recover or can be recut.
Stem Rot: Too Much Water and Too Little Air
A mushy, brown, or foul-smelling stem base means rot. Cut above the damaged area into firm, clean tissue, let it callus, and start again in fresh water or fresh mix.
Prevent repeat rot by changing water often, using perlite-rich mix, and letting the soil surface dry slightly between waterings.
Drooping Leaves: Water Loss Before Roots Form
Unrooted cuttings cannot replace lost moisture, so leaves may sag. Trim the largest leaves, raise humidity with a clear cover, and move the cutting away from heat sources.
If an established plant droops after potting, the causes overlap with the ones in this guide on dieffenbachia wilting.
Slow or No Rooting: Cold and Dim Conditions
A firm cutting that shows nothing after 6 weeks is usually just too cool or dim. Add a heat mat, a grow light, or a brighter spot, and give it another month.
Pale, Yellow, or Bleached Leaves
Losing one or two lower leaves while rooting is normal. Widespread yellowing points to overwatering or cold, while washed-out, whitish patches often mean too much direct sun; dieffenbachia leaves turning white: 7 causes and what to do walks through each possibility.
| Symptom | Likely cause | Fix |
|---|---|---|
| Mushy, dark stem base | Rot from stagnant water or wet mix | Recut above damage, refresh water or mix |
| Drooping leaves on cutting | Water loss, too many leaves | Trim leaves, add humidity |
| No roots after 6+ weeks | Cold or low light | Add warmth and light, wait |
| Yellow lower leaves | Normal shedding or overwatering | Remove leaf, check moisture |
| Brown crispy edges | Dry air near heaters | Raise humidity, move plant |
Is Dieffenbachia Safe Around Pets and Kids?
No. The ASPCA lists dieffenbachia as toxic to cats and dogs because it contains insoluble calcium oxalate crystals.
Chewing causes intense mouth pain, drooling, swelling, and vomiting, and the same irritation applies to children. Root jars and cane trays are tempting to curious pets, so keep them on high shelves or in closed rooms.
If a pet chews the plant, contact your veterinarian or a pet poison hotline. For a child, contact poison control and rinse their mouth with water.
Your Next Steps
- Check your plant for firm, healthy cane and locate the nodes.
- Gather gloves, a clean blade, jars, small pots, and perlite-rich mix.
- Take a 4 to 6 inch tip cutting and let it callus for a few hours.
- Slice the remaining bare cane into 2 to 3 inch node sections and lay them on damp mix.
- Set everything in bright, indirect light at 70 to 80°F, out of reach of pets.
- Cut the stump back and keep it in a bright spot to regrow.
Common Questions About Propagating Dieffenbachia
Can you propagate dieffenbachia from a single leaf?
No. A leaf alone lacks a node, so it may grow a few roots but will not produce a new plant. Always include at least one node from the cane.
How long does it take for dieffenbachia cuttings to root?
Stem cuttings usually root in 3 to 6 weeks in warm conditions. Bare cane sections often take 4 to 8 weeks or longer to sprout, and winter cuttings in cool rooms can take twice as long.
Is water or soil better for rooting dieffenbachia?
Both work well. Water lets you watch roots form but requires frequent changes and a transition to soil. Soil rooting is slightly slower to confirm but avoids transplant stress.
Do you need rooting hormone for dieffenbachia?
No, dieffenbachia roots readily without it. Hormone powder can speed things up a little and is more helpful for cane sections and air layering than for leafy tip cuttings.
Can you keep dieffenbachia growing in water permanently?
It can survive in water for months, but growth slows and the stem becomes more prone to rot over time. Moving it to soil once roots reach 1 to 2 inches gives a healthier, longer-lived plant.

Hi! I’m Sophia, and I love plants – especially an expert in growing house plants. I stay in Chicago, United States of America, and through my blog and social media platforms, provide tips and tricks on how to grow healthy, vibrant plants indoors. Check out more here.