
Your dracaena marginata is standing in its pot with yellow, drooping leaves, a few brown spears scattered on the floor, and you are trying to figure out how to save a dying dracaena marginata before it is too late.
The short version: Most struggling marginatas can be saved if at least part of a cane is still firm.
Find the cause first (usually root rot from overwatering), fix the roots or the watering, move the plant to bright indirect light, and give it a few weeks to push new leaves at the top.
This guide walks you through diagnosis, root checks, water and light fixes, pests, cutting back, and a realistic recovery timeline.
Check These First
- Press the base of each cane. Firm means there is hope; soft or mushy means rot has started.
- Push a finger 2 inches into the soil. Note whether it feels soggy, damp, or bone dry.
- Look at where the plant sits. Is it within a few feet of a cold window, an AC vent, or a radiator?
- Turn a few leaves over and check for webbing, sticky residue, or tiny brown bumps.
- Think about recent changes, such as a move, a repot, or a new watering routine.
Is Your Dracaena Marginata Dying or Just Stressed?
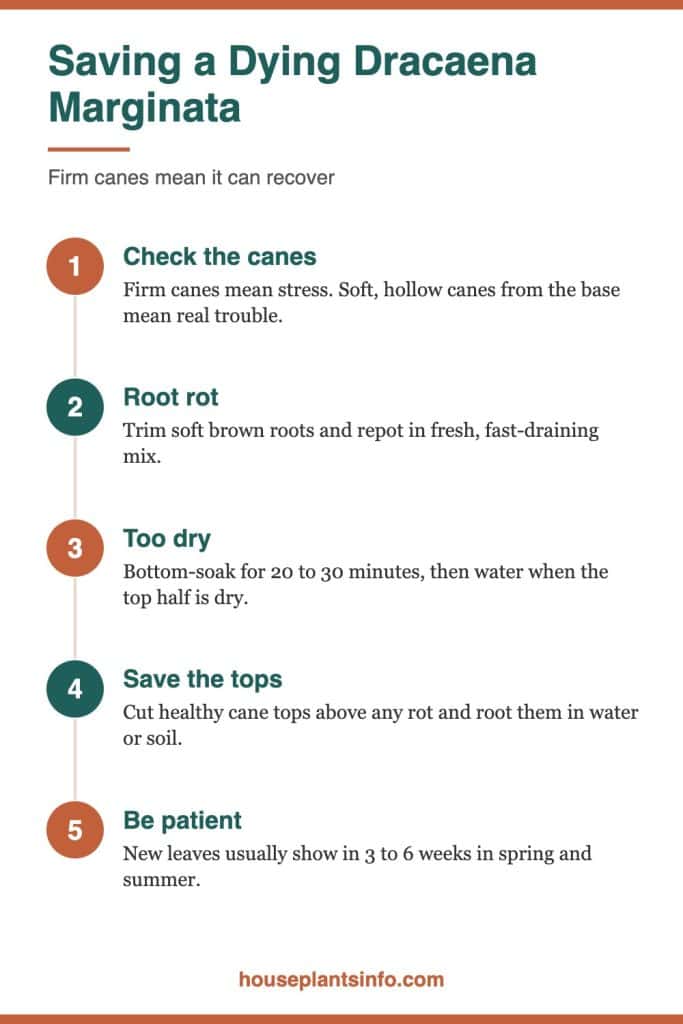
A dracaena marginata is truly dying when its canes turn soft or hollow from the base up. If the canes are firm and only the leaves look bad, the plant is stressed and very likely to recover.
Reading the Leaves and Canes
The symptoms point to the cause fairly reliably. A soil moisture meter helps here, because it tells you what is happening deep in the pot where your finger cannot reach.
| Symptom | Likely Cause |
|---|---|
| Soft, mushy or blackened cane base, yellow leaves, wet soil | Overwatering and root rot |
| Dry, crispy, curling leaves, very dry soil | Underwatering |
| Sudden leaf drop after a move or cold draft | Shock or cold below 55°F |
| Pale, stretched, floppy new growth | Too little light |
| Sticky leaves, fine webbing, tiny dots | Spider mites or scale |
| Brown leaf tips only | Fluoride, salt buildup or dry air |
What Normal Leaf Loss Looks Like
A marginata naturally sheds its lowest leaves as it grows taller. This is how it forms that bare, palm-like cane. A few yellowing leaves at the bottom while the top stays green and full is not a problem.
The concern starts when leaves drop from the middle or top, or when many fall within a week or two. If that is what you are seeing, my guide to dracaena marginata leaves falling covers the patterns in more detail.
Drooping Versus Dying
Drooping leaves can come from too much water, too little water, or a cold shock. The leaves themselves usually perk up once the cause is fixed. You can read more about why a dracaena marginata droops if that is the main symptom.
A cane that bends, wrinkles, or feels spongy is a different story. That points to damage in the cane tissue itself, and it needs action right away.
Step 1: Check the Roots First
The roots tell you more than the leaves do, so unpot the plant before changing anything else. Healthy roots are firm and tan to orange; rotting roots are brown, soft, and often smell sour.
How to Unpot Without Extra Damage
Water stress makes roots fragile, so handle them gently. Tip the pot on its side, support the canes near the soil line, and slide the root ball out. If it sticks, run a butter knife around the inside edge of the pot.
For tall plants with several canes, it helps to have someone hold the top while you work the pot free. Lay the plant on newspaper or an old towel.
What Healthy and Rotting Roots Look Like
Loosen the outer soil with your fingers. Healthy dracaena roots feel firm and springy, with a tan, yellowish, or orange color. They hold the soil loosely.
Rotting roots are dark brown or black and feel mushy. The outer layer may slip off when you pull gently, leaving a thin string behind. A musty or sour smell is another clear sign.
Checking the Base of the Canes
Squeeze each cane from the soil line up to about 6 inches. Firm canes can recover even if many roots are gone. A cane that is soft at the base but firm higher up can still be saved by cutting, which is covered later.
If every cane is mushy all the way up, the plant is beyond rescue. In most cases, though, at least one section of one cane is still solid.
Saving an Overwatered Dracaena
Overwatering is the most common reason a marginata declines indoors. The fix is to remove rotten roots, repot in fresh fast-draining mix, and water far less often than before.
Cleaning Up Root Rot
Rinse the root ball under lukewarm water until you can see every root clearly. This removes the soggy soil that holds fungus and bacteria.
Use clean, sharp shears to cut away every soft, brown, or black root. Wipe the blades with rubbing alcohol before you start and between cuts. Leave only firm, light-colored roots, even if that means removing a lot.
Repotting for Recovery
Choose a pot with drainage holes, no larger than the remaining root mass needs. An oversized pot holds extra wet soil around a small root system, which invites rot to return.
Use a fresh, fast-draining indoor potting mix. Adding a generous handful of perlite or bark loosens it further. Never reuse the old soil, since it may carry the same pathogens.

Watering After a Rot Rescue
Water lightly after repotting, just enough to settle the mix. Then wait until the top half of the soil is dry before watering again. In a Chicago apartment in winter, that can easily mean two or three weeks.
Keep the plant in bright indirect light while it heals. A spot 3 to 5 feet from an east or west window works well. For a deeper look at the odds, see my article on can you save an overwatered dracaena.
Sophia’s tip: Empty the saucer or cachepot 15 minutes after every watering. Decorative pots without holes trap water at the bottom, and that hidden pool is one of the most common causes of rot in otherwise careful homes.
When the Cane Base Is Mushy
If rot has climbed into the base of a cane, the roots alone will not save it. Cut the healthy top section off above the rot and root it separately. The cutting steps are in the section on cutting back.
Reviving an Underwatered Dracaena
An underwatered marginata has dry, crispy, curling leaves and soil that has pulled away from the pot. The fix is a slow, thorough soak from the bottom, followed by a steady watering schedule.
Why Bottom Soaking Works
Very dry potting mix repels water. When you pour from the top, water often runs down the gap along the pot wall and out the bottom, leaving the root ball dry.
Set the pot in a sink or basin with 2 to 3 inches of room-temperature water. Let it soak from the bottom for 20 to 30 minutes, until the soil surface looks darker and feels damp. Then let it drain completely.
Setting a Reliable Schedule
After the soak, water whenever the top half of the soil is dry. For a 10-inch pot, that means checking about 4 to 5 inches down with a finger, a wooden chopstick, or a moisture meter.
Avoid watering on a fixed calendar day. Forced-air heat dries soil quickly in winter, while summer humidity and AC can change the pace again.
What to Expect From Crispy Leaves
Leaves that are already brown and crispy will not recover. Trim dead tips with clean scissors, following the natural pointed shape. Fully dead leaves can be pulled off gently once they release easily.
If browning is limited to the tips and the soil moisture seems fine, the cause may be water quality or dry air. My guide to dracaena marginata brown tips explains how to sort that out.
Sophia’s tip: If your tap water is high in fluoride or minerals, switch to rainwater or distilled water, and flush the pot with plain water every couple of months. Dracaenas are sensitive to fluoride, which shows up as brown tips with yellow edges.
Fixing Light and Temperature Problems
Low light and cold air are slow killers that weaken a marginata over months. Move it to bright indirect light, keep it above 60°F, and keep it away from drafts and direct heat.
Finding the Right Window
Pale, thin, stretched growth that leans toward the window means the plant needs more light. A marginata tolerates lower light but declines in dim corners over time.
East and west windows usually work well at 2 to 5 feet from the glass. South windows are bright, so place the plant a few feet back or behind a sheer curtain. North windows often need the plant right beside the glass.
Using a Grow Light in Winter
Chicago winters bring short, gray days, and even a good window may not provide enough light. A full-spectrum LED grow light placed 12 to 24 inches above the foliage can fill the gap.
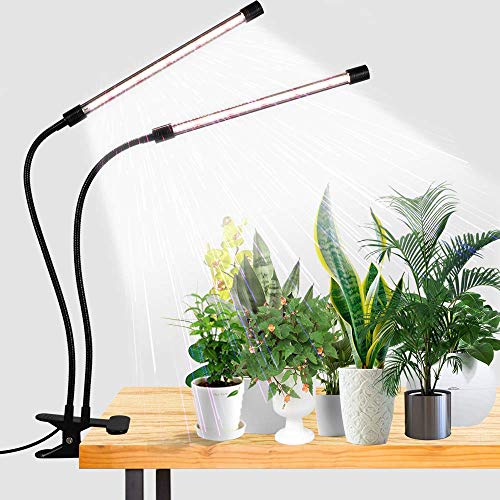
Run it on a timer for 10 to 12 hours a day. This steadies growth and helps a recovering plant produce new leaves instead of stalling until spring.
Keeping Drafts and Heat Away
Marginatas prefer temperatures between 65°F and 80°F. Exposure below 55°F, even briefly, can cause sudden leaf drop. Watch for single-pane windows, front doors, and plants pressed against cold glass at night.
Heat matters too. A radiator or forced-air vent blowing directly on the plant dries leaves and soil fast. Keep it at least 3 feet from heat sources and out of the direct path of AC vents in summer.
Handling Dry Indoor Air
Winter heating can drop indoor humidity well below 30 percent. Marginatas are fairly tolerant, but very dry air adds to tip browning.
A small humidifier nearby helps, as does grouping plants together. Misting does little and can leave water sitting in the leaf crowns.
Dealing With Pests
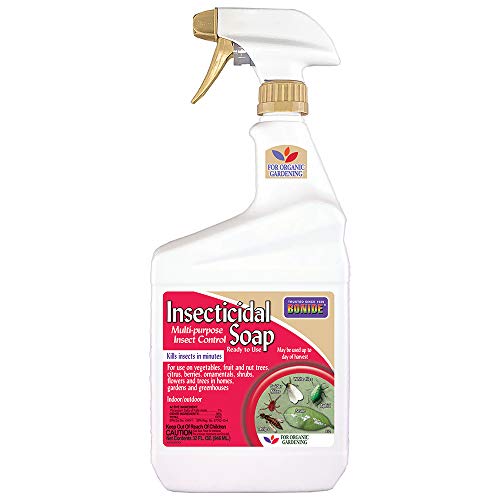
Spider mites and scale are the pests most likely to weaken an indoor marginata. Rinse the plant, wipe the leaves, and treat with insecticidal soap or neem oil weekly for several weeks.
Spotting Spider Mites and Scale
Spider mites leave tiny pale speckles on the leaves and fine webbing where leaves meet the cane. They thrive in warm, dry apartments with forced-air heat.
Scale looks like small brown or tan bumps along the leaves and canes. Both scale and some other sap-feeders leave a sticky residue that can attract sooty mold.
A Treatment Routine That Works
Isolate the plant from your other houseplants first. Then rinse it thoroughly in the shower with lukewarm water, covering the soil to keep it from washing out.
Wipe both sides of every leaf with a soft damp cloth. Scrape off scale bumps with a fingernail or a cotton swab dipped in rubbing alcohol. Spray all leaf and cane surfaces with insecticidal soap or neem oil.
Repeat the spray every week for at least four to six weeks. Eggs hatch in cycles, so stopping after one or two treatments usually lets the population bounce back. For more detail, see my guide to getting rid of spider mites.
Keeping Pests From Coming Back
Check the undersides of leaves every time you water. Inspect new plants for a couple of weeks before setting them near others. Raising humidity slightly also makes conditions less comfortable for spider mites.
Cutting Back and Restarting From Healthy Canes
When a cane is rotting at the base or has lost most of its leaves, cutting it back is often the best rescue. Healthy cane tops root readily, and a firm stump can resprout.
Where to Make the Cut
Find the point where the cane turns firm and healthy, then cut at least an inch or two above any soft or discolored tissue. Use clean, sharp pruners or a small saw for thicker canes.
Look at the cut surface. It should be pale and solid all the way through. If you see brown streaks, cut higher until the tissue is clean.
Rooting the Top in Water or Soil
Remove leaves from the lower few inches of the cutting. To root in water, place it in a jar with a couple of inches of water and change the water weekly. Roots usually appear within a few weeks.
To root in soil, let the cut end dry for a day, then set it 2 to 3 inches deep in moist, fast-draining mix. Keep it in bright indirect light and the soil lightly damp, not wet.
Sophia’s tip: Mark which end of each cane piece was the top with a small pen dot before you put it down. Cane sections will only root from the bottom end, and they are surprisingly easy to mix up once they are on the counter.
Letting the Stump Resprout
Leave any firm cane stump in its pot. Once it has healthy roots, it often pushes one or more new growth points just below the cut within several weeks.
Water the stump sparingly, since it has no leaves to use much moisture. Bright indirect light and warmth encourage new buds to form.
How Long Recovery Takes
In spring and summer, a recovering marginata usually shows new leaves at the top within 3 to 6 weeks. In winter, recovery is slower and may take until the days lengthen.
Signs the Plant Is Turning Around
The first good sign is fresh, bright green growth emerging from the center of the leaf crown. Firm canes and no new yellowing are encouraging too.
Older damaged leaves will not turn green again. Trim or remove them gradually as new growth fills in, so the plant keeps some leaf surface while it rebuilds.
Avoiding Setbacks While It Heals
Hold off on fertilizer until you see steady new growth, then use a diluted balanced liquid feed in spring and summer only. Feeding a stressed plant with damaged roots can burn them further.
Keep the plant in one spot. Moving it repeatedly to “find better light” adds stress and can trigger more leaf drop. For the long-term routine once it recovers, see my full guide to dracaena marginata care.
A Note on Pet Safety
The ASPCA lists dracaena as toxic to cats and dogs. Place recovering plants and rooting cuttings out of reach, and clean up fallen leaves promptly if you have pets or small kids.
Your Next Steps
- Squeeze each cane base today and note which ones are firm and which are soft.
- Unpot the plant and inspect the roots, trimming any that are brown and mushy.
- Repot in fresh, fast-draining mix in a pot with drainage holes, then water lightly.
- Move the plant to bright indirect light, away from radiators, vents and cold glass.
- Check leaf undersides for pests and start weekly treatments if you find any.
- Cut and root healthy cane tops if rot has reached the base.
Common Questions About Saving a Dying Dracaena Marginata
Can a dracaena marginata come back after losing all its leaves?
Yes, as long as the cane is still firm. A leafless cane with healthy roots or a firm stump can push new growth points within several weeks in warm, bright conditions.
Should I cut off yellow leaves on my dracaena?
Remove leaves that are fully yellow or brown, since they will not recover. Leaves that are only partly damaged can stay until new growth appears, because they still help feed the plant.
How do I know if root rot has spread too far?
If every cane is soft or hollow from the base upward, rot has spread too far to save the plant. If any section of cane is firm, you can cut above the rot and root that healthy top.
Why is my dracaena dying even though I water it on schedule?
A fixed schedule ignores changes in light, heat and season. Indoor plants use far less water in winter, so a routine that worked in summer can cause rot by December. Check the soil before every watering instead.
Is it better to root dracaena cuttings in water or soil?
Both work well. Water lets you watch roots form, while soil avoids the adjustment period after transplanting, so choose whichever is easier to keep consistent in your space.

Hi! I’m Sophia, and I love plants – especially an expert in growing house plants. I stay in Chicago, United States of America, and through my blog and social media platforms, provide tips and tricks on how to grow healthy, vibrant plants indoors. Check out more here.