
Your peacock plant sits near the window with crispy brown edges, a few yellow leaves at the base, and patterned foliage that looks dull and tired.
If you are asking why is my peacock plant dying (reasons and solutions) are usually simple once you match the symptom to the cause.
The short version: Most peacock plants decline because of dry indoor air, inconsistent watering, or minerals in tap water. Cold drafts, harsh sun, and pests like spider mites are the next most common causes.
Fix the growing conditions first, and new healthy leaves usually follow within a few weeks.
This guide covers each cause, how to spot it, how to fix it, and how to rescue a plant that is already in rough shape.
Check These First
- Push a finger 1 inch into the soil. Soggy soil points to overwatering, and bone-dry soil points to underwatering.
- Look at the leaf edges. Crispy brown margins usually mean low humidity or tap water minerals.
- Turn a few leaves over and check the undersides for fine webbing, tiny moving dots, or white cottony clumps.
- Note where the plant sits. Within 3 feet of a radiator, heat vent, AC unit, or drafty window is a common problem spot.
- Gently tip the plant out of its pot and smell the roots. A sour, rotten odor means root rot.
Why Is My Peacock Plant Dying? Reasons and Solutions by Symptom
A dying peacock plant is almost always reacting to its environment, not to a disease that came out of nowhere. Match the main symptom you see to the likely cause below, then jump to that section for the fix.
The peacock plant (Calathea makoyana, now often listed as Goeppertia makoyana) grows on shaded rainforest floors in Brazil. It expects steady moisture, warm air, high humidity, and filtered light. Most apartments offer the opposite for at least part of the year.
| Symptom | Most likely cause | First fix |
|---|---|---|
| Crispy brown edges and tips | Low humidity or tap water minerals | Raise humidity, switch to distilled or rainwater |
| Yellow lower leaves, wet soil | Overwatering or poor drainage | Let the top inch dry, check roots |
| Limp, curled leaves, dry soil | Underwatering | Water thoroughly, then stay consistent |
| Faded or bleached patterns | Too much direct sun | Move back from the window or add a sheer curtain |
| Black or water-soaked patches | Cold damage | Move away from cold glass and drafts |
| Speckled leaves, fine webbing | Spider mites | Rinse and treat with insecticidal soap |
| Mushy stems at the soil line | Root rot | Trim rotted roots and repot |
Two Measurements Worth Taking
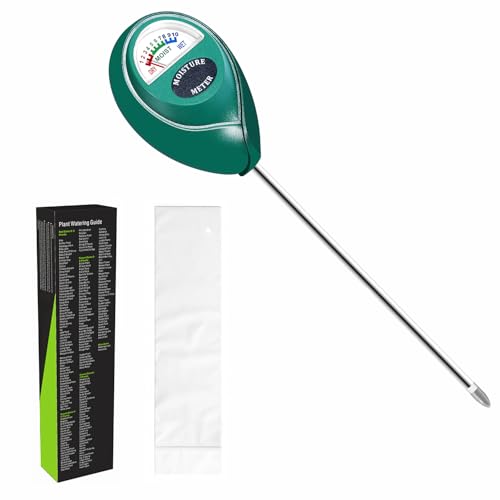
Guessing about moisture and humidity is how many peacock plants get into trouble. A soil moisture meter pushed halfway down the pot tells you what is happening near the roots, which a dry surface can hide.
A small digital hygrometer placed next to the plant shows the real humidity level. In a heated Chicago apartment in January, readings of 20 to 30 percent are common, far below what this plant wants.
Why Problems Often Stack Up
Peacock plants rarely fail from a single cause. Dry winter air stresses the leaves, the stressed plant uses less water, the soil stays wet, and roots start to rot. Look for more than one issue before you settle on a fix.
Dry Air and Crispy Leaves: Raise the Humidity
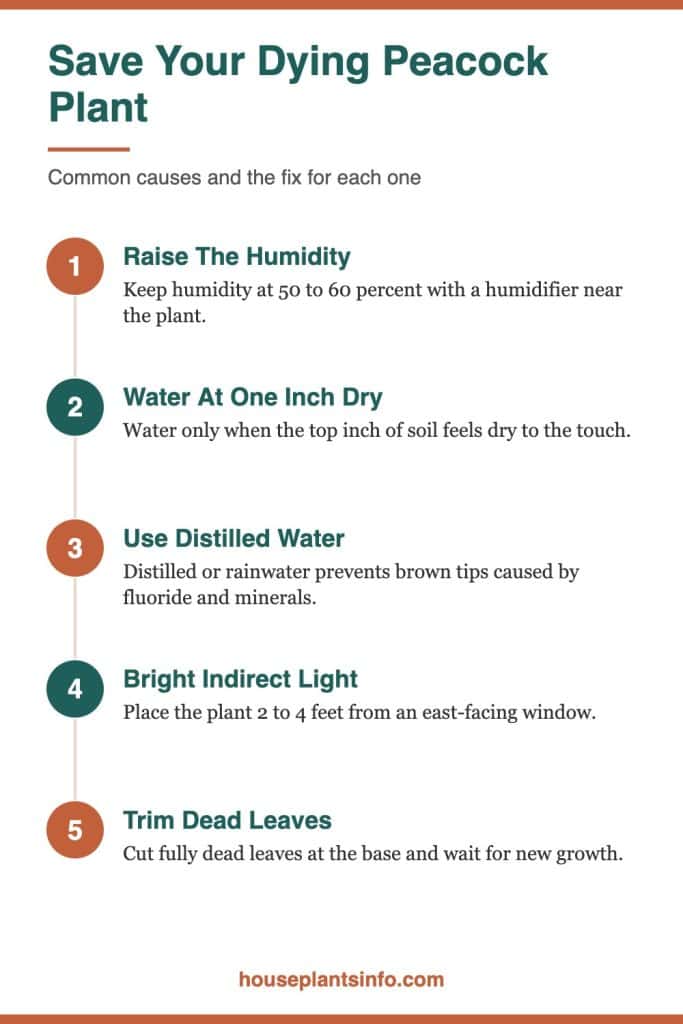
Low humidity is the most common reason a peacock plant looks like it is dying. Aim for 50 to 60 percent humidity or higher, especially in fall and winter when forced-air heat dries out your home.
Dry air pulls moisture out of the thin leaves faster than the roots can replace it. The result is brown, papery edges that spread inward, plus leaves that roll up to protect themselves.
If browning is your main concern, this guide on peacock plant turning brown (causes & how to fix them) covers each pattern in more detail.
Ways to Add Moisture That Actually Work
- Run a cool-mist humidifier within 3 to 5 feet of the plant during the heating season.
- Group your peacock plant with other leafy houseplants to create a slightly more humid pocket.
- Set the pot on a tray of pebbles and water, keeping the pot base above the waterline.
- Grow the plant in a bright bathroom or a clear plastic cabinet if your home stays very dry.
Misting feels helpful, but it raises humidity for only a few minutes. In my opinion, a humidifier is the single most effective change you can make for this plant indoors.
Leaves That Curl or Roll
Rolled leaves during the day often signal thirst or dry air. Peacock plants also fold their leaves upward at night, which is normal behavior in the prayer plant family.

For other causes of rolling, see this article on peacock plant leaves curling (causes & how to fix them).
Sophia’s tip: Keep your peacock plant at least 6 feet from radiators and heat vents. Even with a humidifier running, hot dry air blowing directly on the leaves will brown the edges within days.
Watering Mistakes: Too Much, Too Little, and Root Rot
Peacock plants want soil that stays evenly moist but never soggy. Both overwatering and underwatering can kill the plant, and the symptoms sometimes look similar at first glance.
Signs of Overwatering
Overwatered peacock plants show yellowing lower leaves, limp stems, and soil that stays wet for many days. Over time, the stems near the soil line turn soft and brown.
You can learn more about yellowing in this guide to peacock plant leaves turning yellow (and how to fix it).
Water only when the top 1 inch of soil feels dry. In summer that might be every 5 to 8 days. In winter, with less light, it might stretch to 10 to 14 days, depending on your pot and room temperature.
Signs of Underwatering
An underwatered plant has drooping, curled leaves, crispy edges, and soil pulling away from the pot sides. The pot also feels noticeably light when you lift it.
This guide on peacock plant 8 reasons for drooping leaves (and how to fix it) explains other reasons a plant goes limp.
If the soil has dried completely, water slowly until it drains from the bottom, wait 10 minutes, and water again. Very dry potting mix can repel water at first, so a second pass helps it soak in.
Checking for Root Rot
Root rot is the most serious watering problem because it can kill the plant even after you correct your habits. Slide the plant out of its pot and look at the roots.
| Root condition | What it looks like | What it means |
|---|---|---|
| Healthy | Firm, white to light tan | No action needed |
| Early rot | A few soft, brown roots | Trim and adjust watering |
| Advanced rot | Mostly black, mushy, foul smelling | Save healthy sections or propagate by division |
Always use a pot with drainage holes, and empty the saucer or cachepot 15 minutes after watering. A peacock plant sitting in standing water is one of the fastest ways to lose it.
Sophia’s tip: Lift the pot right after a thorough watering to feel its full weight. Lifting it again a few days later teaches you what “ready for water” feels like, which is more reliable than a fixed schedule.
Tap Water Minerals and Fertilizer Burn
Peacock plants are sensitive to fluoride, chlorine, and dissolved salts in tap water. Mineral buildup and too much fertilizer both cause brown tips and edges, even when humidity and watering are right.
Switching Your Water
Use distilled water, rainwater, or filtered water that removes fluoride when possible. Letting tap water sit out overnight allows some chlorine to escape, but it does not remove fluoride or minerals.
Water at room temperature, around 65 to 75°F. Cold water straight from the tap can shock the roots, especially in winter.
Signs of Salt Buildup
A white or yellow crust on the soil surface or around the pot rim means minerals and fertilizer salts are accumulating. Brown tips that appear on new leaves soon after they unfurl are another clue.
Flush the soil every 2 to 3 months. Slowly pour distilled water through the pot equal to about twice the pot volume, letting it drain fully.
Feeding Without Burning
Fertilize only during spring and summer, about once a month, with a balanced liquid houseplant fertilizer diluted to half strength. Skip feeding in fall and winter, and never fertilize a plant that is bone dry or already struggling.
A stressed plant cannot use extra nutrients. Feeding a dying peacock plant often makes the damage worse rather than better.
Wrong Light, Cold Drafts, and Heat Stress
Peacock plants need bright, indirect light and steady temperatures between 65 and 80°F. Direct sun fades and scorches the leaves, deep shade weakens growth, and temperatures below 60°F cause damage.
Finding the Right Spot
An east-facing window is ideal, with the plant 2 to 4 feet from the glass. A north window works if the plant sits close to it.
With south or west windows, keep the plant 5 to 8 feet back or filter the light with a sheer curtain.
| Light problem | What you see | Fix |
|---|---|---|
| Too much direct sun | Faded patterns, brown scorched patches | Move back or diffuse the light |
| Too little light | Slow growth, small leaves, leggy stems | Move closer to a window or add a grow light |
| Uneven light | Plant leaning hard to one side | Rotate a quarter turn weekly |
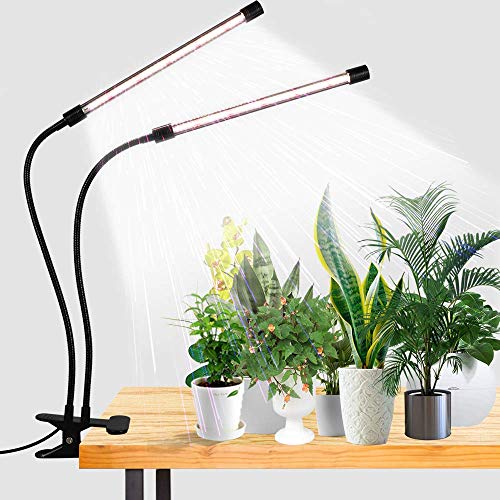
If your apartment is dim, a full-spectrum LED grow light placed 12 to 24 inches above the plant for 10 to 12 hours a day works well. Keep it far enough away that the leaves feel no warmth.
Cold Glass and AC Drafts
Leaves touching a cold window in winter can develop dark, water-soaked patches that later turn brown. Pull the plant at least 12 inches away from the glass on nights that drop below freezing outside.
In summer, keep the plant out of the direct path of air conditioners and fans. Constant moving air dries the leaves and causes curling and brown edges.
Sudden Temperature Swings
Moving a peacock plant from a warm store to a drafty entryway, or from outdoors back inside, can trigger leaf drop. Make changes gradually and keep the plant in one stable spot once it settles.
Pests: Spider Mites, Mealybugs, and Scale
Pests can drain a peacock plant slowly until it looks like it is dying. Spider mites are the most common because they thrive in the same dry indoor air that already stresses this plant.
How to Identify Each Pest
- Spider mites: tiny dots on leaf undersides, fine webbing, and pale speckling on the upper surface.
- Mealybugs: white, cottony clusters along stems and where leaves meet the stem.
- Scale: small brown or tan bumps on stems and leaf veins that scrape off with a fingernail.
- Fungus gnats: small black flies around the soil, a sign the mix stays too wet.
Mealybugs and scale leave a shiny residue called honeydew. If your leaves feel tacky, read this guide on why your peacock plant is sticky to confirm the cause.
Treatment Steps
Isolate the plant from your other houseplants right away. Rinse the leaves, tops and undersides, with lukewarm water in the shower to knock off as many pests as possible.
Spray all leaf surfaces with insecticidal soap or neem oil, following the label directions. Repeat every 5 to 7 days for at least 3 to 4 weeks to catch new hatchlings. Wipe mealybugs and scale individually with a cotton swab dipped in rubbing alcohol.
Keeping Pests Away
Higher humidity makes the plant less appealing to spider mites. Wiping the leaves with a damp cloth every few weeks also removes dust and lets you spot problems early.
Pet Safety
The ASPCA lists the peacock plant (Calathea makoyana) as non-toxic to cats, dogs, and horses. Chewing can still cause mild stomach upset, and pesticide residue on treated leaves is a concern, so keep curious pets away after spraying.

How to Revive a Dying Peacock Plant and Handle Dead Leaves
Most peacock plants can recover if the roots and the base of the stems are still firm. Correct the growing conditions, remove damaged tissue, and give the plant several weeks of stability before judging the result.
A Step-by-Step Rescue
- Remove the plant from its pot and inspect the roots.
- Trim any black, mushy roots with clean, sharp scissors.
- Repot into fresh, well-draining mix in a pot with drainage holes, no more than 1 to 2 inches wider than the root ball.
- Water with distilled or rainwater until it drains.
- Place the plant in bright, indirect light with humidity above 50 percent and temperatures between 65 and 80°F.
- Hold off on fertilizer until you see steady new growth.
A good potting mix for peacock plants combines a peat or coco coir base with perlite and some orchid bark. This holds moisture while letting excess water drain away from the roots.
Should You Cut Off Dead Leaves?
Yes, removing leaves that are fully brown or yellow is helpful. Dead leaves will not recover, and they can harbor pests and fungal problems while making it harder to see new damage.
Cut fully dead leaves off at the base of the stem, close to the soil.
For leaves that are only partly brown, trim the damaged edge with clean scissors, following the natural leaf shape and leaving a thin line of brown to avoid cutting into healthy tissue.
Sophia’s tip: Do not remove more than about a third of the foliage at once on a weak plant. Keep partly green leaves for now, since they still feed the plant while it rebuilds its roots.
Dividing a Badly Damaged Plant
If most of the root system has rotted, look for any section with firm roots and at least one healthy stem. Separate it gently, pot it on its own, and keep it warm and humid.
Peacock plants grow from rhizomes, so division is the most reliable way to save part of a failing plant.
What Recovery Looks Like
Expect new leaves to emerge as tightly rolled spikes from the center of the plant. Recovery usually takes 3 to 8 weeks, depending on light and season. Some older leaves may still decline during this period, which is normal as the plant redirects energy.
Your Next Steps
- Check soil moisture 1 inch down and look at the roots if the soil has stayed wet for over a week.
- Place a hygrometer near the plant and add a humidifier if readings fall below 50 percent.
- Switch to distilled, rain, or fluoride-removing filtered water, and flush the soil if you see white crust.
- Move the plant 2 to 4 feet from an east window and at least 6 feet from radiators and vents.
- Inspect leaf undersides for pests and start treatment right away if you find any.
- Trim fully dead leaves at the base and wait 3 to 8 weeks for new growth before making more changes.
Common Questions About Why Your Peacock Plant Is Dying
Can a peacock plant come back after all the leaves die?
It can, as long as the rhizomes and roots are still firm and pale. Cut away the dead foliage, keep the soil lightly moist, and provide warmth and humidity. New shoots may take 4 to 8 weeks to appear.
Why are new leaves on my peacock plant already brown at the tips?
Brown tips on fresh leaves usually point to tap water minerals, fertilizer salt buildup, or very dry air while the leaf was unfurling. Switch to distilled or rainwater, flush the soil, and raise humidity. New leaves after that should emerge cleaner.
Is it normal for peacock plant leaves to fold up at night?
Yes, peacock plants belong to the prayer plant family and naturally raise and fold their leaves in the evening. The leaves should flatten again in the morning. Curling that lasts all day is a stress sign worth investigating.
How often should I water a peacock plant indoors?
Water whenever the top 1 inch of soil feels dry, rather than on a fixed calendar. That often works out to every 5 to 8 days in summer and every 10 to 14 days in winter. Pot size, light, and room temperature all change the timing.
Should I repot a dying peacock plant?
Repot if you find root rot, compacted soil, heavy salt buildup, or roots circling tightly around the pot. Otherwise, fix humidity, water, and light first, since repotting adds stress. Healthy peacock plants usually need repotting every 1 to 2 years in spring.

Hi! I’m Sophia, and I love plants – especially an expert in growing house plants. I stay in Chicago, United States of America, and through my blog and social media platforms, provide tips and tricks on how to grow healthy, vibrant plants indoors. Check out more here.