
You notice crispy brown tips, papery yellow edges, or whole leaves curling and crackling on a plant that looked fine a few weeks ago.
The short version: Most house plant leaves dry up because the roots cannot deliver enough water to the foliage. That usually comes from underwatering, root rot from overwatering, or dry indoor air from heating and AC.
Less often, the cause is too much sun, fertilizer salt buildup, pests, or normal aging.
This guide shows you how to read the damage pattern, confirm the cause, and fix it without making things worse.
Check These First
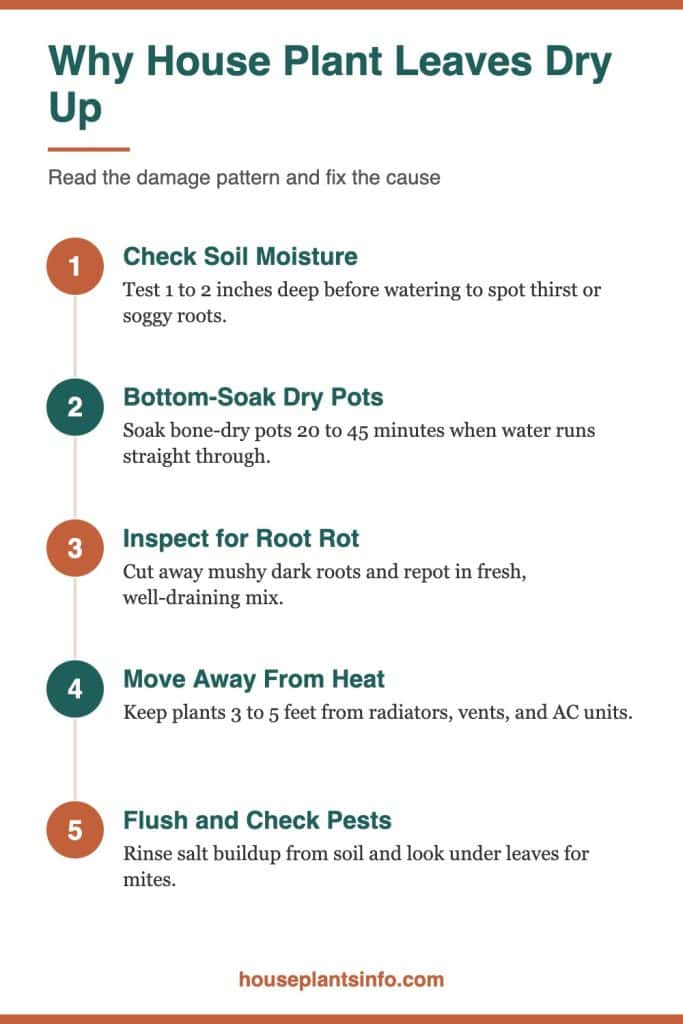
- Push a finger 1 to 2 inches into the soil. Bone dry means thirst. Soggy or sour-smelling soil points to root trouble.
- Look at where the plant sits. Within a few feet of a radiator, heat vent, or AC unit, dry air is a strong suspect.
- Note which leaves are affected. Only the oldest, lowest leaves often means normal aging. New growth drying suggests a care problem.
- Flip a few leaves over and check for webbing, specks, or sticky residue.
- Think back over the last month. A move, repot, new window, or the furnace kicking on often lines up with the damage.
Why Are My House Plant Leaves Drying Up?
Leaves dry up when they lose water faster than the roots can replace it. The location and look of the damage on the leaf usually tells you which part of that system is failing.
A leaf constantly releases water vapor through tiny pores. When the soil is dry, the roots are damaged, or the air pulls moisture out too fast, cells at the tips and edges die first because they are farthest from the water supply.
Reading the Damage Pattern
Before changing anything, take a close look. The table below matches common patterns to their most likely causes.
| What you see | Most likely cause |
|---|---|
| Crispy brown tips, rest of leaf green | Low humidity, inconsistent watering, or salt buildup |
| Whole leaf dry, limp, and curled, soil dry | Underwatering |
| Yellowing then browning, soil wet, stems soft | Overwatering and root rot |
| Bleached or brown patches on the side facing the window | Sunburn or heat from the glass |
| Brown edges with a white crust on the soil | Fertilizer or mineral salt buildup |
| Speckled, dull leaves with fine webbing | Spider mites or other pests |
| Only the oldest bottom leaves drying, one at a time | Normal leaf aging |
Measure Instead of Guessing
Guessing at moisture is the most common way people get this wrong. A simple soil moisture meter pushed down into the root zone shows you whether the middle of the pot is dry or still wet, which a fingertip on the surface cannot.
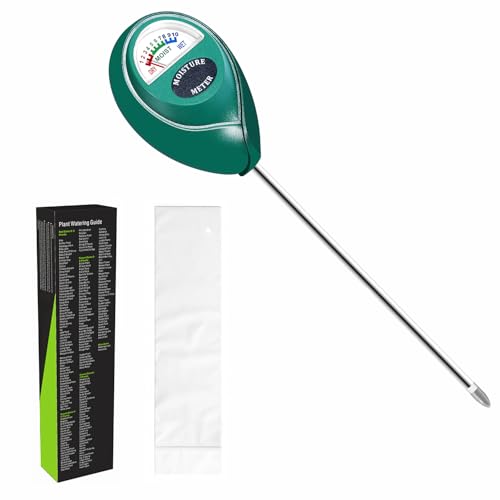
An inexpensive hygrometer placed near your plants is just as useful in winter. If it reads below about 30% relative humidity, which is common in Chicago apartments with forced-air or radiator heat, many tropical plants will start browning at the tips.
Leaf Type Changes the Odds
Plants with succulent foliage handle dry air well but punish overwatering. Many houseplants with thick leaves store water in their tissue, so drying on them usually signals root trouble or extreme thirst rather than low humidity.
Plants with delicate foliage are the opposite. A houseplant with thin leaves, such as a fern or calathea, loses moisture quickly and shows crispy edges within days of dry air or a missed watering.

Underwatering and Water-Repellent Soil: Cause and Fix
Underwatering is the most common reason leaves dry up, and the fix is a thorough soak followed by a steadier watering routine. Watch for soil that has shrunk away from the pot, since that water runs straight past the roots.
Thirsty plants usually droop first, then the leaves turn dull, curl, and go crisp from the edges inward. The pot feels light when you lift it, and the soil may look pale and dusty.
Why Watering More Sometimes Fails
Peat-based potting mixes become water-repellent once they dry out completely. When you pour water on top, it races down the gap between the soil and the pot wall and drains out the bottom, leaving the root ball dry.
If water runs out of the drainage hole within seconds and the pot still feels light, this is what is happening.
How to Rehydrate a Dried-Out Plant
- Set the pot in a sink or bucket with 2 to 3 inches of room-temperature water.
- Let it soak from the bottom for 20 to 45 minutes, until the surface of the soil looks damp.
- Lift it out and let it drain completely so it does not sit in standing water.
- Gently press the soil back against the pot wall if a gap remains.
After this, water when the top 1 to 2 inches are dry for most tropical foliage plants. Succulents and cacti prefer to dry out almost completely between waterings.
Sophia’s tip: Lift your pots right after a thorough watering and again when they are dry. Learning the difference in weight lets you tell when a plant needs water in two seconds, even for hanging baskets you cannot easily reach.
Already-crisp leaves will not turn green again. The goal is to stop the damage from spreading to new growth.
Overwatering and Root Rot: Cause and Fix
Overwatering dries out leaves because waterlogged roots suffocate and rot, and dead roots cannot carry water upward. The fix is to stop watering, check the roots, and remove anything mushy.
This feels backward, but it is very common. The leaves often yellow first, then brown and dry, while the soil stays damp for a week or more. Stems near the soil line may feel soft, and the pot may smell sour.
Checking the Roots
Slide the plant out of its pot and look at the root ball. Healthy roots are firm and usually white, tan, or light orange depending on the plant.
Rotted roots are brown or black, mushy, and may slip off like a sleeve when you pull them gently. A strong musty smell confirms the problem.
Saving a Plant With Root Rot
- Rinse away the old soil so you can see every root.
- Cut off all soft, dark roots with clean scissors, back to firm tissue.
- Repot into fresh, well-draining mix in a pot with a drainage hole, only 1 to 2 inches wider than the remaining root ball.
- Water lightly once, then wait until the top couple of inches dry before watering again.
- Keep the plant in bright, indirect light and out of cold drafts while it recovers.
If most of the root system is gone, take healthy stem cuttings as a backup. Many vining and cane plants root easily in water.
Preventing a Repeat
Decorative pots without drainage holes are a frequent cause. If you love the look, keep the plant in a plastic nursery pot inside the cover pot and empty any water that collects at the bottom after 15 minutes.
Plants also use much less water in winter, when days are short and growth slows. A schedule that worked in July can drown roots in January.
Dry Indoor Air From Heating and AC: Cause and Fix
Low humidity causes crispy brown tips and edges, especially on tropical plants, and it gets worst in winter when the heat runs. The fix is to move plants away from heat sources and raise the humidity around them.
Most common houseplants come from humid regions and grow best at roughly 40% to 60% relative humidity. Heated indoor air in a cold-climate winter often drops to 20% to 30%, and air conditioning in summer can also dry the air.
Where Dry Air Hits Hardest
Radiators, baseboard heaters, and forced-air vents blow warm, very dry air directly across nearby leaves. A plant 2 feet from a vent can brown while the same species across the room stays fine.
Window AC units and ceiling vents do the same in summer. Constant moving air pulls moisture from the leaf surface faster than the plant can replace it.
Ways to Raise Humidity
- Move plants at least 3 to 5 feet away from radiators, vents, and AC units.
- Group plants together so they share the moisture they release.
- Set pots on a tray of pebbles and water, keeping the pot bottom above the waterline.
- Run a room humidifier near humidity-loving plants during heating season.
- Keep the most sensitive plants, like ferns and calatheas, in a naturally humid room such as a bright bathroom.
Misting feels helpful, but it raises humidity for only a few minutes. A humidifier or grouping makes a much larger and longer-lasting difference.
Sophia’s tip: Keep the hygrometer at leaf height right next to your fussiest plant rather than on a shelf across the room. Readings near a window or vent can differ by 10% or more from the middle of the room.
Plants That Need Extra Care in Dry Air
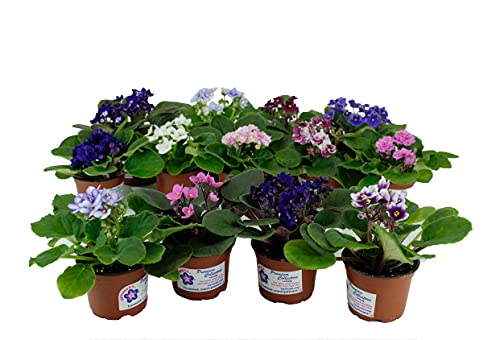
Some foliage needs special handling. A house plant with fuzzy leaves, such as an African violet, can spot if water sits on the leaves, so raise humidity with a humidifier or pebble tray instead of misting.
Too Much Sun or Heat Near the Glass: Cause and Fix
Leaves dry up in patches when strong sun or trapped heat scorches them, usually on the side facing the window. Moving the plant back from the glass or filtering the light stops new damage.
Sunburn looks like bleached, tan, or brown dry patches in the middle of leaves, not just at the tips. It often appears after you move a plant to a brighter spot, or when the seasons shift and the sun angle changes.
Window Direction Matters
South- and west-facing windows deliver the most intense light and heat, especially in the afternoon. A plant pressed against that glass can overheat even when the room feels comfortable.
East-facing windows give gentler morning sun that most foliage plants tolerate well. North-facing windows rarely cause sunburn but may not provide enough light for sun-loving plants.
How to Fix Light Damage
- Pull the plant 2 to 4 feet back from a south or west window, or hang a sheer curtain to diffuse the light.
- Move plants gradually over a week or two when shifting them into brighter light, so leaves can adjust.
- Keep foliage from touching window glass, which gets very hot in summer and very cold in winter.
- Rotate pots a quarter turn every week or two for even exposure.
If you use a grow light, keep it at the distance recommended for that fixture, often 6 to 24 inches. Lights placed too close can bleach and dry the top leaves.
Cold glass causes similar-looking damage. Leaves touching a Chicago window in January can get chilled, turning dark and then drying out, so keep at least a few inches of space.
Fertilizer and Tap Water Buildup: Cause and Fix
Excess fertilizer and dissolved minerals in tap water build up as salts in the soil, which pull moisture away from roots and burn leaf tips and edges. Flushing the soil and fertilizing less fixes it.
Signs include brown, crispy leaf margins, a white or yellowish crust on the soil surface or pot rim, and damage that keeps spreading even though watering seems right.
Flushing Out Salts
- Take the plant to a sink or tub.
- Slowly pour room-temperature water through the soil, using about two to four times the pot’s volume.
- Let it drain completely before returning the plant to its spot.
- Scrape off any heavy white crust on the surface and replace it with fresh mix.
Repeat every few months if you fertilize regularly or have hard water.
Smarter Feeding
Most foliage plants need fertilizer only during active growth in spring and summer. Use a balanced liquid fertilizer at half the label strength, and skip feeding in late fall and winter when growth slows.
Never fertilize a plant that is bone dry or freshly repotted. Water first, and give repotted plants about four to six weeks before feeding.
Some plants, including spider plants and dracaenas, are sensitive to fluoride and other compounds in tap water and show browning tips. Filtered water or rainwater can help these plants.
Pests That Suck Leaves Dry: Cause and Fix
Sap-sucking pests like spider mites, thrips, and mealybugs drain moisture from leaf cells, leaving foliage dull, speckled, and eventually dry. Isolate the plant, wash it, and treat it repeatedly until the pests are gone.
Spider mites thrive in exactly the warm, dry air that heated apartments produce in winter. That is why dried-up leaves and pests often show up together.
Identifying the Culprit
- Spider mites: tiny moving dots, fine webbing between leaves and stems, and pale stippling on the leaf surface.
- Thrips: silvery streaks or patches with tiny black specks, often on new growth.
- Mealybugs: white cottony clumps in leaf joints and along stems.
- Scale: small brown or tan bumps that scrape off with a fingernail, often with sticky residue nearby.
Wipe the underside of a leaf with a white paper towel. Red, brown, or green smudges usually mean spider mites.
Treatment Steps
- Move the infested plant away from others right away.
- Rinse the foliage, especially the undersides, with lukewarm water in the shower.
- Wipe leaves with a damp cloth, and dab mealybugs with a cotton swab dipped in rubbing alcohol.
- Spray thoroughly with insecticidal soap or horticultural oil, following the label.
- Repeat every 5 to 7 days for at least three to four weeks to catch newly hatched pests.
Raising humidity helps prevent spider mites from coming back.
Keeping Pets and Kids Safe
Keep treated plants out of reach until sprays dry, and store products away from children and pets. Also check the ASPCA toxic and nontoxic plant lists for your plant, since chewed or dried leaves that drop can be eaten.
The ASPCA lists pothos as toxic to cats and dogs, while spider plants are listed as nontoxic.

Normal Aging, Repotting Stress and Rootbound Plants: Cause and Fix
Some leaf drying is normal or temporary, such as old bottom leaves dying off, stress after a move or repot, or a plant that has outgrown its pot. The fix depends on whether new growth looks healthy.
Natural Leaf Loss
Many plants shed their oldest, lowest leaves as they grow. If one or two older leaves yellow and dry slowly while new leaves come in healthy, the plant is simply recycling resources.
This is common on dracaenas, rubber plants, and palms. It becomes a concern only when many leaves dry at once or new growth is affected.
Shock After a Change
Moving a plant to a new room, bringing it home from a store, or repotting it can cause a few weeks of drooping and some dried leaves. Light, temperature, and humidity all shift at once.
Keep care steady during recovery. Avoid fertilizing, avoid moving it again, and water based on soil moisture rather than a fixed schedule.
Rootbound Plants
A plant that has filled its pot with roots dries out within a day or two of watering, so the foliage keeps crisping no matter how often you water. Roots circling the bottom or poking out of the drainage hole are the giveaway.
Repot in spring or early summer into a container 1 to 2 inches wider, loosening circling roots gently.
Leaf shape changes can also point to root or light problems, so if your potted house plant has wavy leaves along with dry edges, check watering consistency too.
Should You Cut Off Dried Leaves?
Yes, once a leaf is mostly brown and crisp, removing it tidies the plant and lets it focus energy on healthy growth.
For leaves with only brown tips, trim just the dead part with clean scissors, following the leaf’s natural shape and leaving a thin line of brown to avoid cutting into living tissue.
Sophia’s tip: Before you trim anything, take a photo of the plant from the same angle each week. Comparing photos makes it much easier to tell whether new damage is still appearing or your fix is working.
Narrow, stretched foliage is a separate issue from drying. If you have been wondering why do some potted house plants have thin skinny leaves, the answer is often too little light, which can also weaken a plant and make it more prone to stress.
Your Next Steps
- Check soil moisture in the root zone today, using your finger or a soil moisture meter, and lift the pot to feel its weight.
- If the soil is bone dry and water runs straight through, bottom-soak the pot for 20 to 45 minutes.
- If the soil is soggy and sour, unpot the plant and inspect the roots for rot.
- Move plants at least 3 to 5 feet from radiators, heat vents, and AC units, and place a hygrometer nearby.
- Inspect leaf undersides for pests, and flush the soil if you see white crust on the surface.
- Trim fully dried leaves, then watch new growth for two to four weeks to confirm the fix.
Common Questions About House Plant Leaves Drying Up
Can dried-up leaves turn green again?
No, leaf tissue that has turned brown and crispy is dead and will not recover. Focus on fixing the cause so new leaves come in healthy, and trim the damaged ones whenever you like.
Why are only the tips of my plant’s leaves turning brown?
Brown tips with otherwise green leaves usually point to low humidity, uneven watering, or salt and mineral buildup in the soil. Check how close the plant sits to heat sources, flush the soil, and water more consistently.
How do I tell underwatering from overwatering?
Feel the soil and look at the roots. Underwatered plants have dry, light soil and crispy, curled leaves, while overwatered plants have damp soil, soft stems, and roots that are dark and mushy.
Why do my plants dry up more in winter?
Indoor heating can drop humidity to 20% to 30%, and radiators or vents blow dry air directly onto nearby leaves. Shorter days also slow growth, so the same watering routine can leave roots too wet or too dry.
Should I mist my plants to stop leaves from drying?
Misting raises humidity only for a few minutes, so it rarely solves the problem. A humidifier, a pebble tray, or grouping plants together provides steadier moisture, and it avoids wet leaves on fuzzy-leaved plants.

Hi! I’m Sophia, and I love plants – especially an expert in growing house plants. I stay in Chicago, United States of America, and through my blog and social media platforms, provide tips and tricks on how to grow healthy, vibrant plants indoors. Check out more here.