
Your English ivy is spilling over the rim of its pot, long bare vines trailing toward the floor while the trellis you bought for it stands empty.
Learning how to grow English ivy on a trellis is mostly about guiding those vines early, giving them a surface they can grip, and keeping the plant healthy enough to push out new growth.
The short version: Set a sturdy trellis firmly into the pot at planting time, then weave or loosely tie the longest vines onto it every week or two.
Give the plant bright, indirect light, cool temperatures, and evenly moist soil, and pinch the tips so it branches and fills the frame.
This guide covers how ivy climbs, choosing a trellis, setting it up step by step, placement, care, pruning, and the problems that show up most often indoors.
At a Glance
| Factor | What it needs |
|---|---|
| Light | Bright, indirect light; a few feet from an east or north window, or set back from a south or west window |
| Water | Water when the top 1 inch of soil feels dry; never leave it sitting in water |
| Humidity | Moderate, ideally 40% or higher; dry winter air invites spider mites |
| Temperature | Cool to moderate, roughly 50 to 70°F; avoid radiators and heat vents |
| Soil | Loose, well-draining potting mix in a pot with drainage holes |
| Pet safety | Toxic to cats and dogs according to the ASPCA |
| Difficulty | Easy to moderate; training takes patience, not skill |
How Does English Ivy Climb a Trellis?
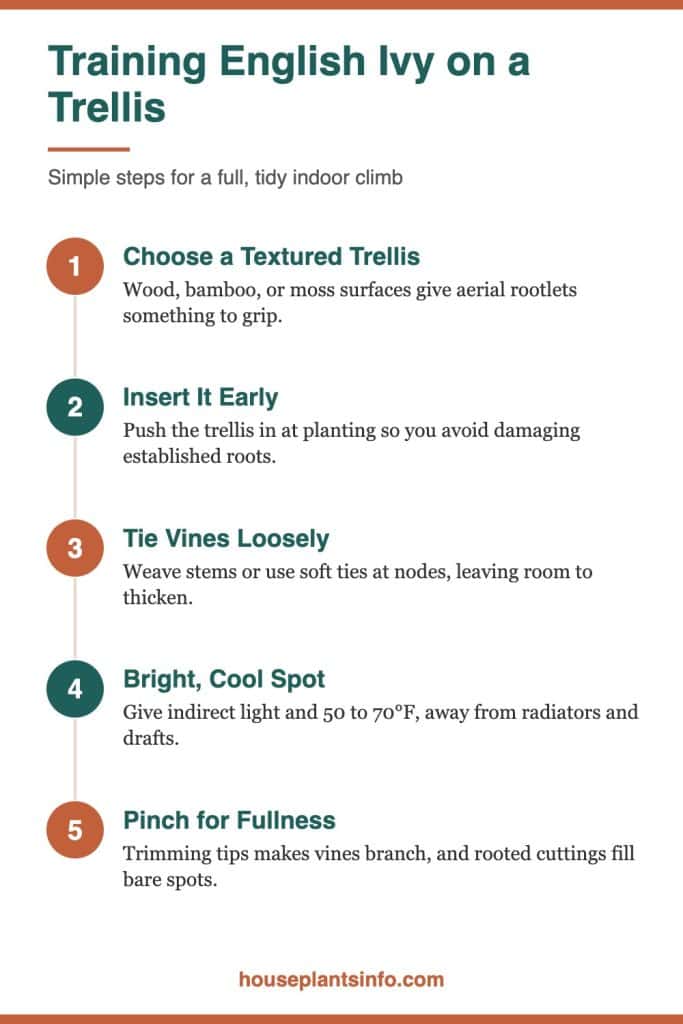
English ivy climbs with small aerial rootlets that grow along its stems and cling to rough surfaces. On a smooth indoor trellis, those rootlets often can’t grip well, so you will need to weave or tie the vines in place, at least at first.
What the rootlets actually do
The rootlets form at the nodes, the points where leaves meet the stem. Outdoors, they cling to bark, brick, and wood.
They don’t wrap around supports the way tendrils on a pea plant do, which is why indoor ivy often just leans against a trellis instead of climbing it.
Indoor air also matters. Rootlets form more readily when the air is reasonably humid, so ivy in a dry, heated apartment tends to cling less and rely more on your help.
Why indoor ivy needs a guide
Left alone, ivy follows gravity and light. Vines grow toward the brightest window and drape downward if nothing catches them. A trellis gives the plant a framework, but you are the one who directs each stem onto it.
The simplest approach uses soft plant ties, garden twine, or cut strips of old cotton T-shirt to hold vines loosely against the frame.
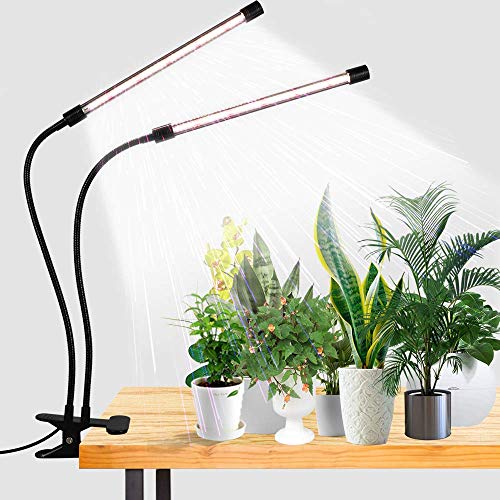
A grow light placed above the plant can also help, because it encourages the vines to grow upward instead of sideways toward a window.
Surfaces ivy grips best
Rough or porous materials give rootlets something to hold. Untreated wood, bamboo, and coir- or moss-wrapped supports work better than smooth metal or glossy plastic.
You can still use a sleek metal or plastic trellis. Expect to tie more often, and plan to keep tying the main vines even after the plant matures.
Which Trellis Works Best for Indoor English Ivy?
The best indoor trellis is sturdy, sized to your pot, and textured enough for rootlets to grab. A fan, ladder, hoop, or obelisk shape all work; choose based on how you want the finished plant to look.
Matching shape to the look you want
Different shapes create different effects in a room. Think about where the plant will sit and how much space you can give it.
| Trellis shape | Best for | Notes |
|---|---|---|
| Fan | Flat display against a wall | Spreads vines wide; easy to tie |
| Ladder | Narrow spaces, shelves | Simple horizontal rungs for weaving |
| Hoop or ring | Tabletop pots | Classic topiary look; vines wrap around in loops |
| Obelisk | Floor pots, corners | Fuller, three-dimensional shape |
| Moss pole | Tall, upright growth | Holds moisture, rootlets attach well |
Getting the size right
A trellis should be roughly one and a half to three times the height of the pot for a balanced look. Too tall, and it looks bare for months. Too short, and you will be trimming constantly.
For a 6-inch pot, a trellis around 12 to 18 inches tall is a good starting point. Larger floor pots can handle 3- to 4-foot frames.
Stability matters more than style
Ivy gets heavier as it fills in, and pots on shelves get bumped by pets, kids, and cleaning. Choose a trellis with legs long enough to push at least 3 to 4 inches into the soil, or one designed to clip to the pot.
Sophia’s tip: If your trellis wobbles, push it in until the legs touch the bottom of the pot, then top-dress with an extra inch of soil. A heavier ceramic or terracotta pot also keeps a tall trellis from tipping.
How to Grow English Ivy on a Trellis Step by Step
Start with a well-draining pot, insert the trellis before the roots fill the soil, and then train vines onto it a little at a time. The full process takes a few months to look established, but the setup takes under an hour.
Step 1: Pick the right pot
Use a pot with drainage holes, about 1 to 2 inches wider than the current root ball. Ivy dislikes soggy roots, and a pot that is too large holds extra water the roots can’t use.
Heavier pots are easier to balance once the trellis and vines add weight up top.
Step 2: Use loose, well-draining soil
A standard indoor potting mix with added perlite works well for most ivy. If you want more detail on mixes and amendments, read this guide on what type of soil to use for indoor English ivy.

Fill the pot partway, set the plant at the same depth it was growing before, and leave room for the trellis legs.
Step 3: Insert the trellis at planting time
Push the trellis in before backfilling, or right after, so you avoid stabbing through established roots. Place it toward the back of the pot if the plant will sit against a wall, or centered for a hoop or obelisk.
Firm the soil around the legs, then water thoroughly until it runs from the drainage holes.
Step 4: Sort the vines
Look at the plant and separate the longest, healthiest vines from short or spindly ones. Long vines go onto the trellis now. Short ones can be left to grow, then trained later.
If a few vines are bare along most of their length, consider trimming them back to encourage branching instead of training a leafless stem.
Step 5: Weave or tie the vines on
Gently guide each long vine up the trellis, weaving it in and out of the openings or wrapping it around a hoop. Where a vine won’t stay, tie it loosely at a node with soft twine or a plant tie.
Leave room for the stem to thicken. A tie should hold the vine against the frame, not pinch it.
Step 6: Spread vines evenly
Distribute vines across the full width of the trellis instead of bunching them on one side. On a fan, angle them outward. On a hoop, wrap stems in the same direction so the loops look neat.
Even spacing gives each vine light and helps the plant fill in evenly.
Step 7: Check and retie every 1 to 2 weeks
New growth won’t find the trellis on its own. During spring and summer, check every week or two and tuck new tips into place. In winter, when growth slows, monthly checks are usually enough.
Remove or loosen old ties once rootlets have attached or the stem is firmly woven in.
Where Should a Trellised English Ivy Sit in Your Home?
Place it where it gets bright, indirect light and stays cool, away from heat sources and cold drafts. An east-facing window or a spot a few feet back from a south or west window usually works well.
Light and window direction
English ivy tolerates medium light, but it grows faster and fuller in bright, indirect light. In low light, vines stretch out with long gaps between leaves, which makes a trellis look sparse.
A north window works for ivy if the plant sits close to the glass. Harsh afternoon sun through a south or west window can scorch leaves, so set the plant back a few feet or use a sheer curtain.
Variegated types need a bit more light to keep their pattern.
Rotate for even coverage
Ivy grows toward the light, so one side of the trellis fills in while the back stays bare. Turn the pot a quarter turn every week or two.
Sophia’s tip: Mark the front of the pot with a small piece of tape. Each time you water, give it a quarter turn clockwise, so you never have to remember which way you turned it last.
Temperature and drafts
Ivy prefers cooler rooms than many houseplants, roughly 50 to 70°F. Warm, dry spots near radiators, baseboard heaters, or forced-air vents stress the plant and invite spider mites.
Cold drafts from a window that leaks in winter, or an AC vent blowing directly on the plant in summer, can also cause leaf damage. A few feet of distance usually solves both problems.
Using a grow light
In a dim apartment or during dark winters, a full-spectrum grow light keeps ivy compact. Position it about 12 to 24 inches above the plant and run it 10 to 12 hours a day.
Overhead light also encourages vines to climb up the trellis instead of reaching sideways toward a window.
How Do You Water, Humidify, and Feed a Climbing Ivy?
Water when the top inch of soil is dry, keep humidity moderate, and feed lightly during spring and summer. Ivy on a trellis has more leaves exposed to air, so it can dry out a bit faster than a compact plant.
Watering without overdoing it
Check the soil with your finger before watering. If the top inch is dry, water thoroughly until it drains, then empty the saucer after 15 to 20 minutes.
In winter, with less light and slower growth, ivy needs water less often. Forced-air heat can dry the pot faster, though, so keep checking instead of following a fixed schedule.
Humidity in heated apartments
Ivy does best at around 40% humidity or higher. Winter heating can drop indoor humidity much lower, which leads to crispy leaf edges and spider mites.
Group the plant with other houseplants, run a humidifier nearby, or set the pot on a pebble tray filled with water that stays below the pot’s base. Misting gives only brief relief and isn’t a substitute.
Feeding for steady growth
Use a balanced liquid houseplant fertilizer diluted to about half strength, every 4 weeks during spring and summer. Skip or reduce feeding in fall and winter when growth slows.

Too much fertilizer can burn roots and cause brown leaf tips. Flushing the pot with plain water every few months helps clear built-up salts.
How Do You Prune and Train Ivy for a Fuller Trellis?
Pinch or trim the growing tips regularly to make the vines branch, and cut back bare stems so new growth fills the gaps. Pruning is what turns a few long strands into a dense, covered trellis.
Pinching for branching
Each time you pinch off the tip of a vine just above a leaf, the plant tends to push out new shoots from the nodes below. More shoots mean more stems to train and fuller coverage.
Pinch the main vines once they reach the top of the trellis, and pinch side shoots when they are a few inches long. If you want more ways to speed things up, see this guide on how to make English ivy grow faster.
Cutting back leggy vines
Long stems with few leaves rarely fill in on their own. Cut them back to a few inches above the soil or to a healthy leaf node, and new growth will usually sprout from there within a few weeks in good light.
Spring and early summer are the best times for harder cuts, since the plant recovers quickly.
Rooting the cuttings
Trimmed stems root easily. Place 4- to 6-inch cuttings in water or moist potting mix, and roots usually form in a few weeks.
Planting rooted cuttings back into the same pot is one of the fastest ways to thicken a sparse trellis.
Sophia’s tip: Tuck rooted cuttings in near the base of the trellis legs, where coverage is usually thinnest. Within a season, they climb up and hide the bare lower section.
What Goes Wrong With Trellised Ivy, and How Do You Fix It?
Most problems come from light, water, dry air, or pests rather than the trellis itself. Spot the symptom, adjust the condition causing it, and the plant usually recovers.
Vines won’t stay on the trellis
The trellis is too smooth, or the vines haven’t been tied. Use soft ties at a few nodes per vine, or switch to a wooden, bamboo, or moss-covered support.
Check that ties aren’t too tight. A pinched stem can weaken or die above the tie.
Brown or crispy leaves
Dry air, underwatering, fertilizer buildup, or too much direct sun are the usual causes. Read this breakdown of English ivy leaves turning brown to narrow it down.
Moving the plant away from a radiator and raising humidity fixes many winter cases.
Curling or puckered leaves
Curling often points to spider mites, underwatering, or heat stress. Inspect the undersides of leaves for fine webbing or tiny moving specks. This guide on English ivy leaves curling covers each cause in more detail.
For mites, rinse the plant in the shower and treat with insecticidal soap, repeating every 5 to 7 days for a few weeks.
Pet safety
The ASPCA lists English ivy as toxic to cats and dogs. Eating the leaves can cause vomiting, drooling, abdominal pain, and diarrhea.
A tall trellis can lift vines out of reach, but trailing ends still tempt pets. If a pet has chewed on it, see my dog ate English ivy: symptoms and what to do now, and contact your veterinarian.
Your Next Steps
- Choose a sturdy trellis about 1.5 to 3 times the height of your pot, ideally with a textured surface.
- Insert it now, before roots fill the pot, and firm the soil around the legs.
- Weave or loosely tie your longest vines onto the frame, spreading them evenly.
- Move the plant to bright, indirect light, away from radiators, heat vents, and drafts.
- Set a reminder to tuck new growth and rotate the pot every 1 to 2 weeks.
- Pinch the tips monthly in spring and summer, and replant rooted cuttings at the base.
Common Questions About Growing English Ivy on a Trellis
Will English ivy climb a trellis on its own?
Sometimes, but rarely well indoors. Its aerial rootlets need a rough surface and decent humidity to attach, so most indoor ivy needs weaving or loose ties to stay on a trellis.
How long does it take ivy to cover a trellis?
It depends on light, pot size, and how many vines you start with. In bright, indirect light, a small trellis can fill in noticeably within one growing season, while larger frames may take a year or more.
Can I use a metal trellis for English ivy?
Yes, but expect to tie vines more often, because rootlets grip smooth metal poorly. Wrapping parts of the frame in jute twine or coir gives the plant something better to hold.
Should I remove the old ties once the ivy is established?
Check them every month or two and loosen any that are digging into the stem. Once a vine is firmly woven through the trellis or attached by rootlets, you can remove the tie entirely.
Is a moss pole better than a trellis for ivy?
A moss pole works well if you want tall, columnar growth, since rootlets attach easily to damp moss. A trellis is better for wide, flat, or decorative shapes like fans and hoops.

Hi! I’m Sophia, and I love plants – especially an expert in growing house plants. I stay in Chicago, United States of America, and through my blog and social media platforms, provide tips and tricks on how to grow healthy, vibrant plants indoors. Check out more here.