
You have a bag of lumpy brown elephant ear bulbs on your kitchen counter, a stack of empty pots by the window, and snow still melting on the sill.
Learning how to plant elephant ear bulbs indoors lets you get a head start on those huge leaves weeks before the weather warms up.
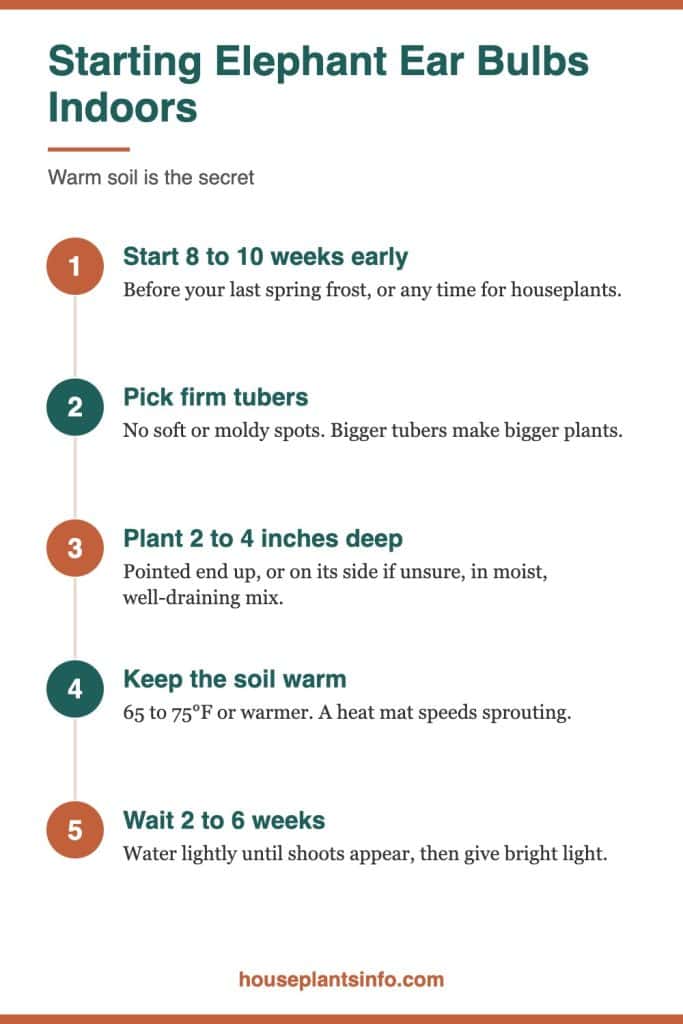
The short version: Plant each tuber growing end up, 2 to 4 inches deep, in a draining pot of moist, rich potting mix. Keep the soil warm, around 65 to 75°F, and lightly moist until shoots appear.
Then give the new plant bright indirect light and more water.
This guide covers timing, bulb selection, supplies, planting steps, sprouting conditions, indoor care, and moving plants outside.
At a Glance
| Factor | What it needs |
|---|---|
| Light | Bright indirect light or a grow light once leaves open |
| Water | Lightly moist before sprouting, more generous after leaves unfurl |
| Humidity | Higher than typical indoor air, especially in winter |
| Temperature | Soil about 65 to 75°F or warmer; no cold drafts |
| Soil | Moist, rich, well-draining potting mix in a pot with drainage holes |
| Pet safety | Toxic to cats and dogs (ASPCA); sap irritates skin |
| Difficulty | Easy to moderate; warmth and drainage are the main challenges |
When Should You Start Elephant Ear Bulbs Indoors?
Start them about 8 to 10 weeks before your last spring frost if they will go outside later. If you plan to keep them as houseplants, you can plant them any time of year.
Timing for Outdoor Plants
Count backward from your area’s average last frost date. In a cold-winter city like Chicago, that usually means planting in late winter or early spring, so the plants are leafy and sturdy by the time nights warm up.
A seedling heat mat with a thermostat is the most useful tool for this early start. A simple soil thermometer is the second, because it tells you whether the mix is actually warm enough instead of guessing.
Timing for Houseplants
If the plant will stay indoors permanently, the calendar matters less than your room temperature. A warm apartment with steady heat can sprout tubers in any season.
Spring and early summer are still the easiest windows. Longer days and warmer windowsills support fast growth, and you avoid fighting dry winter air while the first leaves form.
Why Not Start Earlier?
Starting too early can leave you with a large, leggy plant crowding your windows for months. Big elephant ears can outgrow small pots quickly, and a cramped plant is harder to harden off and move outside.
Choosing Healthy Bulbs
Choose firm tubers with no soft spots, mold, or sour smell. Bigger tubers generally produce bigger plants, so size is worth paying attention to.

What Elephant Ear Bulbs Really Are
The “bulbs” sold as elephant ears are not true bulbs. Colocasia grows from tubers, while Alocasia grows from rhizomes or tubers, depending on the type.
This matters for planting because tubers and rhizomes rot easily in cold, wet soil. Treat them as living storage organs that need warmth and air around them, not as dormant objects that can sit in soggy mix.
Signs of a Good Tuber
Press gently with your thumb. A healthy tuber feels solid, like a firm potato, and the skin may be dry, papery, or slightly fuzzy with rings.
Look for one or more small buds or a pointed tip at one end. Dried roots or root scars on the opposite end are normal and help you tell top from bottom.
Signs to Avoid
Skip tubers that feel spongy, look shriveled to the point of hollowness, or have fuzzy white, gray, or blue mold. A musty or rotten odor usually means decay has started inside.
A small surface blemish can sometimes be trimmed away with a clean knife. Let the cut dry for a day or two before planting so it seals over.
Colocasia or Alocasia?
Colocasia tends to want more water and often handles outdoor summers well. Alocasia types are usually better suited to life as houseplants, with more upright leaves and a lower tolerance for soggy soil.
Check the label before planting. Knowing which group you have helps you set expectations for watering and where the plant will live long term.
What You Need to Get Started
You need a pot with drainage holes, rich well-draining potting mix, and a warm spot. A heat mat, thermometer, and gloves make the process easier and safer.

The Basic Supply List
- A pot at least 6 to 8 inches wide, with drainage holes
- Moist, rich, well-draining potting mix
- A saucer or tray to catch excess water
- Gardening gloves
- A clean knife or pruners for trimming damaged spots
- A plant label with the type and planting date
Helpful Extras
- A seedling heat mat, ideally with a thermostat
- A soil thermometer
- A clear plastic dome or loose bag to hold humidity
- A full-spectrum grow light for dim apartments
Picking the Right Pot
Start with a pot at least 6 to 8 inches wide for a single tuber. Larger tubers may need a bigger pot from the beginning, and fast growers will need a larger container later.
Plastic pots hold moisture longer, which helps in dry, heated rooms. Terracotta dries faster, which can be useful if you tend to overwater, especially with Alocasia.
Choosing a Potting Mix
Use a quality indoor potting mix that holds moisture but drains freely. Adding a handful of perlite or bark to a standard mix improves airflow around the tuber.
Avoid heavy garden soil. It compacts in containers, stays wet too long, and raises the risk of rot before the tuber ever sprouts.
Sophia’s tip: Moisten your potting mix in a bucket before planting until it feels like a wrung-out sponge. Dry mix repels water at first, and pre-wetting means you will not need to drench the pot after planting.
How to Plant Elephant Ear Bulbs Indoors Step by Step
Set each tuber growing end up, about 2 to 4 inches deep, with 1 to 2 inches of moist mix over the top. Then place the pot somewhere warm and wait.
Step 1: Put On Gloves
Elephant ear sap can irritate skin, so wear gloves while handling tubers and trimming any damage. Wash your hands afterward, and keep tubers away from curious pets and kids while you work.
Step 2: Fill the Pot Partway
Add pre-moistened mix to the pot, leaving enough space to set the tuber 2 to 4 inches below the rim of the soil line. Firm the mix lightly so the tuber sits on a stable base.
Step 3: Find the Growing End
Look for the pointed tip, buds, or rings that circle upward. That end faces up. The flatter or rootier end goes down.
If you truly cannot tell, plant the tuber on its side. The shoot will curve upward and the roots will grow downward on their own.
Step 4: Set and Cover the Tuber
Place the tuber in the pot and fill around it with more moist mix. Cover the top with 1 to 2 inches of soil, then press gently to remove large air pockets.
Do not pack the mix tightly. The tuber needs air as well as moisture, and dense soil holds water too long.
Step 5: Water Lightly
If your mix was pre-moistened, a small splash to settle the soil is usually enough. Let any excess drain completely, and empty the saucer so the pot never sits in water.
Step 6: Label and Place Somewhere Warm
Mark the pot with the type and date. Then move it to the warmest stable spot you have, or onto a heat mat set to the right range.
| Planting detail | Target |
|---|---|
| Pot width | At least 6 to 8 inches to start |
| Planting depth | About 2 to 4 inches |
| Soil over tuber | 1 to 2 inches |
| Orientation | Pointed or growing end up; on its side if unsure |
| Soil temperature | About 65 to 75°F or warmer |
Warmth, Water and Light for Sprouting
Warmth matters most at this stage. Keep the soil around 65 to 75°F or warmer, keep it lightly moist, and do not worry much about light until shoots appear.
Keeping the Soil Warm
Cold, wet soil is the most common reason tubers rot instead of sprouting. A seedling heat mat under the pot speeds sprouting noticeably, especially in a drafty apartment.
The top of a refrigerator, a shelf near but not touching a radiator, or a warm interior room can also work. Check the soil temperature with a thermometer rather than trusting the air temperature.
Avoid windowsills in winter. Glass can make the soil several degrees colder at night, even when the room feels comfortable.
Watering Before Shoots Appear
Keep the mix lightly moist, never soggy. A tuber without leaves uses very little water, so the soil dries slowly.
Check by pushing a finger an inch into the mix. Water only when it feels close to dry at that depth, and give just enough to dampen it again.
For more detail on timing and amounts, see this guide on how often to water elephant ear bulbs.
Do Tubers Need Light to Sprout?
Tubers do not need light while buried. Once a shoot breaks the surface, though, move the pot to bright indirect light or under a grow light right away.
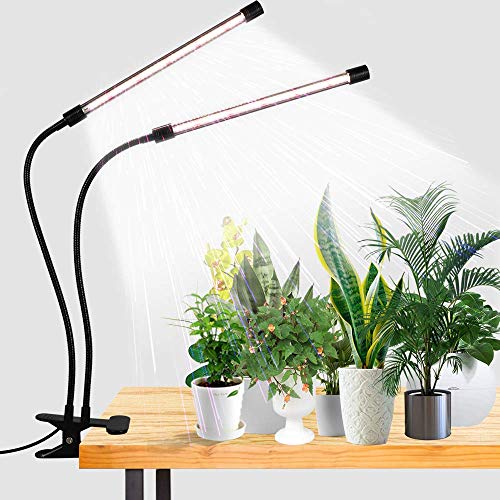
A shoot left in a dark spot stretches quickly and grows pale. Catching it within a day or two keeps the first leaves compact and green.
Managing Humidity
A loose clear dome or plastic bag over the pot can hold in moisture during sprouting. Open it daily for a few minutes so air circulates and mold does not form.
Remove the cover once leaves start to unfurl. At that point, steady airflow matters more than trapped humidity.
Sophia’s tip: Set your heat mat’s thermostat probe directly in the potting mix, not on the mat surface. That way the mat responds to the actual soil temperature, and the tuber stays in the 70 to 75°F range without overheating.
How Long Until They Sprout?
Most elephant ear tubers sprout in 2 to 6 weeks. Some take up to 8 weeks, especially in cooler rooms or with tubers that were stored a long time.
What Affects Sprouting Speed
Soil temperature is the biggest factor. Warm mix on a heat mat often sprouts in the shorter part of that range, while a cool room can stretch it out.
Tuber size and health matter too. Larger, firm tubers usually have more stored energy and push up shoots more confidently than small or dehydrated ones.
How to Check Without Damaging Anything
If several weeks pass with no shoot, gently brush away the top inch of soil. You may find a pale bud forming or white roots near the base.
If the tuber feels firm, cover it again and keep waiting with warm, lightly moist soil. If it feels mushy or smells bad, it has rotted and should be discarded.
When nothing happens after 8 weeks, read through the common reasons for why elephant ear bulbs are not growing to troubleshoot temperature, moisture, and tuber condition.
What the First Growth Looks Like
The first shoot often emerges as a tightly rolled spike. It unrolls into a leaf over several days, and each new leaf usually comes in larger than the one before.
Growing Elephant Ears as Indoor Plants
Once leaves open, give your plant bright indirect light or a grow light, higher humidity, more water, and regular feeding during the growing season. Warm, stable conditions keep growth steady.
Light Indoors
A spot near an east window, or a few feet back from a south or west window, usually provides good bright indirect light. Harsh afternoon sun through glass can scorch the large, thin leaves.
North windows are often too dim for strong growth. In that case, a full-spectrum grow light placed above the plant helps keep leaves sturdy. You can learn more about how much sunlight an elephant ear needs for each window direction.
Watering Actively Growing Plants
After leaves unfurl, increase watering. Colocasia generally likes consistently moist soil, while Alocasia prefers the top inch to dry slightly between waterings.
Water thoroughly until it drains from the bottom, then empty the saucer. Large leaves lose water quickly in warm rooms, so check the soil more often in summer.
Humidity and Temperature
Elephant ears prefer humidity higher than most heated apartments provide in winter. A humidifier nearby or grouping plants together can help keep leaf edges from browning.
Keep plants away from radiators, forced-air vents, and AC drafts. Sudden blasts of hot or cold air dry out leaves and stress the plant.
Feeding
Feed every 2 to 4 weeks during spring and summer with a balanced liquid houseplant fertilizer diluted as directed. Stop or slow feeding in fall and winter when growth slows.
Repotting
Move the plant to a larger pot when roots circle the bottom or poke out of drainage holes. Go up one or two sizes at a time so the soil does not stay wet too long.
Sophia’s tip: Rotate the pot a quarter turn each time you water. Elephant ear leaves lean hard toward the window, and regular turning keeps the plant balanced instead of tipping toward the glass.
Pet Safety
The ASPCA lists elephant ears as toxic to cats and dogs. Chewing the leaves can cause mouth irritation, drooling, and vomiting, so place plants out of reach and review the signs of elephant ear poisoning.
Moving Them Outside or Keeping Them In
Move elephant ears outdoors only after nights stay above about 50 to 60°F, and harden them off over about a week. Alocasia types are often happier staying indoors as houseplants.
Hardening Off Over a Week
Start with an hour or two outside in a shaded, sheltered spot. Each day, increase the time and gradually add morning sun.
By the end of the week, the plant can stay out overnight if temperatures cooperate. Skipping this step can cause sunburned, torn, or drooping leaves.
| Day | Outdoor exposure |
|---|---|
| 1 to 2 | 1 to 2 hours in full shade |
| 3 to 4 | 3 to 4 hours, light morning sun |
| 5 to 6 | Most of the day, partial sun |
| 7 | Full day and night if lows stay above about 50 to 60°F |
Choosing a Spot Outdoors
Pick a location with some afternoon shade and protection from strong wind. Big leaves act like sails and can tear in exposed spots.
Outdoor plants dry out faster than indoor ones. Check containers daily during hot weather.
Keeping Them Indoors All Year
If you prefer to keep the plant inside, choose a bright spot with room for wide leaves. Alocasia in particular tends to adapt well to steady indoor conditions.
Planning for Fall
In cold climates, bring outdoor plants in or dig the tubers before frost. Learn the basics of storing elephant ear bulbs so they stay firm and ready for next spring.
Many gardeners wonder do elephant ears come back every year, and the answer depends on your climate and how the tubers are kept through winter.
Your Next Steps
- Find your last spring frost date and count back 8 to 10 weeks.
- Inspect your tubers and set aside any that are soft or moldy.
- Gather a pot with drainage holes, rich potting mix, gloves, and a heat mat.
- Plant each tuber growing end up, 2 to 4 inches deep, and keep the soil warm.
- Move sprouted plants to bright indirect light or under a grow light.
- Place pots well out of reach of cats, dogs, and young kids.
Common Questions About Planting Elephant Ear Bulbs Indoors
Should I soak elephant ear bulbs before planting?
Soaking is not necessary, and long soaks can raise the risk of rot. If a tuber looks slightly dry, planting it in pre-moistened mix is usually enough to rehydrate it gently.
Which end of an elephant ear bulb goes up?
The pointed end, or the end with buds and rings, goes up. If you cannot tell, plant the tuber on its side and it will orient itself as it grows.
Can I plant several tubers in one pot?
You can, but each plant needs space, so use a much larger pot. A single tuber per 6 to 8 inch pot is simpler to manage and makes it easier to spot rot.
Why is my elephant ear tuber rotting?
Rot usually comes from cold, wet soil or a pot without drainage. Keep the soil around 65 to 75°F or warmer and water lightly until shoots appear.
Can elephant ears grow under a grow light only?
Yes, a full-spectrum grow light can support healthy growth in a dim apartment. Keep it on a regular daily schedule and position it close enough that the leaves do not stretch.

Hi! I’m Sophia, and I love plants – especially an expert in growing house plants. I stay in Chicago, United States of America, and through my blog and social media platforms, provide tips and tricks on how to grow healthy, vibrant plants indoors. Check out more here.