
Your sago palm sits by the window with stiff, glossy fronds arching over a pot that suddenly looks too small, and you are wondering how to transplant a sago palm without setting it back for a year.
The plant grows slowly, so every mistake shows for a long time.
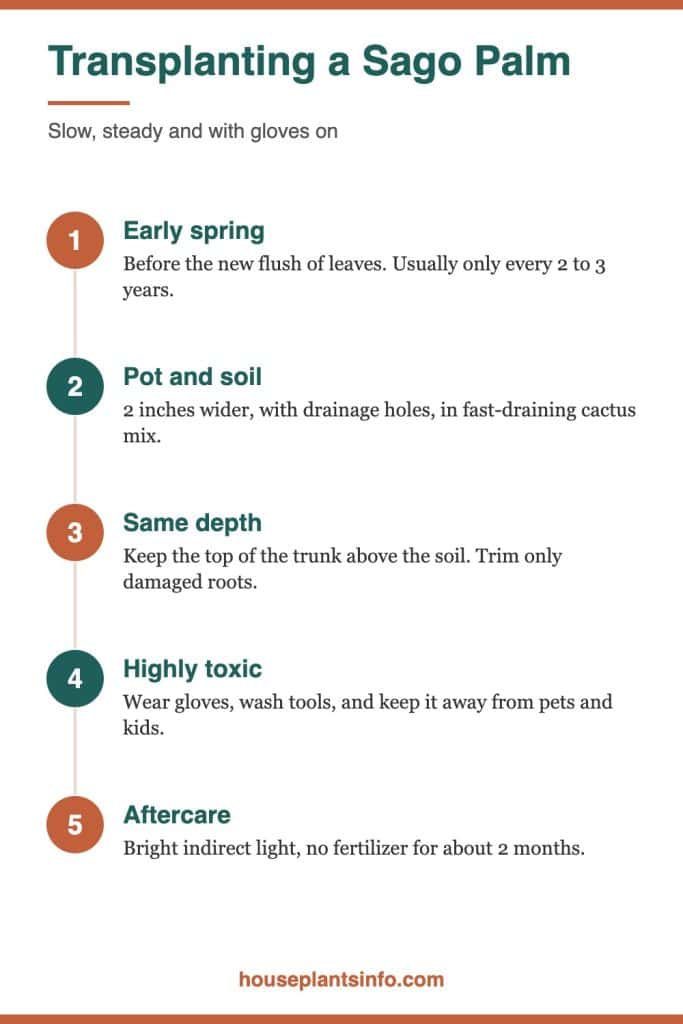
The short version: Repot in early spring, before new leaves push, into a sturdy pot about 2 inches wider than the root ball with drainage holes and a fast-draining mix.
Keep the trunk at the same depth, water once thoroughly, then let the top couple of inches dry before watering again.
This guide covers timing, warning signs, pot and soil choices, each step of the move, safety around this toxic plant, aftercare, and moving it outside for summer.
At a Glance
| Factor | What it needs |
|---|---|
| Light | Bright indirect light; a few feet from a south or west window, or right at an east window |
| Water | Water thoroughly, then wait until the top 2 inches are dry |
| Temperature | 65°F to 80°F indoors; keep away from radiators and cold drafts |
| Soil | Fast-draining cactus mix or potting mix with plenty of perlite, pumice or fine bark |
| Pet safety | Highly toxic to dogs, cats and people (ASPCA lists it as toxic) |
| Difficulty | Easy to moderate; the spines and the toxicity are the main challenges |
When Should You Transplant a Sago Palm?
Transplant a sago palm in early spring, just before the new flush of leaves pushes out of the center. Most potted sagos only need this every 2 to 3 years, or sooner if the roots are circling or cracking the pot.
Why Early Spring Works Best
Sago palm (Cycas revoluta) is a cycad, not a true palm. It grows very slowly, often putting out just one flush of new leaves a year. That flush draws heavily on the roots, so you want the roots settled before it starts.
In a Chicago apartment, early spring usually means March or April, when daylight is lengthening but the heat is still running. Repotting at that point gives the roots several weeks to recover before the plant commits energy to new fronds.
If you repot while new leaves are already emerging, the soft fronds can bend, scar or grow in distorted. They stay that way for years because the plant will not replace them quickly.
Times to Avoid
Avoid repotting in late fall and winter. Indoor light is weak, the plant is barely growing, and dry air from forced-air heat adds stress while damaged roots try to recover.
Also avoid repotting right after you bring the plant home from a store. Let it adjust to your light and temperature for a few weeks first, unless the pot is cracked or the soil is clearly waterlogged.
Getting Your Space Ready
Before you start, check how your current setup is working. A soil moisture meter helps you see how long the existing pot stays wet, which tells you whether the soil is draining well or holding too much water.
If your brightest window faces north or sits behind a building, consider placing a grow light about 12 to 18 inches above the plant for 10 to 12 hours a day. Steady light after repotting helps the roots recover faster.
Sophia’s tip: Mark your calendar for late February. Check the center of the plant weekly; when you see a tight, fuzzy cone of new growth just starting to swell, repot within the next week or two.
Signs It Has Outgrown Its Pot
A sago palm has outgrown its pot when roots circle the bottom, poke out of the drainage holes, or push hard enough to crack or bulge the container. Water running straight through without soaking in is another common sign.
Roots You Can See
Tip the pot slightly and look at the drainage holes. Thick, pale roots pushing out of the holes mean the root ball has filled the space.
You may also see roots rising to the soil surface around the trunk. A few are normal, but a dense mat on top suggests the plant is running out of room below.
Changes in the Pot Itself
Sago palm roots are strong. Plastic nursery pots can bulge, split or warp into an oval shape as the roots expand.
Thin terracotta can crack outright. If you see a hairline crack running up from the base, plan to repot soon, since the pot may break when you move it.

Watering Clues
When the root ball is packed, water often runs down the inside wall of the pot and out the bottom in seconds. The soil stays dry in the middle even though you just watered.
The opposite can also happen. Old, broken-down mix compacts and stays wet for too long, which can lead to yellowing and root rot.
What Is Not a Reason to Repot
Remember that sagos prefer to be slightly root-bound. A few roots near the drainage holes, with healthy fronds and normal drying times, is not an emergency.
Yellow fronds alone are also not a sign to repot. If you are seeing a sago palm turning yellow, check watering, light and the age of the fronds before disturbing the roots.
| Sign | What it likely means | Action |
|---|---|---|
| Roots out of drainage holes | Root ball has filled the pot | Repot next spring |
| Cracked or bulging pot | Roots pushing on the walls | Repot soon |
| Water runs straight through | Packed roots or hydrophobic soil | Repot in spring |
| Soil stays wet for over a week | Old, compacted mix | Repot into fresh, gritty mix |
| A few visible roots, plant healthy | Normal snug fit | Leave it alone |
Choosing the Pot and Soil
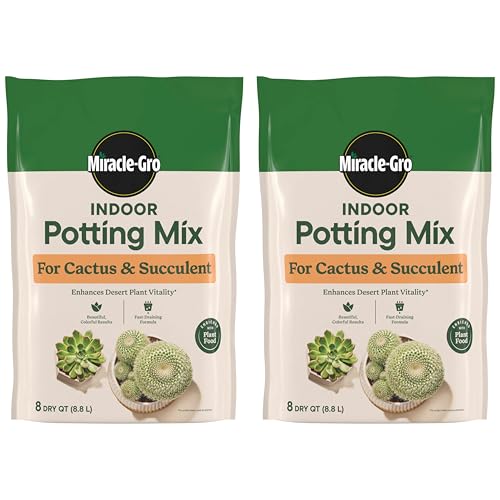
Choose a sturdy pot only about 2 inches wider than the current root ball, with drainage holes. Fill it with a fast-draining mix such as cactus mix or regular potting mix with plenty of perlite, pumice or fine bark.
Pot Size and Material
Going up just 2 inches in width keeps the soil volume close to what the roots can use. A much larger pot holds extra wet soil around the roots, and that is the most common path to rot.
Sago palms can become top-heavy as the fronds spread. A heavy material like terracotta, ceramic or concrete helps keep the plant from tipping when a pet brushes past.
Terracotta also breathes, so the mix dries faster. That suits a sago in a humid room or a spot with weaker light. In a sunny window near a radiator, glazed ceramic may help the soil stay evenly moist a bit longer.
Drainage Holes Are Not Optional
The pot must have at least one drainage hole. A decorative pot without holes can be used as an outer cover, but the sago itself should sit in a draining pot inside it.
Skip the layer of gravel at the bottom. It does not improve drainage and actually raises the wet zone higher into the root area.
Building the Right Mix
Sagos want soil that drains in seconds and dries fairly quickly. A bagged cactus mix works well on its own for many indoor setups.
If you use regular potting mix, combine roughly 2 parts potting mix with 1 part perlite, pumice or fine bark. The goal is a loose, gritty texture that does not pack down when squeezed.
| Mix option | Best for | Notes |
|---|---|---|
| Cactus mix alone | Most indoor sagos | Simple and fast-draining |
| 2 parts potting mix, 1 part perlite | Bright, warm rooms | Holds slightly more moisture |
| Potting mix, pumice and fine bark | Cooler or lower-light rooms | Very airy; dries quickly |
Pre-Moisten the Mix
Dry mix can repel water at first. Lightly dampen the new mix before you pot so it settles evenly around the roots.
It should feel like a wrung-out sponge, never soggy. If water drips when you squeeze a handful, let it sit open for an hour.
How to Transplant a Sago Palm Step by Step
To transplant a sago palm, protect your skin, lay the pot on its side, ease the plant out, trim only damaged roots, and replant it at the same depth in fresh mix. Water once thoroughly, then let it dry down.
Step 1: Protect Yourself and Your Space
Put on sturdy gloves and long sleeves. The leaflets are stiff and sharp at the tips, and they can scratch or puncture skin.

Spread a tarp, old sheet or newspaper on the floor. Keep pets and children in another room until cleanup is finished, since soil and fallen bits of the plant are toxic.
Step 2: Water a Day Ahead
Water the sago lightly the day before. Slightly moist soil holds the root ball together and helps it slide out of the pot.
Do not repot a bone-dry plant. Dry roots are brittle and break more easily during handling.
Step 3: Lay the Pot on Its Side
Gently tip the pot onto its side on your tarp. Supporting the trunk with one gloved hand, tap or squeeze the sides of the pot to loosen the root ball.
If it sticks, run a dull knife around the inside edge. For a cracked plastic pot, cutting the pot away is often easier than pulling the plant.
Step 4: Ease the Plant Out
Slide the root ball out slowly by holding the trunk at its base, never by pulling on the fronds. The fronds can tear away from the trunk, and the plant takes a long time to replace them.
Set the root ball on the tarp and take a close look at the roots.
Step 5: Inspect and Trim Only What Is Damaged
Healthy sago roots are firm and light-colored. Leave them alone, including any that circle the bottom.
Trim only roots that are black, mushy, hollow or broken, using clean, sharp pruners. Gently loosen the outer roots with your fingers if they are tightly wound, but do not tease apart the whole root ball.
If you find widespread rot and a soft trunk base, the plant needs more than a repot. A guide on saving a dying sago palm covers how to handle severe rot.
Step 6: Set the Trunk at the Same Depth
Add enough fresh mix to the bottom of the new pot so the top of the root ball sits about 1 inch below the rim. Center the plant.
Keep the trunk, called the caudex, at the same depth it was growing before. The top of the trunk must stay above the soil line, since burying it invites rot.
Step 7: Fill and Firm the Mix
Fill around the sides with your pre-moistened mix. Press it down gently with your fingers to remove large air pockets.
Do not pack it hard. The mix should be firm enough to hold the plant upright but loose enough for water and air to move through.
Step 8: Water Thoroughly Once
Water slowly until it runs freely from the drainage holes. This settles the mix around the roots.
Let the pot drain fully and empty any saucer. Then wait until the top couple of inches of mix are dry before watering again.
Sophia’s tip: If the plant wobbles after watering, wedge a few small stones against the trunk base on top of the soil for two or three weeks. They steady the plant while new roots anchor it, and you can remove them later.
Safety: Sago Palms Are Highly Toxic
Sago palm is highly toxic to dogs, cats and people, and the ASPCA lists it as toxic to both dogs and cats. All parts of the plant contain cycasin, with the seeds being the most dangerous.
What Cycasin Does
Cycasin can cause vomiting, diarrhea and liver failure. Ingestion can be fatal, even in small amounts, especially for pets.
Signs in pets may appear within hours and can include vomiting, drooling, weakness and lethargy. Liver damage may develop over the following days.
If you think a pet has chewed any part of a sago palm, contact your veterinarian or an emergency animal clinic right away. Do not wait for symptoms to appear.
Protecting Pets and Kids During Repotting
Repotting scatters soil, root bits and sometimes leaflet fragments. Clean up carefully and check the floor for small pieces once you finish.
Cats often investigate fresh soil, so keep them out of the room until the area is clean. If you have a cat, read more on is sago palm toxic to cats for symptoms to watch for.
Dogs may chew fallen fronds or dig in the pot. The article on sago palm leaves poisonous to dogs explains the risk in more detail.
Cleanup Habits
Wash your hands with soap and water after handling the plant, even if you wore gloves. Wash gloves, pruners and any trowel used.
Bag and dispose of trimmed roots and old soil rather than leaving them in an open bin. Keep the repotted plant on a stand or in a room that pets and young children cannot reach.
Aftercare and Transplant Shock
After repotting, place the sago in bright indirect light, skip fertilizer for about 2 months, and expect some yellowing on older fronds. Do not cut fronds that are still green.
Light and Placement
Return the plant to bright indirect light. A spot a few feet back from a south or west window, or right beside an east window, works well indoors.
Avoid harsh direct afternoon sun right after repotting, especially through glass, which can scorch stressed fronds. Keep the plant several feet from radiators, heating vents and AC drafts.
Watering After the First Soak
The most common aftercare mistake is watering too often. Fresh mix and a slightly larger pot hold more water than you may expect.
Check the top couple of inches with your finger or a moisture meter. Water only when that layer is dry. For a fuller schedule through the seasons, see how often to water sago palms.
Humidity and Temperature
Sago palms tolerate average indoor humidity well. Winter heat can drop humidity very low, though, which may brown leaflet tips.
Grouping plants together or running a humidifier in the room can help. Keep indoor temperatures between about 65°F and 80°F, and keep fronds from touching cold window glass.
What Transplant Shock Looks Like
Mild shock is normal. You may see one or two of the oldest, lowest fronds turn yellow over the following weeks.
The plant may also skip or delay its next flush of leaves. That is the root system recovering, not a sign of failure.
Watch for warning signs instead: a soft or mushy trunk base, a foul smell from the soil, or yellowing that spreads to newer fronds. Those point to rot, usually from too much water.
Fertilizer and Frond Care
Wait about 2 months before feeding. Fresh mix and healing roots do not need fertilizer, and feeding too early can burn tender root tips.
Leave green fronds on the plant, even if they look a little pale. Sagos pull nutrients from older fronds, and cutting green ones weakens the plant.
Sophia’s tip: Trim a frond only once it is fully brown and dry, cutting close to the trunk with clean pruners. Partly yellow fronds are still feeding the plant, so leave them in place.
Moving a Potted Sago Palm Outdoors
You can move a potted sago palm outdoors for the warm months, but plan to keep it outside year-round only in zones 8 to 11. Wait until nights stay above 50°F, then introduce it to sun gradually.
Timing the Move
In Chicago and other cold climates, a sago can spend summer on a balcony or patio and come back inside before fall chills arrive. Check nighttime lows, not just daytime highs.
Avoid moving the plant outside right after repotting. Give it at least a few weeks indoors so the roots settle before it faces wind and stronger light.
Acclimating to Sun
Indoor fronds are not used to direct sun. Moving the plant straight into full sun can scorch the leaflets, leaving bleached or brown patches that never recover.
Start in bright shade for about a week. Then increase direct morning sun gradually over two to three weeks before offering any stronger afternoon light.
Bringing It Back Inside
Bring the pot indoors before nights drop below 50°F. Check the fronds and the pot for insects before it comes back near other plants.
Expect a short adjustment period indoors, since the light drops sharply. For more on climate limits and seasonal moves, read can an indoor sago palm live outside.
| Stage | Conditions | Duration |
|---|---|---|
| Bright shade | Outdoors, no direct sun | About 1 week |
| Morning sun | 1 to 3 hours of direct early sun | 1 to 2 weeks |
| Full placement | Morning sun with afternoon shade, or more as tolerated | Rest of summer |
| Return indoors | Before nights fall below 50°F | Early fall |
Your Next Steps
- Check the pot and drainage holes now for circling roots, cracks or bulging walls.
- Set a reminder for late winter to watch for the new growth cone in the center.
- Buy or mix a fast-draining blend and choose a sturdy pot about 2 inches wider than the root ball.
- Pick a repotting spot away from pets and kids, and have gloves, long sleeves and a tarp ready.
- After repotting, hold off on fertilizer for about 2 months and water only when the top couple of inches are dry.
Common Questions About Transplanting a Sago Palm
How often should you repot a sago palm?
Most potted sago palms need repotting every 2 to 3 years. Because they grow slowly and prefer to be slightly root-bound, repot sooner only if roots circle heavily or crack the pot.
Can I repot a sago palm in summer?
You can if the pot is cracked or the soil is rotting, but early spring is better. Summer repotting often disturbs a new flush of leaves, which can distort fronds that last for years.
Should I cut yellow fronds after repotting?
Wait until a frond is fully brown and dry before cutting it. Green and partly yellow fronds still supply nutrients to the plant, so removing them early weakens it during recovery.
Is it safe to repot a sago palm with pets in the house?
Yes, if you keep pets out of the room and clean up thoroughly afterward. All parts of the plant contain cycasin, so check the floor for soil, roots and leaflet pieces before letting pets back in.
Why is my sago palm not growing after transplanting?
Sago palms often pause new growth while the roots recover, sometimes skipping a flush for a season. As long as the trunk stays firm and older fronds stay mostly green, give it bright indirect light and patience.

Hi! I’m Sophia, and I love plants – especially an expert in growing house plants. I stay in Chicago, United States of America, and through my blog and social media platforms, provide tips and tricks on how to grow healthy, vibrant plants indoors. Check out more here.