
You are standing at the window, looking out at a prickly pear or barrel cactus that has crept across the side yard and now blocks a walkway.
The short version: To remove cactus from yard beds for good, cut it down in sections with long-handled tools, dig out the main root crown, and collect every pad or fallen segment so nothing re-roots.
Herbicides help with large stands, and careful disposal keeps the cactus from coming back somewhere else.
This guide covers gear, hand removal, large specimens, herbicides, regrowth, disposal, and saving a cutting to grow indoors.
At a Glance
| Factor | What it needs |
|---|---|
| Best timing | Cool, dry weather in spring or fall, when soil is workable |
| Protective gear | Heavy gloves, long sleeves, eye protection, closed shoes |
| Key tools | Long tongs, a flat spade, loppers or a pruning saw, a tarp |
| Root depth | Usually shallow, often 4 to 12 inches for most yard cacti |
| Regrowth risk | High for pad-forming cacti like prickly pear |
| Pet safety | Spines and glochids injure pets; keep them inside during work |
| Difficulty | Moderate for small plants, hard for large or tall stands |
What Do You Need Before You Start Removing a Cactus?
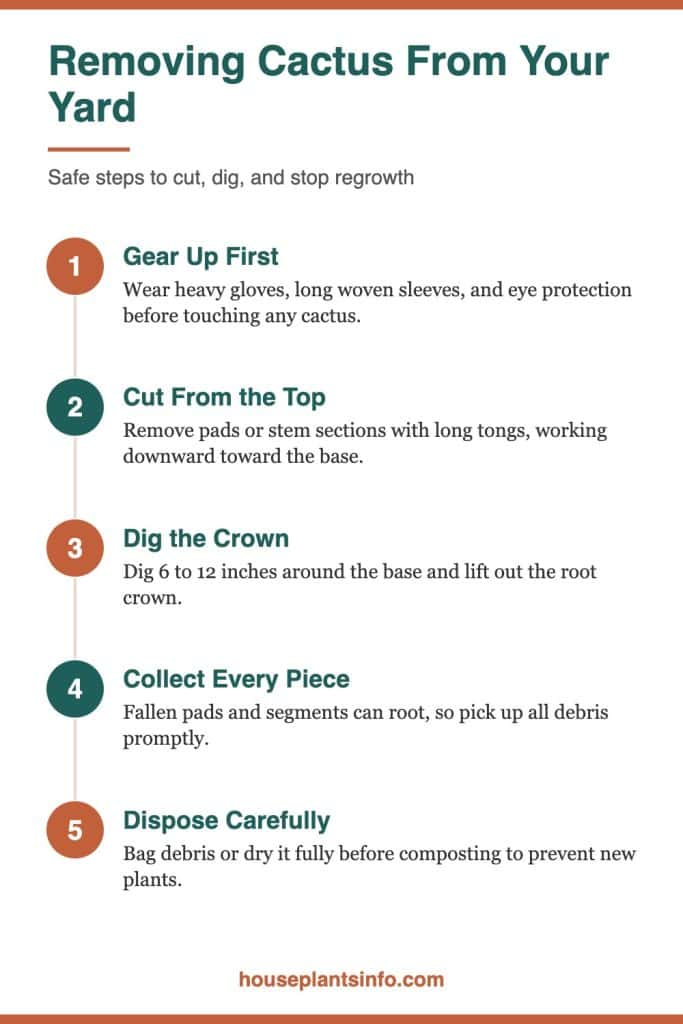
You need puncture-resistant gloves, eye protection, long tools that keep your hands away from spines, and a tarp or heavy bags for the debris. Preparing these first prevents most injuries and stops pieces from scattering across the yard.
Gear That Protects Your Skin
Leather or puncture-resistant gloves are the minimum. For prickly pear, wear a second pair of thin nitrile gloves underneath, because the tiny barbed bristles called glochids work through seams and stick to fabric.
Long sleeves made of tightly woven canvas or denim help more than fleece or knits, which trap glochids. Add safety glasses, since cut pads can flick spines when they fall.
Tools That Do the Handling for You
A pair of long kitchen or fireplace tongs lets you lift pads and segments without touching them. A flat spade works better than a pointed shovel for slicing under shallow roots.
For woody trunks or thick stems, use loppers or a pruning saw. Lay a tarp next to the plant before you cut so every piece lands in one place.
Sophia’s tip: Keep a lint roller and a roll of wide packing tape by the back door. Rolling your sleeves and pant legs before you walk inside keeps glochids off carpets, couches, and the floor where pets lie.
Check the Rules First
Some native cacti are protected by state law in parts of the Southwest, and removing them may require a permit. If the plant is large and native to your region, check local regulations before you cut anything.
Also call your local utility-marking service before digging deep. Cactus roots are shallow, but a large root crown can sit near irrigation lines or buried cables.
How to Remove Cactus From Yard Beds by Hand
The most reliable method for small and medium cacti is to cut the plant down from the top, then dig out the root crown and the main roots.
Working top-down keeps the plant from falling on you and makes each piece light enough to handle with tongs.
Step 1: Water the Soil the Day Before
Dry, compacted soil grips roots tightly. Watering the area 12 to 24 hours ahead softens the ground so the spade slides in and roots pull free with less tearing.
Avoid working in mud, though. Wet soil sticks to roots and makes the debris heavier to bag.
Step 2: Cut It Down in Sections
For prickly pear, grip each pad with tongs and slice it off at the joint with a long knife or loppers. Drop each pad directly onto the tarp, starting from the outer and upper pads and working inward.
For columnar or branching cacti, remove arms first, then shorten the main stem in 12 to 18 inch pieces. Short sections are easier to control and less likely to roll.
Step 3: Dig Out the Root Crown
Once only a stump remains, dig a circle about 6 to 12 inches out from the base. Most yard cacti have a fibrous, spreading root system rather than a deep taproot, so lever the spade under the crown and lift.
Pull out any thick lateral roots you can follow. Small hair roots left behind rarely regrow, but the crown and thick roots can.
Step 4: Sweep the Area
Rake the bed slowly and pick up every pad, stem chunk, and fruit with tongs. Even a fragment the size of a coin can root on many pad-forming species.
Finish by checking the tarp edges and your shoes before leaving the area.
Large or Tall Cactus? How to Take It Down Safely
Big cacti need to come down in controlled sections, and very large ones are often a job for two people or a professional crew. A full-size columnar cactus holds a lot of water and can weigh several hundred pounds.
Plan the Fall Zone
Before cutting anything, decide where pieces will land. Clear a space wider than the cactus is tall, and keep kids, pets, and anyone not helping well outside it.
Never stand downhill from a tall stem you are cutting. Sections can slide or roll once they hit the ground.
Support the Stem While You Cut
Wrap a section in an old carpet piece, a folded blanket, or several layers of cardboard tied with rope. This gives you something to hold and keeps spines off your arms.
Cut with a pruning saw just below the wrap, lower the section with a helper, and repeat. Never cut at the base first on a tall plant.
When to Call a Pro
Hire help if the cactus is taller than you can reach with both feet on the ground, leans toward a structure, or sits near power lines. Removal crews have the rigging to lower heavy sections without damage.
Also get help if the plant is a protected native species, since a permitted removal may be required.
Do Herbicides Work on Cactus?
Herbicides can kill cactus, especially large stands of prickly pear, but they act slowly and must be labeled for cactus or prickly pear. Many common weed killers work poorly on cacti because the waxy skin resists absorption.
Which Active Ingredients Are Used
Products labeled for prickly pear control often contain triclopyr, picloram, or a combination of related ingredients. Glyphosate alone tends to give inconsistent results on thick-skinned cacti.
Picloram is a restricted-use or limited-use product in many areas because it persists in soil and can move to nearby trees and shrubs. Read the label carefully and follow EPA-registered directions exactly.
How Application Usually Works
Labels for cactus typically call for spraying pads until wet, or injecting or painting cut stems. Results take weeks to months, and treated pads often turn yellow, then purple-brown, then collapse.
Many people combine methods. They cut a stand down by hand and treat the stump and regrowth, which uses less product than spraying a whole thicket.
Safety Around Homes, Kids, and Pets
Keep children and pets off treated areas for as long as the label specifies. Store herbicide containers locked away, never in food or drink bottles.
Avoid spraying on windy days or near vegetable beds, ponds, or the root zones of shade trees. Some ingredients can damage desirable plants through drift or root uptake.
Non-Chemical Alternatives
Solarizing is a slower option for small patches. After cutting the plant, cover the area with clear or black plastic for 4 to 8 weeks in hot weather to cook remaining roots and fragments.
Boiling water and vinegar may damage surface tissue, but they rarely kill an established root crown. I would not rely on them for anything bigger than a seedling.
Cactus Growing Back? Stop Regrowth From Pads and Roots
Cactus grows back when root crowns, thick roots, or fallen pieces stay in the soil. The fix is to remove missed fragments promptly and check the area for at least one full growing season.
Why Cacti Are So Hard to Kill
Pad-forming cacti like prickly pear reproduce easily from detached pads. A pad that touches soil can send out roots in a few weeks, even without watering.
Cholla and other segmented cacti behave the same way. Their joints break off easily and root wherever they land.
Inspect Every Few Weeks
Walk the area every 2 to 4 weeks during warm months. New growth often appears as small green nubs or a fresh pad pushing up from the soil.
Dig out each sprout with a hand trowel, including the root, as soon as you see it. Small sprouts come out in seconds.
Treat Stubborn Stumps
If a crown was too large to dig, cut it flush with the ground and either cover it with heavy plastic or treat it with a labeled product. Covering it blocks light and slowly starves the remaining tissue.
Replant the area with groundcover or mulch once you see no sprouts for a full season. Bare soil invites cactus fragments and weeds to fill the gap.
How Do You Dispose of Cactus Safely?
Bag cactus debris in heavy contractor bags, let pieces dry out before composting, or take them to yard waste collection if your area accepts them. The goal is to prevent injuries to sanitation workers and stop pads from rooting elsewhere.
Bagging and Yard Waste Pickup
Double-bag small pieces in heavy plastic and wrap large chunks in cardboard first so spines do not poke through. Label the bag “cactus” so whoever handles it knows to take care.
Check whether your local yard waste program accepts cactus. Some do, some ask you to bundle or bag it separately.
Drying Before Composting
Fresh pads can survive and root in a compost pile. If you want to compost them, chop the pieces small and let them dry in sealed black bags in a sunny spot for several weeks until shriveled and brown.
Only then add them to a hot compost pile. Spines and glochids can persist, so keep cactus compost away from beds where you kneel or garden bare-handed.
What Not to Do
Do not toss pads into woods, ditches, or vacant lots. Prickly pear spreads easily and can become a weed problem on land where it does not belong.
Avoid burning cactus unless local rules allow it. The high water content makes it smolder rather than burn cleanly.
Cleaning Up Spines and Glochids
Wash tools, gloves, and the tarp with a hose, spraying away from walkways. Shake out clothing outdoors and wash it separately.

If glochids reach your skin, the approach is the same as when you remove bunny ear cactus spines: press tape or a thin layer of white glue over the area, let it dry, then peel it away.
Sophia’s tip: Keep a pair of fine-tipped tweezers and a magnifying glass by the sink during cleanup. Pull larger spines with tweezers first, then use tape for the hair-fine glochids you can barely see.
Want to Keep a Piece? Salvage It as a Houseplant
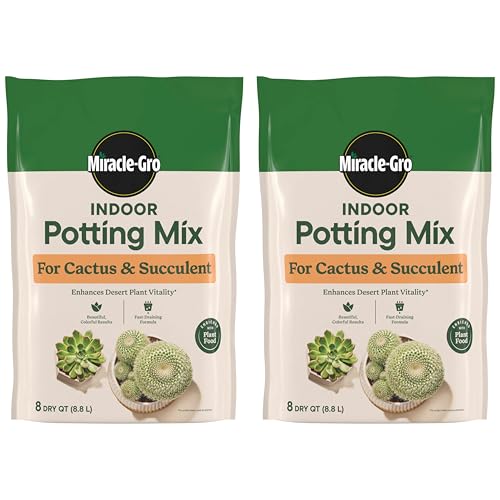
You can save a healthy piece of the cactus and grow it indoors in a pot. Choose a clean, firm segment, let the cut end callus, and root it in fast-draining cactus mix near a bright window.
Choosing a Good Cutting
Pick a firm, unblemished pad or stem tip 4 to 8 inches long. Avoid pieces with soft spots, scarring, or white cottony patches, which can signal pests.
Before you bring anything inside, inspect joints and crevices closely. If you are unsure what you are seeing, read up on whether can cactus get mealybugs before the cutting goes near your other plants.
Rooting It Indoors
Let the cut end dry in a shaded, airy spot for 1 to 2 weeks until it forms a callus. Then set it upright in dry cactus mix in a pot with a drainage hole.
Place it within 1 to 3 feet of a south- or west-facing window, or under a grow light for 12 to 14 hours a day. Water lightly only after roots start to form, usually in 3 to 6 weeks.
Columnar Cuttings and Troubleshooting
Tall columnar cacti root the same way but need support while the base calluses. The process is the same one you would use to grow peruvian apple cactus from cutting.
Slow rooting usually comes from cold soil, too much water, or a cutting that was not fully callused. The fixes for peruvian apple cactus not rooting apply to most cactus cuttings.
Ongoing Indoor Care
Once rooted, keep the pot away from radiators and forced-air vents, which can overheat one side of the plant. Water deeply but only when the mix is fully dry, often every 2 to 4 weeks in summer and far less in winter.
Columnar species have similar needs, so the routine to care for peruvian apple cactus is a good model for light, watering, and winter rest.
Sophia’s tip: In a dry winter apartment, cactus cuttings need almost no water. Keep them in a cool spot around 50°F to 60°F near a bright window, and water only once a month or less until spring.
Pet Safety for Salvaged Cuttings
The ASPCA lists Christmas cactus as nontoxic to cats and dogs, but status varies by species, so check your specific cactus. Spiny cacti cause mechanical injuries to mouths and paws regardless of toxicity, so set potted cuttings on high shelves away from pets and kids.
Your Next Steps
- Identify the cactus species and check whether it is protected in your area.
- Gather heavy gloves, eye protection, long tongs, a flat spade, and a tarp.
- Water the soil 12 to 24 hours ahead, then cut the plant down in sections from the top.
- Dig out the root crown and pick up every fallen pad or segment.
- Bag or dry the debris before disposal, and inspect the area every few weeks for regrowth.
- Save one healthy, pest-free cutting to callus and root indoors if you want to keep the plant.
Common Questions About Removing Cactus From a Yard
How deep are cactus roots?
Most yard cacti have shallow, spreading roots, often 4 to 12 inches deep. Some large species send roots wider than the plant is tall, but they rarely go very deep. Digging a wide circle usually gets the crown and main roots.
Will cactus grow back after I cut it down?
It often will if the root crown or fallen pieces stay in the soil. Pad-forming cacti like prickly pear root easily from detached pads. Remove the crown and collect every fragment to prevent regrowth.
What is the fastest way to kill a cactus?
Cutting it down and digging out the root crown is the fastest reliable method. Herbicides labeled for cactus work but take weeks to months. For large stands, many people combine cutting with stump treatment.
Can I put cactus in my compost bin?
Only after the pieces are fully dried and dead, since fresh pads can root inside a pile. Chop them small and let them dry in sealed bags for several weeks first. Spines can persist, so handle that compost with gloves.
How do I get cactus spines out of my skin?
Pull larger spines with fine-tipped tweezers, pulling in the direction they entered. For hair-fine glochids, press tape or a thin layer of white glue over the area and peel it away once dry. Wash the skin afterward with soap and water.

Hi! I’m Sophia, and I love plants – especially an expert in growing house plants. I stay in Chicago, United States of America, and through my blog and social media platforms, provide tips and tricks on how to grow healthy, vibrant plants indoors. Check out more here.