
Your dieffenbachia is leaning toward the window, roots are poking out of the drainage holes, and the soil dries out two days after you water it.
That is a plant telling you it has run out of room, and dieffenbachia repotting is the fix that gets it growing steadily again.
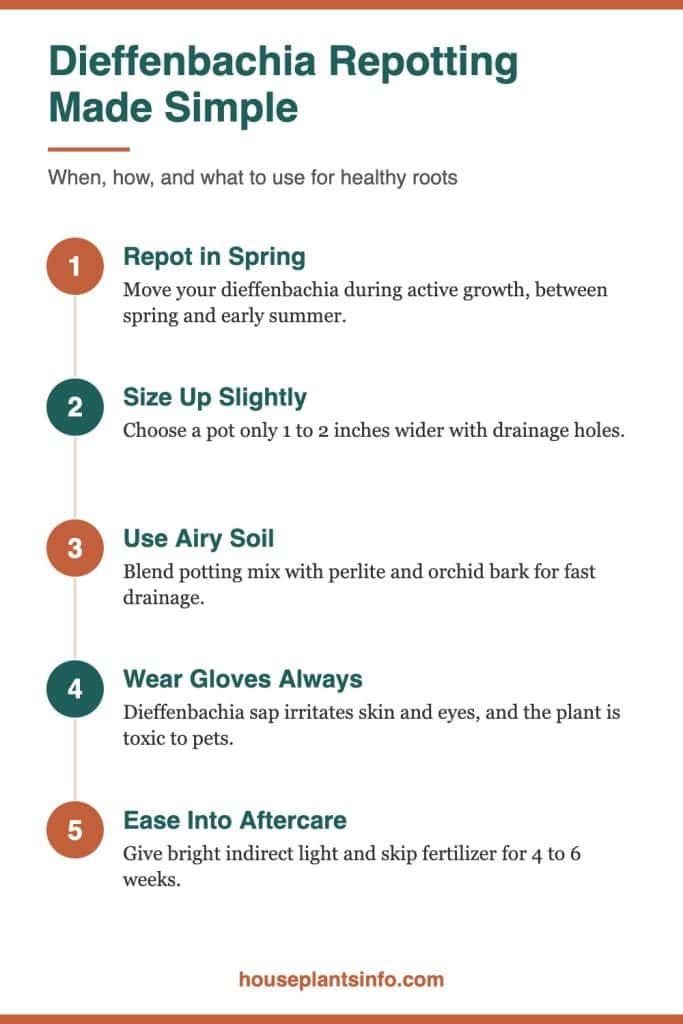
The short version: Repot a dieffenbachia every 1 to 2 years when it is young and every 2 to 3 years once it is mature, ideally in spring or early summer.
Move it into a pot only 1 to 2 inches wider than the current one, use a chunky, fast-draining mix, and wear gloves because the sap irritates skin.
This guide covers the signs it is time, pot and soil choices, a step-by-step method, aftercare, common problems, and safety around pets and kids.
At a Glance
| Factor | What it needs |
|---|---|
| Best timing | Spring to early summer, during active growth |
| Pot size | 1 to 2 inches wider than the current pot, with drainage holes |
| Soil | Airy, well-draining mix with peat or coco coir, perlite, and bark |
| Light after repotting | Bright, indirect light, a few feet from an east or west window |
| Water | Water thoroughly once, then let the top 1 to 2 inches dry |
| Temperature | 65 to 80°F, away from drafts and radiators |
| Pet safety | Toxic to cats and dogs per the ASPCA |
Signs Your Dieffenbachia Needs a Bigger Pot
The clearest signs are roots escaping the drainage holes, soil that dries out much faster than it used to, and growth that has stalled during the warm months. One sign alone may not mean much, but two or three together usually do.
Roots Showing Up Where They Should Not
Look underneath the pot first. Roots poking out of the drainage holes or circling on the soil surface mean the root system has filled the available space.
If you can, slide the plant out of its pot and check. A solid mat of roots wrapped around the outside of the soil ball, with very little visible soil, confirms the plant is root-bound.
Water Running Straight Through
When roots crowd out the soil, there is less material left to hold moisture. Water may pour out of the bottom almost instantly, and the pot feels light again within a few days.
A soil moisture meter helps you see this pattern clearly. If the reading drops from moist to dry far faster than it did a few months ago, and your watering routine has not changed, the pot is likely too small.
Stalled Growth and Top-Heavy Stems
A healthy dieffenbachia in bright, indirect light should push out new leaves regularly from spring through summer. If new leaves are small or slow to appear despite good light and feeding, cramped roots may be the cause.

Watch for a plant that tips over easily, too. Tall dieffenbachias can outgrow a small pot physically, and a top-heavy plant is a sign it needs a wider, heavier base.
Old, Broken-Down Soil
Potting mix compacts and breaks down over time. If the soil looks dense, crusty, or has a white mineral crust on top, it no longer drains or breathes the way roots need.

Soil that smells sour or stays wet for more than a week can signal root trouble. That calls for repotting soon, even outside the ideal season.
How Often Does Dieffenbachia Need Repotting?
Young, fast-growing dieffenbachias usually need a new pot every 1 to 2 years, while mature plants often do fine for 2 to 3 years between repottings. The plant’s growth rate and your indoor conditions decide the exact timing.
Why Spring Is the Best Window
Repot in spring or early summer, when longer days and warmer temperatures push the plant into active growth. Roots recover from disturbance faster during this period and spread into fresh soil quickly.
In a Chicago apartment, that usually means somewhere between April and July. By then, the radiator season is ending and window light is strong enough to support new root growth.
When You Should Not Wait
Root rot, a pest infestation in the soil, or a plant that has tipped over and cracked its pot are emergencies. Repot right away, even in fall or winter, and accept a slower recovery.
For routine repotting, avoid the darkest months if you can. Winter light is weak, forced-air heat dries the air, and the plant grows slowly, so it takes longer to settle into new soil.
Growth Rate Varies by Setup
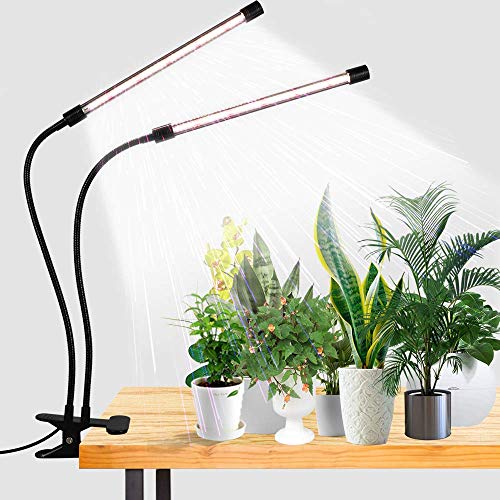
A dieffenbachia under a grow light or near a bright east window will fill its pot faster than one sitting in a dim corner. Warm rooms and regular fertilizing also speed things up.
Check the roots once a year in spring. That simple habit tells you whether this is a repotting year or whether the plant can wait another season.
How to Choose the Right Pot Size and Material
Pick a pot 1 to 2 inches wider in diameter than the current one, and make sure it has drainage holes. A pot that is much larger holds excess wet soil around the roots, which raises the risk of rot.
Sizing Up Without Overdoing It
For small plants in 4 to 6 inch pots, go up 1 inch. For larger plants in 8 to 12 inch pots, going up 2 inches is usually fine.
Resist the urge to jump several sizes to avoid repotting again. Dieffenbachia roots cannot use all that extra soil right away, and the unused soil stays soggy.
Plastic, Ceramic, or Terracotta
Each material changes how fast the soil dries, which matters in indoor conditions.
| Pot material | How it behaves | Best for |
|---|---|---|
| Plastic | Lightweight, holds moisture longer | Dry rooms, radiator-heated apartments |
| Glazed ceramic | Heavy, stable, holds moisture | Tall, top-heavy plants |
| Terracotta | Porous, dries soil faster | Growers who tend to overwater |
| Self-watering | Keeps soil evenly moist | Not ideal; can stay too wet |
If your apartment air gets very dry in winter, plastic or glazed ceramic helps the soil hold moisture longer. If you tend to water too often, terracotta gives you more margin for error.
Sophia’s tip: For a dieffenbachia over 3 feet tall, choose a heavy glazed ceramic pot or set a plastic nursery pot inside a weighted cachepot. That keeps the plant from tipping when a pet brushes past or the AC kicks on.
Drainage Is Not Optional
Every pot needs at least one drainage hole. Decorative pots without holes trap water at the bottom, and dieffenbachia roots sitting in standing water rot quickly.
Skip the layer of gravel at the bottom. It does not improve drainage and actually raises the zone of saturated soil closer to the roots.
What Soil Mix Is Best for Dieffenbachia?
Dieffenbachia does best in a loose, well-draining mix that holds some moisture but never stays waterlogged. A slightly acidic to neutral pH, roughly 6.0 to 7.0, suits it well.
A Simple Home Blend
You can make a reliable mix with three basic ingredients:
- 2 parts quality indoor potting mix or peat-based mix (or coco coir)
- 1 part perlite for drainage and air pockets
- 1 part fine orchid bark for structure and airflow
This blend drains quickly, gives roots oxygen, and still holds enough moisture to keep the plant from drying out between waterings.
What to Avoid
Garden soil and topsoil compact in pots and can carry pests. Dense, moisture-retentive mixes without any perlite or bark stay wet too long indoors, especially in cool or low-light rooms.
Avoid mixing in kitchen scraps or other additions just because they are organic. If you are curious about one popular option, read whether dieffenbachia likes coffee grounds and how to use them safely before adding any to the pot.
Pre-Moisten Before Potting
Dry peat and coco coir repel water at first. Lightly dampen your mix before filling the new pot so it absorbs evenly after potting.
The mix should feel like a wrung-out sponge, not dripping wet. Squeeze a handful; it should hold its shape loosely and crumble when poked.
Dieffenbachia Repotting Step by Step
Water the plant a day ahead, ease it out of the old pot, loosen the roots, set it at the same depth in fresh mix, and water thoroughly. The whole process takes about 20 to 30 minutes for a medium-size plant.
Before You Start
Gather your new pot, pre-moistened soil mix, clean pruning shears, gloves, and newspaper or a tarp. Dieffenbachia sap contains calcium oxalate crystals that irritate skin and eyes, so gloves are a must.
Work somewhere pets and kids cannot reach, and keep your hands away from your face. Wash your tools and hands when you finish.
The 7 Steps
- Water the plant lightly the day before. Slightly moist roots slide out more easily and handle stress better than bone-dry ones.
- Turn the pot on its side, support the base of the stems with one hand, and gently tip or squeeze the pot to release the root ball. For stuck plants, run a butter knife around the inside edge.
- Loosen the root ball with your fingers. Tease apart circling roots so they can grow outward into the new soil.
- Inspect the roots. Healthy roots are firm and white to light tan. Trim any that are brown, mushy, or smell bad, using clean shears.
- Add fresh mix to the bottom of the new pot so the top of the root ball sits about 1 inch below the rim.
- Set the plant in the center and fill around it with mix, pressing gently to remove large air pockets. Keep the stem at the same depth it was growing before.
- Water slowly until it flows out of the drainage holes, then let the pot drain completely. Top up the soil if it settles.
Sophia’s tip: Before you start, set the old pot inside the new one and check the gap. You want about 1 inch of space all around, which tells you the size jump is right.
Dividing or Cutting While You Repot
Some dieffenbachias grow multiple stems from the base. If the root ball separates naturally into clumps, each with its own roots, you can pot them separately.
Repotting is also a good time to handle a leggy, bare-stemmed plant. If you want to propagate dieffenbachia from stem cuttings, take them now and root them while the main plant settles in.
How to Care for Your Dieffenbachia After Repotting
Give the plant bright, indirect light, steady warmth, and a careful watering routine for the first 3 to 4 weeks. Hold off on fertilizer for about 4 to 6 weeks so the new roots are not stressed.
Light and Placement
Place the plant a few feet back from an east or west window, or near a south window filtered by a sheer curtain. Direct afternoon sun right after repotting can scorch leaves while the roots are still recovering.
Keep it away from radiators, forced-air vents, and AC drafts. Sudden blasts of hot or cold air dry out the leaves faster than the disturbed roots can replace moisture.
Watering in the First Month
After the first thorough watering, wait until the top 1 to 2 inches of soil feel dry before watering again. Fresh mix holds moisture differently, so check with your finger rather than following a fixed schedule.
Overwatering is the most common mistake after repotting. The roots cannot absorb much water while they recover, so soggy soil sits around them.
Humidity and Temperature
Dieffenbachia prefers 40 to 60 percent humidity and temperatures between 65 and 80°F. Below 60°F, growth slows and the plant becomes more vulnerable to stress.
In a heated winter apartment, a small humidifier nearby helps. Grouping plants together can raise humidity slightly too.
Expect a Little Droop
Some drooping in the first week is normal transplant stress. Leaves usually perk back up within 1 to 2 weeks as roots settle.
If drooping continues past that or gets worse, compare the symptoms with this guide to dieffenbachia wilting to rule out watering or root problems.
Common Repotting Problems and How to Fix Them
Most post-repotting trouble comes from too much water, too big a pot, or root damage that was already there. Each one has a clear fix if you catch it early.
Yellowing Lower Leaves
One or two lower leaves turning yellow and dropping after repotting is normal. The plant is redirecting energy to its roots.
If several leaves yellow at once and the soil stays wet, cut back on watering. Check that the pot drains freely and that the new pot is not much larger than the old one.
Root Rot Discovered During Repotting
Mushy, dark brown roots with a sour smell indicate rot. Trim away every soft root with clean shears, leaving only firm, healthy tissue.
Repot into fresh mix in a clean pot sized to the remaining roots, which may be smaller than the original. Water lightly and keep the plant in bright, indirect light while it recovers.
Sophia’s tip: If more than half the roots are rotten, take stem cuttings as a backup right away. Healthy stem sections root reliably, so you keep the plant even if the base does not recover.
Pale or Bleached Leaves
Leaves that fade or turn pale after a move often point to a sudden change in light. Moving a plant closer to a bright window during repotting can trigger it.
For a fuller breakdown of the possible reasons, see dieffenbachia leaves turning white: 7 causes and what to do.
Leaves Damaged or Snapped Off
Large dieffenbachia leaves break easily when you handle the plant. Cut damaged leaves off cleanly at the stem with clean shears.
Those exact leaves will not regrow from the same spot, but the plant keeps producing new leaves from the growing tip. Read more on whether dieffenbachia leaves will grow back if the plant lost several.
Plant Will Not Stay Upright
Fresh, loose soil sometimes cannot hold a tall stem straight. Insert a bamboo stake or moss pole into the pot, avoiding the main roots, and tie the stem loosely with soft plant ties.
Remove the stake after a few months once roots anchor the plant firmly.
Is Dieffenbachia Safe Around Pets and Kids During Repotting?
No. The ASPCA lists dieffenbachia as toxic to cats and dogs because it contains insoluble calcium oxalate crystals.
Chewing the leaves or stems can cause mouth irritation, drooling, swelling, and vomiting in pets. The sap can also irritate human skin and eyes, which is why gloves matter during repotting.
Keep the Work Area Clear
Repot on a table or counter with pets in another room. Sweep up dropped leaves, trimmed roots, and soil immediately so curious animals or toddlers do not pick them up.
Place the finished plant on a high shelf or plant stand out of reach. If a pet chews any part of the plant, contact your veterinarian or a pet poison helpline.
Protecting Yourself
Wear gloves and avoid touching your eyes, nose, or mouth while working. If sap gets on your skin, wash it off with soap and water.
If sap gets in your eyes, rinse thoroughly with water and seek medical advice if irritation continues.
Your Next Steps
- Check the drainage holes and soil drying speed this week to see if your plant shows repotting signs.
- Mark spring on your calendar for a yearly root check, even if the plant looks fine.
- Buy a pot 1 to 2 inches wider with drainage holes, plus perlite and orchid bark for your mix.
- Set gloves aside with your repotting supplies so you never handle the sap bare-handed.
- Plan a spot with bright, indirect light, away from radiators and vents, for the plant’s first month after repotting.
- Hold fertilizer for 4 to 6 weeks after repotting, then resume a light, regular feeding schedule.
Common Questions About Dieffenbachia Repotting
Can I repot a dieffenbachia in winter?
You can, but it is better to wait until spring unless the plant has root rot or a broken pot. Winter light is weak and growth is slow, so the plant takes much longer to recover from root disturbance.
Should I water dieffenbachia right after repotting?
Yes, water thoroughly right after repotting until water runs out of the drainage holes. This settles the soil around the roots and removes air pockets, and after that, wait until the top 1 to 2 inches dry before watering again.
How do I know if my dieffenbachia is root-bound?
Slide the plant out of its pot and look at the root ball. If roots circle tightly around the outside with little soil visible, or roots are escaping the drainage holes, the plant is root-bound and ready for a bigger pot.
Can I use cactus soil for dieffenbachia?
Cactus mix alone usually drains too quickly and holds too little moisture for dieffenbachia. You can blend it with regular potting mix, but a peat or coir-based mix with perlite and bark is a better match.
Why is my dieffenbachia drooping after repotting?
Mild drooping for 1 to 2 weeks is normal transplant stress while the roots recover. If it lasts longer, check for soggy soil, an oversized pot, or root damage, and adjust watering and placement.

Hi! I’m Sophia, and I love plants – especially an expert in growing house plants. I stay in Chicago, United States of America, and through my blog and social media platforms, provide tips and tricks on how to grow healthy, vibrant plants indoors. Check out more here.