
A dieffenbachia cutting sits in a glass jar on your windowsill, its broad speckled leaves leaning toward the light while you wonder whether those pale roots can carry it for months or only weeks.
Can you grow dieffenbachia in water, or does every water-rooted cutting eventually need soil?
The short version: Yes, dieffenbachia roots readily in plain water and can live in water for many months, sometimes years, with clean water, bright indirect light, and light feeding.
Growth is usually slower and smaller than in soil, so most growers use water as a rooting stage or a low-mess display.
This guide covers how water growing works, how to start cuttings, daily care, common problems, and how to move a water-grown plant into soil.
At a Glance
| Factor | What it needs |
|---|---|
| Light | Bright indirect light, 3 to 6 feet from an east or west window, or under a grow light |
| Water | Clean, room-temperature water changed every 1 to 2 weeks |
| Humidity | 40 to 60 percent is ideal; average home air is workable |
| Temperature | 65 to 80°F, never below 60°F |
| Feeding | Liquid fertilizer at one-quarter strength every 4 to 6 weeks during spring and summer |
| Pet safety | Toxic to cats and dogs (ASPCA) |
| Difficulty | Easy to root, moderate to keep long term |
Can You Grow Dieffenbachia in Water Long Term?
You can grow dieffenbachia in water long term, as long as you keep the water fresh, the roots oxygenated, and the plant fed at a low dose. What water cannot do is match the size and leaf production of a well-potted plant in good soil.
What “Long Term” Realistically Looks Like
A rooted cane or top cutting can stay in water for a year or more. Expect a compact plant with a few leaves at a time, where older lower leaves yellow and drop as new ones unfurl at the top.
Large, multi-stemmed dieffenbachia that reach 3 to 5 feet indoors are almost always soil-grown. In water, the stem tends to stay shorter and the leaves slightly smaller.
Setting Up for Success From Day One
A clear glass vase lets you watch root growth and spot cloudy water early, which matters more than looks.
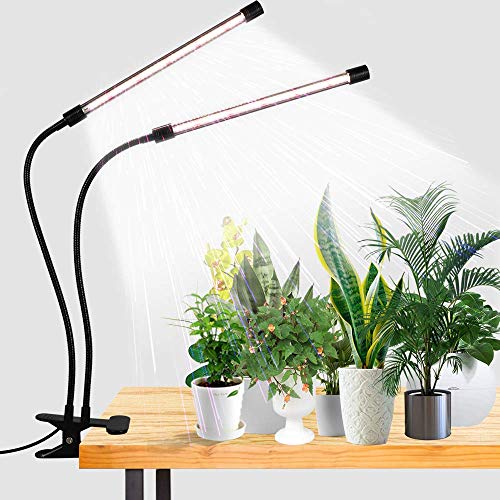
If your brightest spot is a north window or a dim corner, a full-spectrum grow light set 12 to 18 inches above the leaves for 10 to 12 hours a day keeps growth steady through Chicago-style gray winters.
If you would rather keep a full-size specimen, the guide to grow and care for dieffenbachia plant covers soil, potting, and light in detail.

How Does Dieffenbachia Survive Without Soil?
Dieffenbachia survives in water because soil was never the food itself. Soil holds water, air, and minerals around the roots, and water culture supplies those same three things in a different way.
Roots Adapt to Their Medium
Roots that form in water are thinner, smoother, and more brittle than soil roots. They are built to pull dissolved oxygen and nutrients straight from the water, which is why fresh water matters so much.
These water roots are not inferior, just specialized. They struggle if suddenly packed into dense soil, which is why transitions need care later on.
The Role of Oxygen
Roots breathe. Still water slowly loses dissolved oxygen, and bacteria multiply as it goes stale, which leads to brown, mushy roots.
Changing the water every 1 to 2 weeks restores oxygen and flushes out waste. Room-temperature water holds a healthy balance; very warm water holds less oxygen.
Where the Nutrients Come From
Plain tap water carries only trace minerals. A cutting lives off stored energy in its thick stem for the first few months, then needs a light dose of liquid fertilizer to keep producing healthy leaves.
This approach is a simple form of hydroculture, the broader practice of growing plants without soil. Dieffenbachia, with its fleshy stems and vigorous roots, is one of the easier aroids to grow this way.
Water vs. Soil: Which Is Better for Dieffenbachia?
Soil is better for size and longevity, while water is better for rooting, low mess, and watching roots develop. Your choice depends on whether you want a statement plant or a tidy windowsill display.
| Factor | Grown in Water | Grown in Soil |
|---|---|---|
| Growth rate | Slower, smaller leaves | Faster, larger plant |
| Watering | No guesswork, just top off and change | Must check moisture regularly |
| Pests | Fungus gnats rare | Fungus gnats more common |
| Root rot risk | From stale water | From overwatering and poor drainage |
| Feeding | Very dilute, regular | Standard dilution in growing season |
| Maintenance | Water change every 1 to 2 weeks | Repot every 1 to 2 years |
| Best for | Cuttings, small displays, offices | Floor plants, long-term growth |
Why People Choose Water
Water growing removes the most common soil mistake, which is overwatering. It also suits small spaces, rental apartments, and anyone who dislikes soil spills on a radiator shelf or desk.
Fungus gnats breed in damp potting mix, so water culture largely avoids them. That alone makes it appealing for kitchens and bedrooms.

Why Soil Still Wins for Big Plants
Soil holds a buffer of nutrients and supports heavier root systems. A potted dieffenbachia can carry a tall cane and many large leaves that a jar simply cannot anchor.
Soil care has its own learning curve, mostly around moisture. If you go that route, read about how often should you water your potted dieffenbachia plant before you settle into a schedule.
How to Start a Dieffenbachia Cutting in Water
Take a healthy cutting with at least one node, set it in clean water in bright indirect light, and expect roots in about 2 to 6 weeks. Dieffenbachia is forgiving, and both top cuttings and leafless cane sections root well.
Choose and Prepare Your Cutting
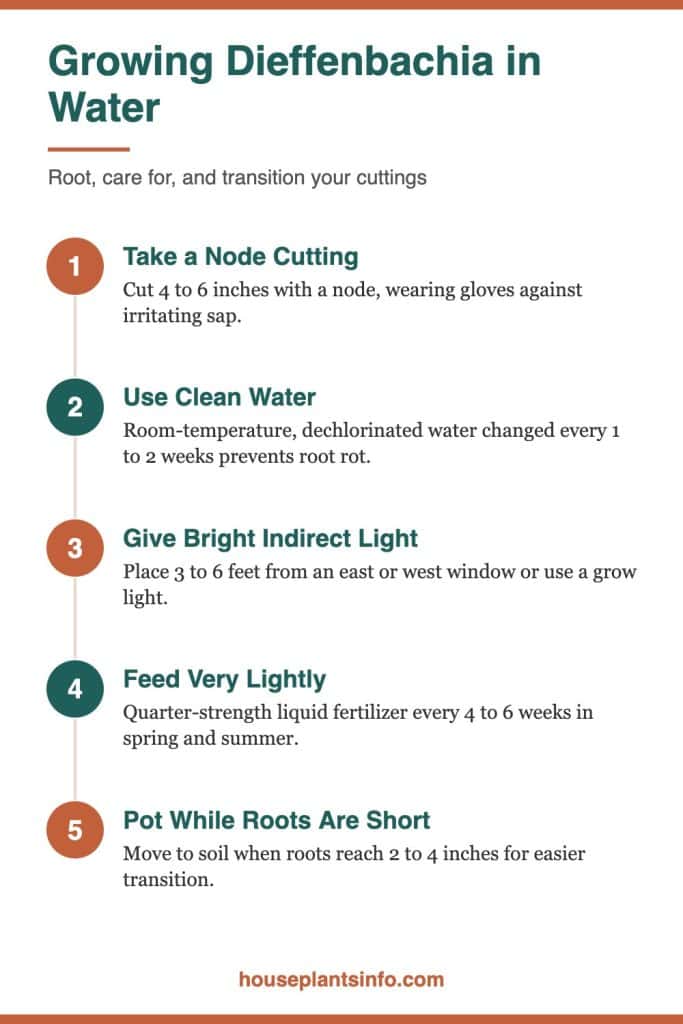
Wear gloves before you cut. The sap contains calcium oxalate crystals that irritate skin, eyes, and mouth.
- Top cutting: cut 4 to 6 inches below the crown of leaves, just below a node (the ring-like scar on the stem).
- Cane sections: slice a bare stem into 2 to 3 inch pieces, each with at least one node.
- Use a clean, sharp knife or pruners wiped with rubbing alcohol.
- Remove leaves that would sit below the waterline, since submerged leaves rot quickly.
Let cut ends dry for a few hours to callus slightly. This lowers the chance of rot in the first week.
Set It in Water
Place a top cutting upright so 1 to 3 inches of stem sits underwater. Lay cane sections horizontally in a shallow dish with water reaching about halfway up, keeping buds facing up.
Put the container 3 to 6 feet from an east or west window, out of direct midday sun. Keep it away from radiators, forced-air vents, and drafty single-pane glass in winter.
Sophia’s tip: Mark the waterline on the glass with a small piece of tape. When you top off, you will keep the level steady instead of slowly submerging more stem than you intended.
What to Expect Week by Week
- Weeks 1 to 2: little visible change; the cut end may lighten or swell slightly.
- Weeks 2 to 4: small white root bumps appear at or near the nodes.
- Weeks 4 to 8: roots lengthen to 1 to 3 inches; cane sections may push a new shoot.
- After 8 weeks: a new leaf often unfurls on a top cutting.
Rooting is faster in warm months and slower in a cool winter apartment. If you want more detail on stem and cane methods, see how to grow dieffenbachia from cuttings, and for division and air layering, learn how to propagate dieffenbachia by other routes.
What Container and Water Should You Use?
Use a stable container with a narrow neck to support the stem, and use dechlorinated tap water, filtered water, or rainwater at room temperature. The right setup prevents tipping, algae, and root damage.
Picking a Container
Dieffenbachia gets top-heavy, so choose glass with a wide base. A narrower neck holds the stem upright without stakes.
Clear glass shows root health but grows algae faster in bright light. Tinted or opaque containers slow algae; you just lift the plant out to check roots.
Choosing Your Water
Tap water works for most homes. Letting it sit uncovered for 24 hours allows chlorine to dissipate, though chloramine, which some cities use, does not leave this way.
If leaf tips brown despite good care, switch to filtered water or collected rainwater. Avoid softened water, since its added sodium builds up around the roots.
Temperature Matters Too
Use room-temperature water, roughly 65 to 75°F. Cold water from the tap in a Chicago January can shock tender roots.
Sophia’s tip: Fill a pitcher with tap water the night before each change and leave it on the counter. By morning it is room temperature and much of the chlorine has dissipated.
How to Care for Dieffenbachia Growing in Water
Change the water every 1 to 2 weeks, give bright indirect light, feed lightly in the growing season, and keep the plant warm. Consistency matters more than any single step.
Water Changes and Topping Off
Top off evaporation as needed between full changes. Every 1 to 2 weeks, pour out all the water, rinse the container, and refill fresh.
While the plant is out, gently rinse the roots under room-temperature water. Healthy roots are white to pale tan and firm.
Light and Placement
Bright indirect light is ideal. An east window gives gentle morning sun, and a west window works if the plant sits a few feet back or behind a sheer curtain.
South windows can scorch leaves and heat the water. North windows usually need a grow light, especially from November through February.
Feeding Without Burning Roots
After roots reach 2 to 3 inches, feed with a balanced liquid houseplant fertilizer at one-quarter of the label strength. Add it at a water change every 4 to 6 weeks in spring and summer.
Skip feeding in late fall and winter when growth slows. Too much fertilizer causes brown leaf edges and encourages algae.
Temperature and Humidity
Keep the plant between 65 and 80°F. Dieffenbachia is tropical and suffers below 60°F, so keep it off cold sills and away from AC vents blowing directly on it.
Dry winter air from forced-air heat can crisp leaf edges. Grouping plants or running a humidifier nearby helps keep humidity around 40 to 60 percent.
Pet and Child Safety
The ASPCA lists dieffenbachia as toxic to cats and dogs. Chewing causes mouth irritation, drooling, and vomiting, so place jars on high shelves away from pets and small children, and know that knocked-over water may contain sap.
Common Problems With Water-Grown Dieffenbachia and How to Fix Them
Most problems come from stale water, poor light, or temperature stress. Catch them early by checking roots and leaves at every water change.
Yellowing Lower Leaves
Cause: natural aging, low light, or nutrient shortage. One older leaf yellowing at a time is normal.
Fix: move the plant closer to a bright window, and begin quarter-strength feeding if you have not. Remove yellow leaves at the base.
Brown, Mushy Roots or a Soft Stem
Cause: root rot from bacteria in stale or warm water. A foul smell is a clear sign.
Fix: trim all soft roots with clean pruners, cut the stem above any mushy section, rinse the container, and start in fresh water. If the whole stem is soft, take a new cutting from healthy upper growth.
Drooping or Limp Leaves
Cause: root rot, cold drafts, or a cutting still running on stored energy before roots form. Sudden temperature drops near a winter window are common culprits.
Fix: check roots first, then move the plant somewhere warmer and steadier. For a full rundown of causes, see this guide on dieffenbachia wilting.
Green Algae or Cloudy Water
Cause: light hitting the water plus nutrients. Algae is mostly cosmetic but competes for oxygen.
Fix: scrub the container, change water more often, reduce fertilizer slightly, or switch to a tinted container.
Brown Leaf Tips and Edges
Cause: dry air, mineral buildup, or fertilizer that is too strong. Chlorinated or softened water can add to it.
Fix: use filtered or rested water, cut fertilizer back, and raise humidity. Trim brown tips with clean scissors, following the leaf’s natural shape.
Sophia’s tip: Keep a small pair of pruners and a bottle of rubbing alcohol on the same shelf as your water-grown plants. Quick, clean cuts at the first sign of soft roots save cuttings that would otherwise rot.
How to Move a Water-Grown Dieffenbachia Into Soil
Pot it when roots are 2 to 4 inches long, use a light, well-draining mix, and keep the soil evenly moist for the first 2 to 3 weeks. This bridges the gap while water roots adjust.
When to Make the Switch
The best time is spring or early summer, when warmth and light speed recovery. Roots 2 to 4 inches long transition more easily than a dense, foot-long mass.
Waiting too long is not fatal, but older water roots are more likely to die back before soil roots replace them.
Potting Steps
- Choose a pot 1 to 2 inches wider than the root mass, with drainage holes.
- Use a peat- or coir-based potting mix lightened with perlite or bark.
- Set the plant at the same depth it sat in water and firm the mix gently.
- Water thoroughly until it drains, then empty the saucer.
Aftercare
Keep the mix lightly moist, not soggy, for 2 to 3 weeks while new soil roots form. Then let the top inch dry before watering, as you would any potted dieffenbachia.
Some drooping or one dropped leaf is normal transplant stress. Keep the plant in bright indirect light and skip fertilizer for about a month.
Your Next Steps
- Take a 4 to 6 inch top cutting or 2 to 3 inch cane sections, wearing gloves.
- Set cuttings in room-temperature, dechlorinated water 3 to 6 feet from an east or west window.
- Change the water every 1 to 2 weeks and rinse roots each time.
- Start quarter-strength liquid fertilizer once roots reach 2 to 3 inches, in spring and summer only.
- Place jars out of reach of cats, dogs, and children.
- Decide by month three whether to keep it in water or pot it while roots are still short.
Common Questions About Growing Dieffenbachia in Water
How long can dieffenbachia live in water?
With fresh water, good light, and light feeding, dieffenbachia can live in water for a year or more. Growth stays more compact than in soil, and older leaves drop as new ones form.
How long does it take dieffenbachia cuttings to root in water?
Most cuttings show roots in about 2 to 6 weeks. Warm temperatures and bright indirect light speed things up, while cool winter rooms slow rooting considerably.
Should I add fertilizer to the water?
Yes, once roots are established. Use a balanced liquid fertilizer at one-quarter strength every 4 to 6 weeks in spring and summer, and stop feeding in fall and winter.
Why are the roots on my dieffenbachia turning brown?
Brown, mushy roots usually mean rot from stale or warm water. Trim the damaged roots, clean the container, and refill with fresh water, then change it more often going forward.
Is dieffenbachia in water safe around pets?
No. The ASPCA lists dieffenbachia as toxic to cats and dogs because of calcium oxalate crystals in the plant, so keep jars on high shelves and wipe up spilled water promptly.

Hi! I’m Sophia, and I love plants – especially an expert in growing house plants. I stay in Chicago, United States of America, and through my blog and social media platforms, provide tips and tricks on how to grow healthy, vibrant plants indoors. Check out more here.