
Your bunny ear cactus sits on the windowsill with a crowd of fuzzy pads, and a few of them look ready to become plants of their own.
Learning how to propagate bunny ear cactus is mostly about patience, because the pads root easily once you let the cut end dry.
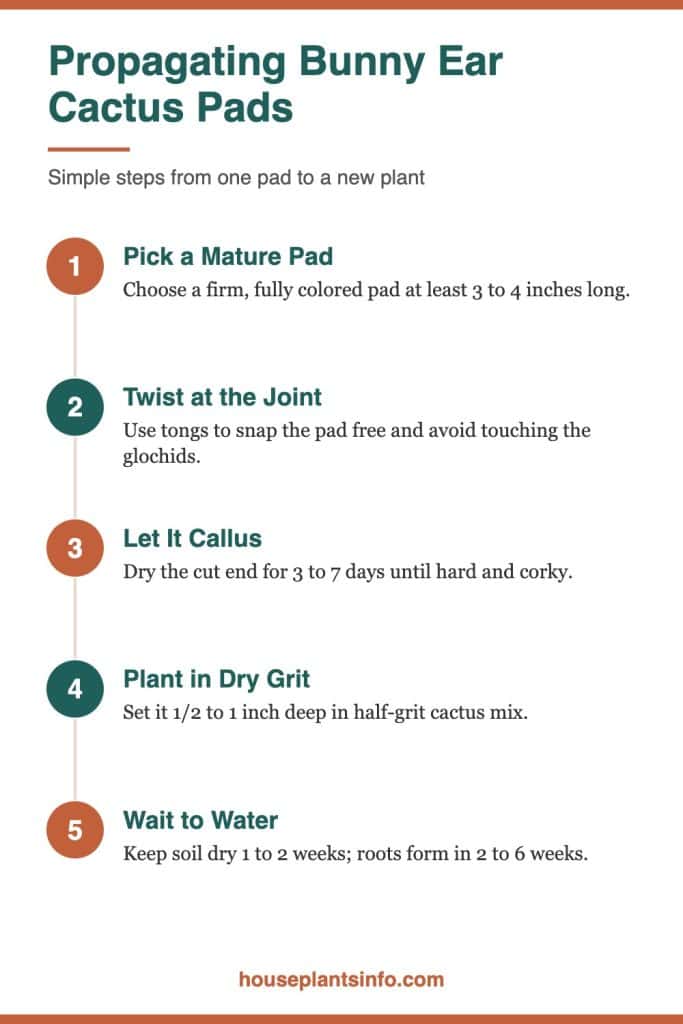
The short version: Twist off a firm, mature pad at the joint, let the cut end dry for 3 to 7 days until it forms a callus, then set it upright in dry, gritty cactus mix.
Keep it in bright, indirect light and water lightly only after roots form, usually in 2 to 6 weeks.
This guide covers timing, step-by-step propagation, glochid safety, aftercare, and the fixes for rotting or shriveling pads.
At a Glance
| Factor | What it needs |
|---|---|
| Light | Bright, indirect light while rooting; full sun once established |
| Water | None until roots form, then a light soak when the mix is fully dry |
| Temperature | 70 to 85°F for fastest rooting; keep above 50°F |
| Soil | Fast-draining cactus mix with extra perlite or pumice |
| Pet safety | Not known to be toxic, but glochids irritate mouths, paws, and skin |
| Difficulty | Easy; most failures come from watering too early |
What Do You Need Before Taking a Pad?
You need a way to handle the pad without touching it, a small pot with a drainage hole, and a gritty mix.
A pair of kitchen tongs and a folded sheet of newspaper wrapped around the pad keep the glochids off your hands far better than garden gloves.
Protection From Glochids
Bunny ear cactus has no true long spines. Instead, each white or golden dot is a cluster of tiny barbed bristles called glochids, and they detach at the lightest touch. They lodge in fabric gloves and then in your fingers.
Thick leather gloves work, but tongs are better because they never make contact. Keep a roll of wide tape nearby so you can lift stray glochids from skin, and if some get through, here is how to remove bunny ear cactus spines safely.
Pot and Mix
Choose a terracotta pot 3 to 4 inches wide for a single pad. Terracotta pulls moisture out of the soil, which helps prevent rot during the slow rooting phase.
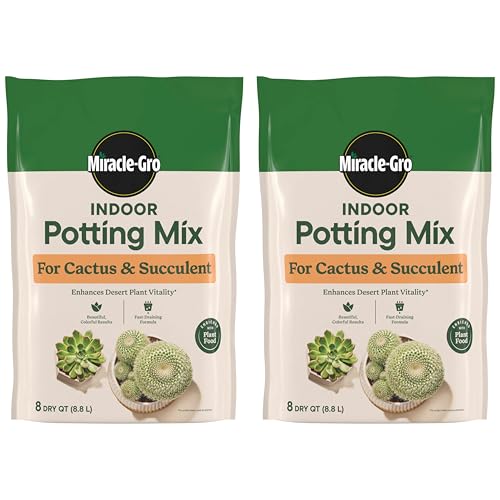
Use a commercial cactus mix and add perlite or pumice until it is roughly half grit. If you squeeze a handful of the damp mix and it holds a firm ball, it needs more grit.
A Clean Blade, Just in Case
Most pads twist off cleanly at the joint. If a pad resists, a clean, sharp knife wiped with rubbing alcohol gives a neat cut with less tissue damage than tearing.
How to Propagate Bunny Ear Cactus Step by Step
Select a healthy mature pad, remove it at the joint, let it callus, then plant it in dry mix and wait. The whole process takes about 4 to 8 weeks from cutting to a rooted plant.
Step 1: Pick the Right Pad
Choose a pad that is firm, flat, and fully colored, at least 3 to 4 inches long. Young, pale pads at the tips are still soft and tend to shrivel before they root.
Avoid pads with soft spots, brown patches, or white cottony spots, which can signal mealybugs or scale. A healthy parent gives a healthy cutting.
Step 2: Remove It at the Joint
Grip the pad with tongs and twist gently where it meets the pad below. It should snap free at the narrow joint, leaving a small, clean wound.
If you cut instead, slice straight through the joint rather than across the middle of a pad. Cuts through the joint heal faster and look tidier on the parent plant.
Step 3: Let the Cut End Callus
Set the pad on a paper towel or tray in a dry spot out of direct sun. Over 3 to 7 days, the cut end hardens into a dry, slightly corky layer called a callus.
In humid summer weather, callusing can take up to 2 weeks. Wait until the cut surface is dry to the touch and no longer looks green or wet.
Sophia’s tip: Stand the pad upright in an empty jar while it calluses. It dries evenly on all sides, and the jar keeps the glochids contained if someone bumps the shelf.
Step 4: Plant It in Dry Mix
Fill your pot with dry cactus mix. Push the callused end straight down about 1/2 to 1 inch deep, or roughly one quarter of the pad’s height, so it stands on its own.
If it leans, prop it with a few small stones or pebbles around the base. Do not bury it deeper to stabilize it, since buried pad tissue is more likely to rot.
Step 5: Hold Off on Water
Leave the mix dry for the first 1 to 2 weeks. The pad lives on its stored water while it starts sending out roots, and wet soil around an unrooted pad invites rot.
After the second week, you can lightly moisten the top inch of mix every 10 to 14 days. Keep it barely damp, never soggy.
Step 6: Check for Roots
Roots usually appear in 2 to 6 weeks. Give the pad a very gentle tug; slight resistance means roots are holding on.
New growth is the clearest sign. A small bump or fresh pad emerging from an areole along the top edge means the cutting has established.
Step 7: Move to Regular Care
Once the pad resists a tug or shows new growth, start watering normally and move it into brighter light. More on that in the aftercare section below.
Similar Cacti, Similar Method
The callus-then-plant approach works for many cacti. If your collection includes related plants, the same patience applies when you propagate Eve’s needle cactus or grow Peruvian apple cactus from cutting, though columnar cuttings need longer to callus.
When Is the Best Time to Propagate?
Late spring through early summer is ideal, when the plant is actively growing and indoor temperatures sit between 70 and 85°F. Pads taken at this time root fastest and are least likely to rot.
Why Spring and Summer Work Best
Longer days give the pad more light energy to build roots. Warm air also speeds up callusing and root growth.
In a typical apartment, south and west windows get strong light from May through August, which helps young plants put on sturdy growth before winter.
Propagating in Fall or Winter
You can still root pads in winter, but expect it to take twice as long. Short days and cool windowsills slow everything down.
Forced-air heat dries the air, which actually helps callusing, but cold glass at night can chill the pot. Keep winter cuttings at least a few inches from the window and away from drafty frames.
Timing Around Repotting
Repotting the parent plant is a natural moment to take pads. You are already handling it, and removing a few crowded pads helps the plant keep a balanced shape.
Should You Use Rooting Hormone or a Grow Light?
Rooting hormone is optional for bunny ear cactus, since the pads root readily without it. A grow light is helpful whenever natural light is weak, especially in winter or in north-facing rooms.
Rooting Hormone
Dipping the callused end in rooting powder can speed up root formation slightly. Tap off the excess, because a thick coating does not help and can stay damp in the soil.
Only apply it after the callus forms. Putting powder on a fresh, wet cut traps moisture and slows healing.
Grow Lights
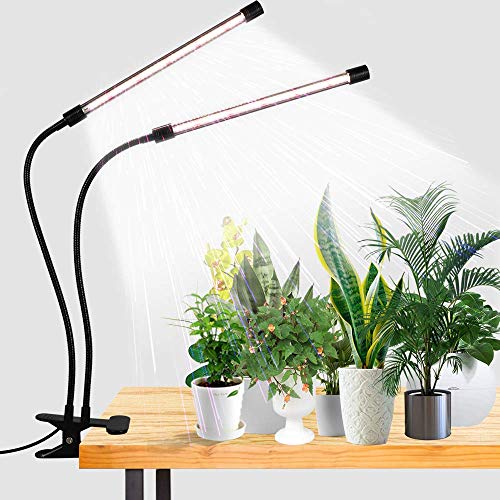
A full-spectrum LED grow light placed 6 to 12 inches above the pad, running 12 to 14 hours a day, gives steady light for rooting. It is the easiest way to get reliable results in a dim apartment.
Light also shapes later growth. Pads raised in low light often stretch, and if your parent plant already shows that pattern, read about a bunny ear cactus growing long and skinny before choosing a spot for the new plant.
Sophia’s tip: Put a grow light on a simple outlet timer. Consistent day length matters more for rooting cuttings than occasional bursts of strong light.
Bottom Heat
A seedling heat mat set under the pot can help in a cold room, keeping the soil around 70 to 75°F. It is unnecessary in summer and should never be used with wet soil.
How Do You Care for a Newly Rooted Pad?
Treat a rooted pad like a small adult plant, but introduce sun and water gradually. Water deeply only when the mix is completely dry, and wait 2 to 3 months before fertilizing.
Light for Young Plants
Move the pot to bright, indirect light first, such as a few feet back from a south window or right in an east window. After 2 to 3 weeks, shift it closer to the glass.
Sudden full sun can scorch young pads, leaving tan or white patches. Gradual exposure lets the pad toughen up.
Watering Routine
In spring and summer, water thoroughly until it drains from the bottom, then let the mix dry out completely. In most homes this means every 1 to 3 weeks depending on pot size and light.
In winter, cut back to roughly once a month or less. Bunny ear cactus rests in cool months, and wet soil during dormancy is the most common cause of rot.
When to Fertilize
Hold off on fertilizer until the plant has been rooted for 2 to 3 months. Young roots burn easily, and the fresh potting mix already contains some nutrients.

Then use a cactus fertilizer diluted to half or quarter strength once a month during spring and summer. Skip feeding entirely from fall through winter.
Temperature and Airflow
Bunny ear cactus prefers 70 to 90°F during the growing season and tolerates cooler winters down to about 50°F. Keep it out of the direct blast of radiators, heating vents, and AC units.
Good airflow helps the soil dry evenly. A shelf near a window with gentle air movement works better than a closed cabinet or crowded corner.
When to Repot
A single pad can stay in its starter pot for a year or more. Move it up one size, about 1 to 2 inches wider, when roots poke from the drainage hole or the plant becomes top-heavy.
Can You Grow Bunny Ear Cactus From Seed or Offsets?
Yes, but pad cuttings are far faster and more reliable. Seeds take months to years to reach a decent size, while a rooted pad looks like a small plant almost immediately.
Growing From Seed
Seeds come from the fruit, which indoor plants rarely produce. Sow them on the surface of moist, gritty mix and keep them warm, around 70 to 80°F, under bright light.
Germination can be slow and uneven, sometimes taking several weeks. Seedlings grow slowly, so this is a project for patient growers.
Separating Pads That Have Rooted
Sometimes lower pads touch the soil and form roots on their own. You can gently lift these, separate them at the joint, and pot them right away without callusing a fresh wound for long.
Let any torn surface dry for a day or two first. Then plant and water lightly within a week since the roots are already working.
Rooting Multiple Pads Together
Several pads can share one wider, shallow pot for a fuller look. Space them 2 to 3 inches apart so they have room to grow and you can still reach the soil.
Why Did My Cutting Rot, Shrivel, or Fail to Root?
Most failures come from water at the wrong time, too little light, or a pad that was too young. Each problem has a clear sign and a simple fix.
Soft, Brown, or Black Base
Cause: rot from watering before roots formed, or planting before the callus was complete. The base turns mushy and may smell sour.
Fix: pull the pad, cut above the rotten tissue with a clean knife, and let it callus again for a full week. Replant in fresh, dry mix.
Wrinkled or Shriveled Pad
Cause: the pad is using its stored water, which is normal for the first few weeks. Heavy wrinkling over a long period means it has used up its reserves.
Fix: once 2 to 3 weeks have passed, lightly moisten the mix. If the pad stays shriveled and soft at the base, check for rot instead.
Pad Falling Over
Cause: planted too shallow, pot too large, or a heavy pad in loose mix. A floppy parent plant can also point to broader care issues, covered in this guide to bunny ear cactus drooping.
Fix: replant slightly deeper, firm the mix, and brace with pebbles. Stakes are rarely needed for a single pad.
No Roots After Two Months
Cause: low light, cool temperatures, or a pad that was too young. Winter cuttings are the usual suspects.
Fix: move it under a grow light and somewhere warmer, around 70 to 80°F. As long as the pad is firm and green, it is still alive and can root.
Yellow or Pale Pad
Cause: too much water or too little light. Yellowing at the base usually points to moisture; overall paleness points to light.
Fix: let the mix dry fully and increase light gradually. Do not fertilize a struggling cutting.
Sophia’s tip: Write the planting date on a plant label and push it into the pot. It stops you from watering too early or giving up too soon.
Is Bunny Ear Cactus Safe Around Pets and Kids?
Bunny ear cactus is not known to be toxic to cats or dogs, but the glochids are a real physical hazard. They lodge in mouths, noses, paws, and small fingers and are painful to remove.
Placing New Plants
Keep propagating pads on a high shelf or windowsill that pets and kids cannot reach. Callusing pads on open tables are especially easy to knock over.
Clean up after taking cuttings. Wipe surfaces with a damp paper towel and vacuum the floor, since dropped glochids can end up in carpets and pet fur.
If Contact Happens
Signs in pets include pawing at the face, drooling, or licking a paw repeatedly. Contact your veterinarian if bristles are in the mouth or eyes.
For people, tape or white glue applied, dried, and peeled off removes most glochids from skin.
Your Next Steps
- Choose one or two firm, mature pads at least 3 to 4 inches long on your plant.
- Twist them off at the joint with tongs and let them callus for 3 to 7 days.
- Prepare a 3 to 4 inch terracotta pot with cactus mix that is about half grit.
- Plant the pad upright, keep the mix dry for 1 to 2 weeks, and place it in bright, indirect light.
- Set a grow light on a 12 to 14 hour timer if your window faces north or it is winter.
- Mark your calendar to check for roots at 3 weeks and to start fertilizing at about 3 months.
Common Questions About Propagating Bunny Ear Cactus
Can you root a bunny ear cactus pad in water?
It is possible, but it is not recommended. Pads sitting in water rot easily, and water roots often struggle once moved into soil. Dry, gritty mix gives far better results.
How long does a bunny ear cactus pad take to root?
Most pads root in 2 to 6 weeks in spring or summer. In winter or a cool, dim room, it can take 8 weeks or longer.
Should the pad be planted upright or laid flat?
Upright, with the callused end about 1/2 to 1 inch into the mix, is the most common method. Laying a pad flat on the soil also works, and roots will form from the underside, though the plant may grow at an angle.
Can a broken pad be propagated?
Yes, as long as the piece is firm and healthy. Trim the broken edge cleanly, let it callus fully, and plant it the same way as a whole pad.
Do I need to water a pad before it has roots?
No. The pad holds enough stored water to last several weeks. Start with light moisture after about 2 weeks and water normally once it shows roots or new growth.

Hi! I’m Sophia, and I love plants – especially an expert in growing house plants. I stay in Chicago, United States of America, and through my blog and social media platforms, provide tips and tricks on how to grow healthy, vibrant plants indoors. Check out more here.