
Your cactus has outgrown its spot on the windowsill, leaning toward the glass, a soft brown patch near the base, or an arm that keeps snagging your sleeve.
Knowing how to trim a cactus without killing it comes down to timing, a clean blade, and patience while the wound heals.
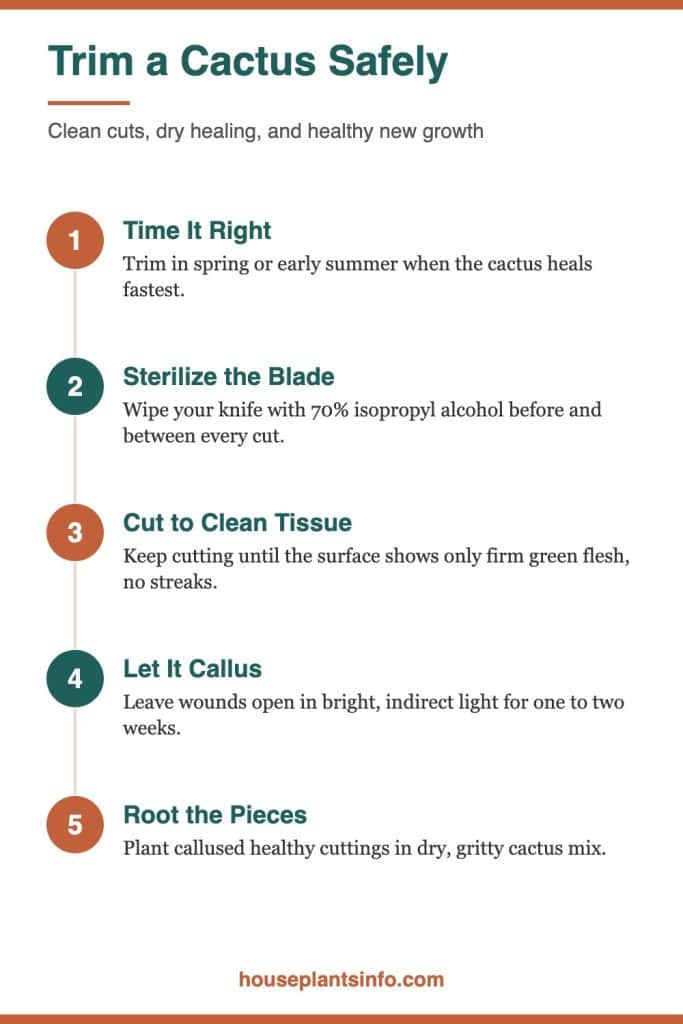
The short version: Trim in spring or early summer with a sharp, sterilized blade, cutting only into firm, healthy tissue.
Let the wound dry and callus for several days to two weeks, and hold off on watering until it has sealed. Most cacti recover easily when the cut stays dry and clean.
This guide covers timing, preparation, step-by-step cutting, shaping, rot removal, segmented and paddle types, what to do with the pieces, and aftercare.
At a Glance
| Factor | What it needs |
|---|---|
| Best timing | Spring to early summer, during active growth |
| Light after trimming | Bright, indirect light for 1 to 2 weeks, then return to full sun |
| Water after trimming | None until the cut has callused, usually 1 to 2 weeks |
| Temperature | 65 to 85°F, away from radiators and AC drafts |
| Soil | Fast-draining cactus mix with added grit or perlite |
| Pet safety | Spines injure pets; Christmas cactus is listed non-toxic by the ASPCA |
| Difficulty | Easy to moderate, depending on size and spines |
When Should You Trim a Cactus?
The best time to trim is spring through early summer, when the plant is actively growing and heals fastest. Emergency cuts for rot can and should happen any time of year.
Signs Your Cactus Needs a Cut
You do not need to trim a healthy cactus on a schedule. Most never need it at all. Trim when you see a clear reason:
- Soft, brown, black, or mushy tissue that suggests rot
- Stretched, pale, narrow growth from low light
- An arm or column that makes the plant top-heavy or unstable
- Growth that blocks a walkway or puts spines at a child’s or pet’s eye level
- Dead, dry, or broken sections
Why Season Matters Indoors
In a Chicago apartment, winter means short days, dry air from forced-air heat, and a cactus that is mostly resting. Cuts made during dormancy heal slowly and sit open longer, which gives fungi and bacteria more time to enter.
From roughly April through July, longer days and warmer rooms speed up callusing. If your plant sits under a grow light year-round, it may heal well in winter too, but spring is still the safer window.
Before you cut anything, check moisture. Push a soil moisture meter or a wooden chopstick a few inches into the pot. You want the soil dry or close to it, because a well-hydrated but not soggy cactus handles stress best.

Sophia’s tip: Water your cactus lightly about 3 to 5 days before a planned trim, then let the soil dry. The tissue stays plump and firm, which makes cleaner cuts, but the wound will not sit in damp conditions.
How to Prepare Your Cactus and Your Blade
Preparation prevents most trimming disasters. You need a clean, sharp blade, a way to handle spines safely, and a dry, bright spot for the plant to heal.
Choosing the Right Blade
Match the blade to the stem thickness:
- Thin stems and segments: sharp pruning shears or a small paring knife
- Medium columns, 1 to 3 inches thick: a sharp kitchen knife or grafting knife
- Thick trunks over 3 inches: a long serrated bread knife or a fine-toothed pruning saw
A dull blade crushes cells instead of slicing them. Crushed tissue heals slowly and invites rot, so sharpen or replace anything that drags.
Sterilizing Everything
Wipe the blade with 70% isopropyl alcohol before the first cut and between each cut. This matters most when removing rot, since you can easily carry pathogens from diseased tissue into healthy flesh.
Let the alcohol evaporate for a few seconds before cutting. You can also clean the blade with a 10% bleach solution, then rinse and dry it.
Protecting Your Hands
Thick leather gloves work for many cacti, but long spines can poke through. For tall or heavily spined plants, wrap the stem in a folded towel, several layers of newspaper, or a strip of foam, then grip through it.
Kitchen tongs are useful for holding small arms steady while you cut. Many cacti, especially prickly pears, have glochids, tiny barbed hairs that lodge in skin. Wear long sleeves and work over newspaper you can fold up and toss.
Setting Up Your Workspace
Work on a table near a bright window, not in the cramped space where the plant usually sits. Keep pets and kids out of the room, since dropped spines and fresh cuttings are easy to step on or sniff.
How to Trim a Cactus Without Killing It: Step by Step
Make a single clean cut through healthy tissue, keep the wound dry, and give it time to seal. These seven steps work for most columnar, branching, and globe cacti.
The Seven Steps
- Decide exactly where to cut. Identify the section to remove and look for a joint, a natural narrowing, or a point a little above the problem area.
- Support the section you are removing. Hold it with tongs or a wrapped towel so it does not tear or fall onto the rest of the plant.
- Make one smooth cut. Slice straight through in a single motion if possible. Sawing back and forth is fine for thick trunks, but keep the motion steady.
- Inspect the cut surface. Healthy tissue is green, firm, and moist, often with a pale ring in the center. Brown, red, or black dots or streaks mean you need to cut higher.
- Angle the remaining stump slightly if it faces up. A gentle slope on large columns lets any stray water run off rather than pool.
- Leave the wound open to air. Do not seal it with wax, glue, or tape. If you like, dust it lightly with sulfur powder or ground cinnamon to help keep it dry.
- Move the plant to bright, indirect light. Keep it out of hot, direct sun at the glass until the cut has callused.
Note: the step labels above use ordinary numbered list formatting; keep them as plain text when publishing.
How Much You Can Safely Remove
Most healthy cacti tolerate the loss of a single arm or the top few inches without trouble. Avoid removing more than about a third of the plant at once unless you are cutting away rot, where saving any healthy tissue is the goal.
What a Healthy Cut Looks Like Later
Within a few days, the surface dries and turns pale or tan. Over one to three weeks, it hardens into a firm, corky callus. On many species, new growth or side shoots eventually appear near the cut, often weeks or months later.
Sophia’s tip: After each cut, take a quick phone photo of the cut surface in good light. Zooming in makes faint brown streaks easier to spot than looking with the naked eye, so you know whether to cut higher.
How to Shape an Overgrown or Leggy Cactus
You can control size and shape by removing whole arms or cutting the top off a column, but you cannot make stretched growth thicken again. Fix the light first, then cut.
Correcting Stretched, Pale Growth
Thin, pale, narrow growth that leans toward the window is called etiolation. It happens when the plant does not get enough light, a common problem in north-facing rooms or a few feet back from the glass.
That stretched section will stay narrow forever. Cut it off at the point where the stem returns to normal thickness, and root the healthy top if it is large enough.
If you are unsure how much light your plant really needs, read about whether you can grow cactus without sunlight before choosing its new spot.
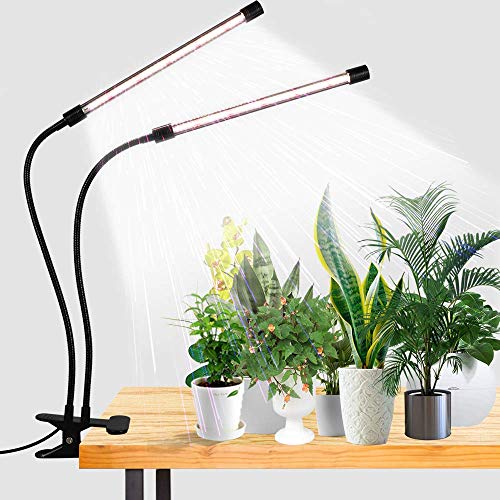
A south or west window, within a foot or two of the glass, suits most desert cacti. In darker rooms, a full-spectrum grow light placed 6 to 12 inches above the plant for 12 to 14 hours a day helps prevent new stretching.
Keeping a Natural Shape
Step back and look at the whole plant before cutting. Remove arms where they meet the main stem, rather than leaving short stubs sticking out, which tend to look awkward.
For branching cacti, aim for balance. If one side is much heavier, remove an arm from that side so the pot will not tip. Rotate the pot a quarter turn every week or two afterward so new growth stays even.
Reducing Height on Tall Columns
Columnar cacti that hit the ceiling can be “topped.” Cut the main stem at the height you want, and the plant will often branch below the cut. The removed top can be rooted as a new plant if it is healthy.
How to Remove Rot and Save a Sick Cactus
Cut away every bit of discolored tissue until only clean, green flesh remains, sterilizing your blade between each slice. Rot spreads inside the stem, so stopping short almost always leads to more loss.
Recognizing Rot Early
Rot usually starts from overwatering, cold wet soil, or a wound that stayed damp. Look for:
- Soft, squishy spots that dent under light pressure
- Brown, black, or translucent patches, often near the soil line
- A sour or unpleasant smell
- A plant that wobbles because the base has collapsed
Cutting Out the Damage
Remove the plant from its pot and shake off the soil. Slice thin layers off the affected area, checking each new surface. Keep going until the cut face is entirely clean green or white with no dots, rings, or streaks.
Sterilize the blade every single time it touches diseased tissue. If rot runs through the base and roots, cut above it and treat the healthy top as a cutting to reroot.
When the Base Can Be Saved
If the rot is a small surface patch on the side, you can scoop it out and leave the plant intact. Let the wound dry for one to two weeks in a bright spot before repotting in fresh, dry cactus mix.
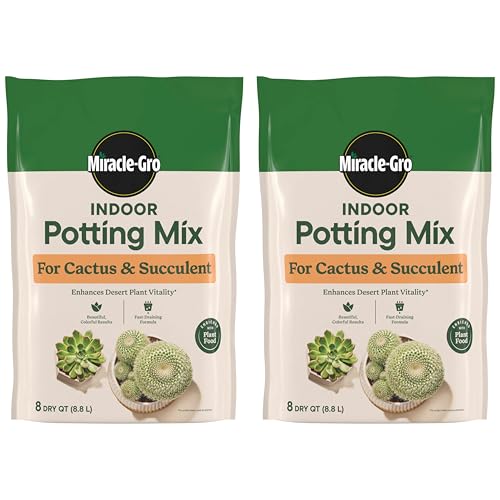
Throw away old, wet soil rather than reusing it. Scrub the pot with soap and water, or use a clean one. Make sure the pot has a drainage hole.
Preventing a Repeat
Overwatering causes most cactus rot indoors. Water only when the soil is completely dry, and cut back sharply in winter. To set a realistic routine, check how long can a cactus go without water for typical intervals by season.
How to Trim Segmented and Paddle Cacti
Segmented and paddle cacti are the easiest to trim, because they grow in natural sections. Remove whole pieces at the joints rather than cutting through the middle of a segment.
Prickly Pear and Other Pad Types
For prickly pear (Opuntia), cut each pad where it joins the one below. A clean cut at the joint heals faster and looks better than a cut across the pad. Hold the pad with tongs, never bare hands, since glochids detach at the slightest touch.
If glochids get into your skin, press a strip of tape against the area and peel it away. Repeat until the tiny hairs are gone.
Holiday Cacti
Christmas, Thanksgiving, and Easter cacti are forest cacti, not desert types. Twist or snip off segments at the joints, usually one to three segments back from the tip. Trimming right after flowering encourages bushier growth for the next season.
These plants have their own timing and care needs, so follow the dedicated guide on how to trim a christmas cactus for details specific to holiday types.

Clustering and Globe Cacti
Mammillaria, Echinopsis, and similar clumping cacti produce offsets, or “pups,” around the base. You can pull or cut these free where they attach, using a clean knife. Each one can become a new plant.
Avoid cutting into a single-stemmed globe cactus unless rot forces you to, since it has no branches to spare and recovers slowly.
What to Do With the Pieces You Cut Off
Most healthy pieces can be rooted into new plants. Let them callus fully, set them on dry, gritty soil, and wait for roots before watering regularly.
Callusing the Cuttings
Place cuttings on a paper towel or in an empty tray in bright, indirect light, away from heat vents. Small segments and pads usually callus in 3 to 7 days. Thick columns can take 2 to 3 weeks or longer.
The cut end should look dry, firm, and slightly sunken before you plant. Planting too early is the most common reason cuttings rot.
Sophia’s tip: Stand tall column cuttings upright in an empty jar or pot while they callus, cut end down but not touching anything. They root better upright, and the stem will not curve as it would lying flat.
Rooting in Soil
Set the callused end about 1 inch deep in dry cactus mix with extra perlite or pumice. Support tall pieces with stakes or rocks around the base. Keep them in bright, indirect light at 70 to 80°F.
Wait about one to two weeks, then begin giving a small amount of water every week or two. Roots often form within 2 to 6 weeks, longer in cool rooms. A gentle tug that meets resistance tells you roots have formed.
Some growers root cuttings in pure perlite, pumice, or even water. If you are curious about those methods, read about whether you can grow cactus without soil.
Species-Specific Rooting
Fast-growing columnar types root especially well from cuttings. For a detailed example, see how to grow peruvian apple cactus from cutting, which walks through a tall species from cut to established plant.
Disposing of Diseased Pieces
Never try to root sections with rot in them. Bag rotten tissue and throw it out with household trash rather than composting it, and wipe down any surface it touched.
How to Care for a Cactus After Trimming
Keep the trimmed plant dry, bright, and warm until the wound seals, then return to normal care. The first two weeks matter most.
Water and Humidity
Hold off watering for at least one to two weeks, or until the cut is completely callused. Do not mist the plant. Dry indoor air in winter actually helps wounds seal, though the plant itself should not sit beside a radiator.
Light and Placement
Move the plant a few feet back from a hot south or west window for the first week or two. Fresh wounds and newly exposed tissue can scorch. Then return it gradually to its usual bright spot over several days.
Keep it away from AC vents and cold drafts from leaky windows. Temperatures between 65 and 85°F suit healing best.
Pet and Child Safety
Spines are the main risk for cats, dogs, and kids, so keep fallen pieces and spiny cuttings off the floor. The ASPCA lists Christmas cactus as non-toxic to cats and dogs.
Some cactus-like plants are actually euphorbias with irritating milky sap, so check your plant’s identity before assuming it is harmless.
Watching for Trouble
Check the cut every few days. A dry, tan, firm surface is normal. If the wound turns soft, dark, wet, or smells bad, cut again into clean tissue with a sterilized blade and let it dry once more.
Hold off on fertilizer for about a month. Once you see new growth, you can resume a diluted cactus fertilizer during spring and summer.
Your Next Steps
- Check the plant for rot, stretching, or unstable arms, and decide whether it truly needs a cut.
- Wait for spring or early summer unless you are removing rot.
- Sharpen your blade and sterilize it with 70% isopropyl alcohol before and between cuts.
- Cut into firm, clean tissue, then leave the wound open to dry in bright, indirect light.
- Skip watering for one to two weeks, until the cut is fully callused.
- Callus and root healthy cuttings in dry, gritty cactus mix.
Common Questions About Trimming a Cactus
Will a cactus grow back after you cut it?
A cactus will not regrow the exact piece you removed, but many species branch or sprout new growth near the cut. Columnar types often produce one or more new arms below the wound. New growth may take a few weeks to several months to appear.
Should I seal a cactus cut with anything?
No sealant is needed, and wax, glue, or tape can trap moisture and cause rot. Letting the cut air-dry is the standard method. A light dusting of sulfur powder or ground cinnamon is optional and helps keep the surface dry.
How long should a cactus cut dry before watering?
Wait at least one to two weeks, or until the cut is firm, dry, and fully callused. Thick stems can take longer, sometimes up to three weeks. In cool rooms, healing slows, so check the wound rather than relying on the calendar.
Can I trim a cactus in winter?
You can, but healing is slower during winter dormancy, which raises the risk of infection. Save shaping and size control for spring or early summer. Cut out rot immediately, whatever the season, because waiting lets it spread.
Why is my cactus turning brown where I cut it?
A tan, dry, corky surface is normal callus and means the wound is healing. Soft, dark brown, or black tissue that spreads inward points to rot. Cut above the damaged area with a sterilized blade and keep the plant dry.

Hi! I’m Sophia, and I love plants – especially an expert in growing house plants. I stay in Chicago, United States of America, and through my blog and social media platforms, provide tips and tricks on how to grow healthy, vibrant plants indoors. Check out more here.