
You water your pothos, glance down, and see tiny white worms in house plants soil wriggling just under the surface or along the inside rim of the pot.
It is unsettling, especially when the plant sits on a kitchen counter or a windowsill where you see it every day.
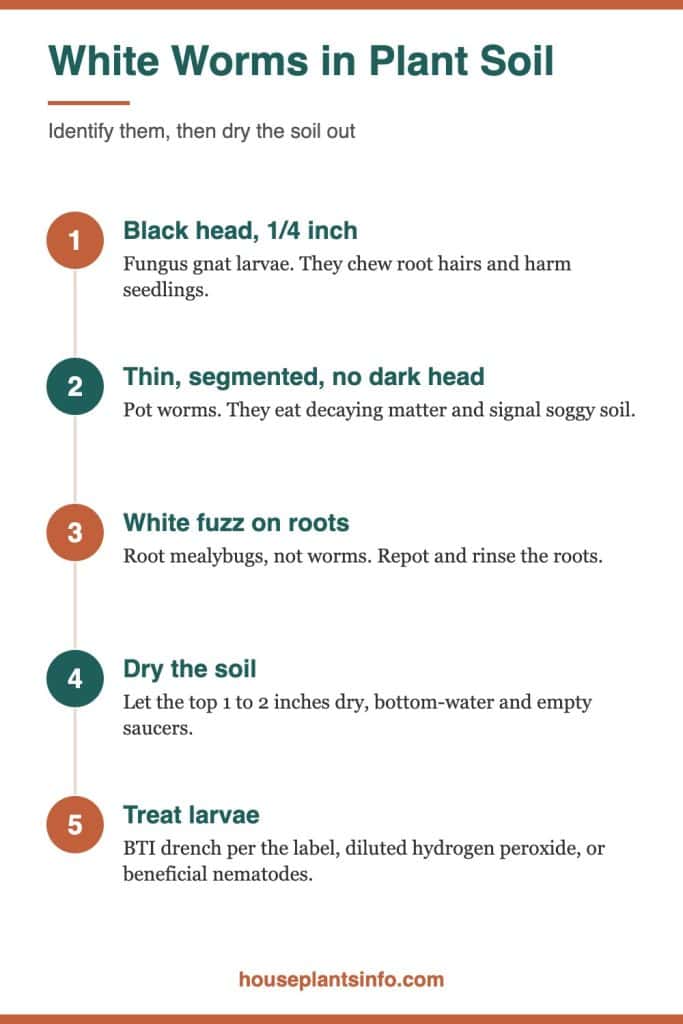
The short version: Most white worms in indoor potting soil are either fungus gnat larvae, which have a shiny black head, or pot worms, which are thin, segmented and headless.
Both point to soil that stays too wet, and both clear up once you dry the soil out and treat the larvae.
This guide covers how to tell the culprits apart, whether they harm your plant, and how to get rid of them and keep them gone.
Check These First
- Look for a shiny black dot at one end of each worm. A black head means fungus gnat larvae; no dark head usually means pot worms.
- Check for small black flies hovering near the pot or crawling on the soil surface. Adult gnats confirm a larval infestation below.
- Push a finger 1 inch into the soil. If it feels wet two or three days after watering, moisture is the root of the problem.
- Lift the pot and check the saucer or cachepot for standing water.
- Tip the plant out gently and look at the roots for white cottony fuzz, which points to root mealybugs instead of worms.
What Are the White Worms in Your Plant Soil?
The white worms in your plant soil are almost always fungus gnat larvae or pot worms (enchytraeids). Both live in damp, organic potting mix, and both multiply fastest when the soil never gets a chance to dry.
A few other soil dwellers get mistaken for worms, including root mealybugs, springtails and soil mites. None of those are true worms, and spotting the difference saves you from treating the wrong problem.
How to Get a Clear Look
Most of these creatures are under 1/2 inch long, so a closer view helps. A hand lens or the zoom on your phone camera makes it easy to see whether a larva has a dark head or a worm has visible segments.
Use a spoon to scrape the top 1 inch of soil onto a white paper towel. Pale creatures are far easier to see against white than against dark potting mix.
Why Moisture Matters So Much
Indoor pots dry slowly in fall and winter, when days are short and plants sit farther from bright windows. A pot in a north-facing room or several feet back from the glass can stay wet for a week or more.
A soil moisture meter takes the guessing out of watering. Push the probe toward the root zone and water only when it reads on the dry side, rather than following a fixed calendar schedule.
The Potato Slice Test
Set a slice of raw potato, cut side down, on the soil surface and leave it for a day. Fungus gnat larvae are drawn to it and gather on the underside.
Lift the slice the next day and check it on a white paper towel. Several larvae with black heads mean you have an active gnat population worth treating.
Fungus Gnat Larvae
Fungus gnat larvae are tiny, translucent white grubs with a shiny black head, about 1/4 inch long, living in the top inch of moist soil. They hatch from eggs laid by the small black flies you may already see around your plants.
How to Recognize Them
The black head capsule is the giveaway. The body looks clear to milky white, and you can sometimes see the gut contents through it.
The larvae stay close to the surface because that is where the soil is wettest and where fungi and decaying material are most plentiful. Turning over the top inch with a spoon usually reveals them quickly.
The Adult Flies
Adult fungus gnats are small, dark, weak fliers that look like tiny mosquitoes. They tend to walk across the soil or flutter up when you water or move the pot.
If you keep noticing little flies in your house plant, assume larvae are in the soil too. Each female lays eggs in damp mix, so the cycle repeats as long as the surface stays wet.
Where They Show Up Most
Gnats love pots that drain slowly, mixes heavy in peat or bark fines, and plants watered on a schedule instead of by need. Grow-light setups with seedlings and propagation trays are common hotspots because they stay constantly moist.
They also arrive on new plants from the store or in bags of potting mix stored open. A bag left in a warm closet near a radiator can become a nursery before you ever pot with it.
Pot Worms (Enchytraeids)
Pot worms are thin, white, segmented worms about 1/2 inch long with no dark head. They thrive in wet, acidic, rich soil and feed on decaying organic matter rather than living roots.
How They Differ From Gnat Larvae
Pot worms look like miniature, pale earthworms. Under a lens you can see the ring-like segments along the body, and neither end has a black head.
They also move differently. Gnat larvae tend to wriggle in place, while pot worms stretch and contract as they crawl through the soil.
What Their Presence Tells You
Pot worms are mostly a signal, not a crisis. They show up in soil that stays soggy, has turned sour and acidic, or contains a lot of breaking-down organic material.
If you have been adding kitchen scraps, coffee grounds or uncomposted leaf matter to your pots, that buffet attracts them. Old potting mix that has broken down and compacted creates the same conditions.
Sophia’s tip: Check the drainage hole before you blame the soil. A hole blocked by a pot shard, compacted mix or roots keeps the bottom inches waterlogged, and that is exactly where pot worm populations build up.
Root Mealybugs and Other Look-Alikes
Not every white thing in the soil is a worm. Root mealybugs, springtails and soil mites are the most common look-alikes, and each one needs a different response.
Root Mealybugs
Root mealybugs appear as white, cottony fuzz on roots and along the inside wall of the pot. Up close, you may see tiny oval insects coated in waxy white powder within the fluff.
These are true plant pests. They feed on roots, and a heavy infestation can cause yellowing, wilting and stalled growth even when watering is correct.
Treatment means unpotting the plant, rinsing the roots thoroughly under lukewarm water, discarding the old soil and scrubbing the pot. Repot in fresh mix, then follow up with an insecticidal soap drench or a systemic treatment labeled for root mealybugs.
Springtails
Springtails are tiny, pale, six-legged creatures that jump when disturbed. They often float to the surface when you water, which makes them look like a sudden swarm.
They eat mold and decaying matter and do little harm to healthy plants. Our guide to springtails in houseplants explains how to thin them out by reducing moisture.
Soil Mites
Soil mites are minute, round, slow-moving specks, often white, tan or reddish brown. You usually notice them crawling on the soil surface or the pot rim.
Most are harmless decomposers. Learn more about soil mites in house plants if you are seeing dots rather than worms.
| Creature | Size | Appearance | Main Concern |
|---|---|---|---|
| Fungus gnat larvae | About 1/4 inch | Translucent white, shiny black head | Chew root hairs, harm seedlings and cuttings |
| Pot worms | About 1/2 inch | Thin, white, segmented, no dark head | Signal soggy, acidic soil |
| Root mealybugs | Tiny insects in fuzz | White cottony masses on roots | Feed on roots, damage plant |
| Springtails | Tiny | Pale, jump when disturbed | Mostly harmless, signal moisture |
| Soil mites | Tiny specks | Round, slow-moving dots | Mostly harmless decomposers |
Are They Harming Your Plant?
Fungus gnat larvae can harm plants, especially seedlings and cuttings, while pot worms mostly do not. Neither one poses any risk to people or pets.
When Gnat Larvae Cause Damage
Gnat larvae feed on fungi and organic matter, but they also chew tender root hairs. An established plant with a strong root system usually tolerates a small population.
Seedlings, fresh cuttings and young plants are more vulnerable. Damaged root hairs reduce water uptake, and you may see wilting, slow growth or seedlings that collapse at the base.
Why Pot Worms Are Mostly Harmless
Pot worms eat decaying material, not healthy roots. In small numbers, they actually help break down organic matter.
The real issue is the soggy soil they point to. Constantly wet mix starves roots of oxygen and invites root rot, which damages the plant far more than the worms ever will.
Signs the Plant Is Struggling
Watch for yellowing lower leaves, drooping despite wet soil, a sour smell from the pot, or brown, mushy roots. These signs point to overwatering and possible rot.
If you see those symptoms, unpot the plant and inspect the roots. Healthy roots are firm and white or tan; rotted roots are dark, soft and peel away easily.
People and Pet Safety
None of these soil creatures bite, sting or carry disease to people, cats or dogs. A curious pet that digs in the pot will not be harmed by the worms themselves.
For the plant, check its toxicity status with the ASPCA, which lists plants such as pothos and philodendron as toxic to cats and dogs, while spider plants and calatheas are listed as non-toxic.
How to Get Rid of White Worms Step by Step
The fix starts with drying out the soil, then targeting larvae directly. Work through these steps in order, and expect results over two to four weeks as you break the life cycle.
Step 1: Let the Soil Dry Out
Let the top 1 to 2 inches of soil dry completely between waterings. Gnats need moist surface soil to lay eggs, and larvae die off when that layer stays dry.
Move the plant closer to a bright window if it has been sitting in a dim corner, ideally within 3 feet of east- or west-facing glass. Better light means the plant drinks faster and the soil dries sooner.
Keep it away from cold AC drafts in summer, which slow drying, but take advantage of forced-air heat in winter. Dry indoor air from radiators speeds up surface drying.
Step 2: Change How You Water
Bottom-watering keeps the surface drier. Set the pot in a bowl of water for 15 to 20 minutes, let it soak up from below, then lift it out to drain fully.
Always empty saucers and decorative cachepots within 30 minutes of watering. Standing water keeps the lower soil saturated and feeds both gnats and pot worms.
Sophia’s tip: Add a 1/2 inch layer of coarse sand or fine gravel over the soil surface. It dries within hours of watering, which discourages adult gnats from laying eggs, and you can still check moisture underneath with your finger.
Step 3: Trap the Adult Gnats
Place yellow sticky traps at soil level or just above the rim of each affected pot. Adult gnats are drawn to the color and get stuck.

Traps do not touch the larvae, but they stop adults from laying new eggs. They also show you whether the population is shrinking, so replace them once they fill up.
Keep them out of reach of pets and kids, since the glue is messy on fur and fingers.
Step 4: Treat the Larvae in the Soil
BTI (Bacillus thuringiensis israelensis) is a naturally occurring bacterium that kills fungus gnat larvae while leaving plants, pets and people unharmed. Mix it into your watering can and drench the soil, following the label directions.

Repeat the BTI drench every week or as the label directs for several weeks. Our article on whether are Mosquito Bits safe for houseplants covers how this type of treatment works in pots.
A hydrogen peroxide drench is another option. Mix 1 part 3 percent hydrogen peroxide with 4 parts water and water the soil until it drains from the bottom. It fizzes on contact and kills larvae it reaches.
Step 5: Bring in Biological Help
Beneficial nematodes (Steinernema feltiae) are microscopic organisms that hunt gnat larvae in the soil. Mix them into water and apply as a drench, keeping the soil lightly moist for a few days afterward so they can move.

Predatory mites that feed on gnat larvae are another option for heavily infested collections. Both work best combined with better watering habits rather than as a stand-alone fix.
Step 6: Repot for Heavy Pot Worm Populations
If pot worms are everywhere and the soil smells sour, repot. Shake off as much old mix as you can, trim any mushy roots, and use fresh potting mix.
Add perlite to open up the mix so water drains and air reaches the roots. Use a pot with a drainage hole that is no more than 1 to 2 inches wider than the root ball.
| Treatment | Targets | How Often |
|---|---|---|
| Dry top 1 to 2 inches | Gnat larvae, pot worms | Every watering cycle |
| Yellow sticky traps | Adult gnats | Replace when full |
| BTI drench | Gnat larvae | Per label, often weekly |
| Hydrogen peroxide (1:4) | Gnat larvae | Once, repeat if needed |
| Beneficial nematodes | Gnat larvae | One or two applications |
| Repot with perlite | Pot worms, soggy soil | Once for heavy infestations |
How to Keep Them From Coming Back
Prevention comes down to drainage, careful watering and clean soil. Once the soil environment no longer suits them, these creatures rarely return.
Build a Better Mix
A loose, airy mix dries evenly and gives roots oxygen. Our guide to well-drained soil for houseplants shows how to blend potting mix with perlite, bark or pumice for different plants.
Avoid adding uncomposted organic matter such as kitchen scraps, raw coffee grounds or fresh leaves. These rot in the pot and feed both pot worms and gnat larvae.
Water by Need, Not by Calendar
Plants drink less in winter, when Chicago-style gray days cut light levels sharply. Check the top 1 to 2 inches with your finger or a moisture meter before every watering.
Plants under grow lights or in sunny south windows dry faster and may need water more often. Adjust each plant individually instead of watering the whole collection on the same day.
Quarantine and Store Smart
Keep new plants away from your collection for two weeks and watch for gnats or worms. Check the soil surface and set a potato slice test if you are unsure.
Store potting mix in a sealed bag or bin, away from heat sources. Bags left open invite egg-laying gnats, and our page on fungus gnats in houseplant soil has more prevention ideas.
Sophia’s tip: Before using a fresh bag of mix, spread it out and let it dry for a day or two. Dry mix gives any hidden eggs or larvae a poor start, and you can moisten it right before potting.
Keep Pots Clean
Remove fallen leaves and dead plant material from the soil surface. Decaying debris is food for larvae and pot worms alike.
Wash reused pots with hot, soapy water before planting. Old soil residue can carry eggs into a fresh setup.
Your Next Steps
- Scrape the top inch of soil onto a white paper towel and check for black heads or segments.
- Set a raw potato slice on the soil overnight to confirm fungus gnat larvae.
- Let the top 1 to 2 inches dry fully before watering again, and empty every saucer.
- Add yellow sticky traps and start a BTI or diluted hydrogen peroxide drench for gnat larvae.
- Repot heavily infested or sour-smelling pots in fresh mix with added perlite.
- Move slow-drying plants closer to a bright window or under a grow light.
Common Questions About White Worms in House Plants
Can white worms in potting soil hurt my cat or dog?
No. Fungus gnat larvae, pot worms, springtails and soil mites pose no risk to people or pets. Keep pets away from treated soil and sticky traps, and check your plant’s own ASPCA toxicity status.
Will the worms go away on their own?
They usually fade only if the soil starts drying properly between waterings. If you keep the surface wet, gnats keep laying eggs and pot worms keep thriving, so the population persists.
Is hydrogen peroxide safe for my plant’s roots?
Diluted at 1 part 3 percent hydrogen peroxide to 4 parts water, it is generally safe for established houseplants. Use it as an occasional drench rather than a routine, and skip it on very delicate seedlings.
Should I throw away the plant if I find worms?
Almost never. Gnat larvae and pot worms respond well to drier soil, targeted drenches and repotting. Only a plant with severely rotted roots may be beyond saving.
How long does it take to get rid of fungus gnat larvae?
Expect two to four weeks, since you need to break the full life cycle from egg to adult. Combining dry surface soil, sticky traps and a larval drench gives the fastest results.

Hi! I’m Sophia, and I love plants – especially an expert in growing house plants. I stay in Chicago, United States of America, and through my blog and social media platforms, provide tips and tricks on how to grow healthy, vibrant plants indoors. Check out more here.